Entering Expenses
The Employee Portal allows employees with the appropriate access to create and submit expenses by attaching them to their timesheet. Not all employees will have access to enter expenses. Expense access is determined by the staffing agency. Follow the steps below to create an expense report.
If Receipts are uploaded, but are not attached to an Expense, the timesheet will not be able to be Approved. As there is not currently a way to attach these receipts on the Admin side, this will have to be completed by the Candidate before it can be approved.
The Timesheet Status is very important when creating and submitting expenses:
- If your Timesheet Status is "Not Created" you must create a timesheet so expenses can be entered.
- You can't add a new expense or attachment if the timesheet is in an "Approved" status. If you need to add an expense to an approved timesheet, contact your agency. Only an Admin can unsubmit the timesheet and push it back to you to correct.
- In your Employee Portal, select the Expenses tab.
- Select Add Expense.
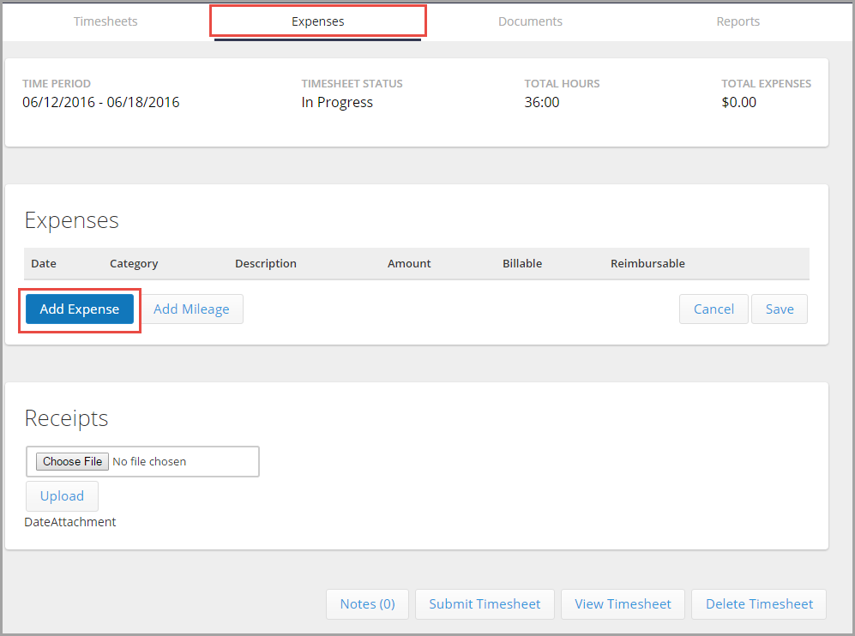
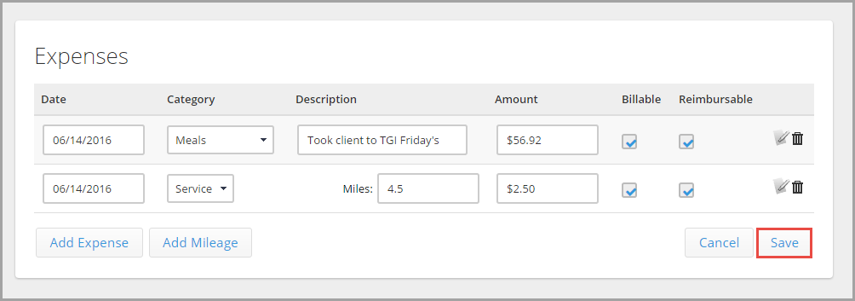
- Add the details of the expense:
- Date: The date of transaction
- Category: The category of expense (e.g., meal, lodging)
- Description: Describe the expense.
- Amount: Enter the monetary amount to be expensed
- Billable: Check the box if the expense is billable.
- Reimbursable: Check the box if the expense is reimbursable.
- You can also perform the following optional actions:
- Adding Mileage: If necessary, select the Add Mileage button and complete the requested information.
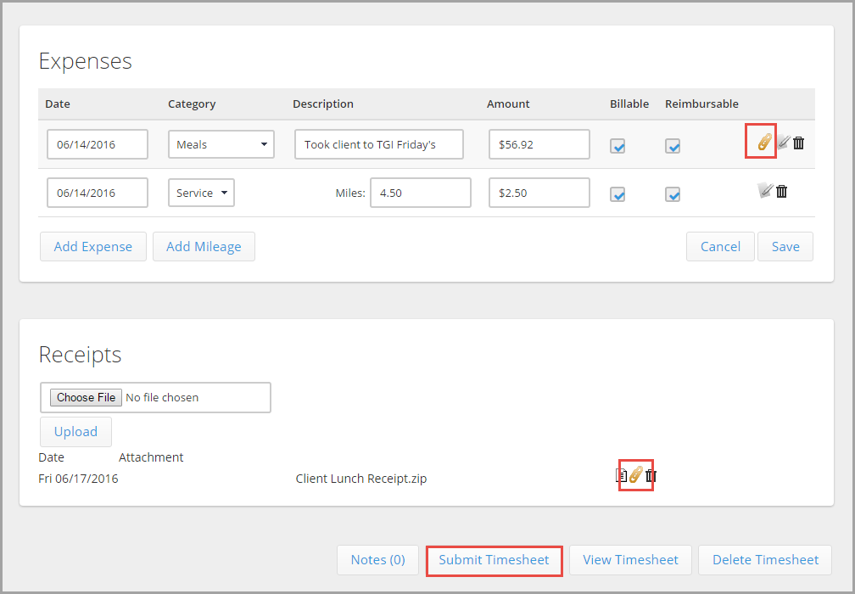
- Adding a Note: You can add a note to the individual expense by selecting the Pen and Paper icon on the right. This icon will turn gold once a note has been saved.
- Add More Expenses: Click the Add Expense button to add additional lines of expenses.
- Delete an Expense: Delete an individual line item expense by selecting the Trash Can icon to delete the line.
- Click Save.
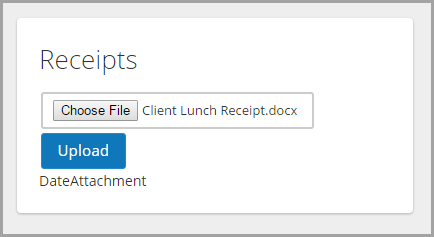
- Next, attach a receipt in the Receipts section by clicking the Choose File button.
- Make sure you have scanned your receipts and saved them on your hard drive.

- Make sure you have scanned your receipts and saved them on your hard drive.
- Locate your receipt on your desktop and click Open.
- Click the Upload button.
- Click OK twice to confirm that the file uploaded and that you can now attach to an expense.
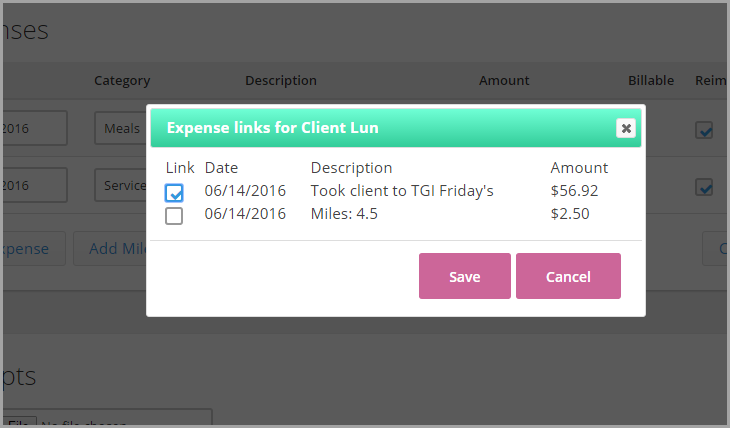
- To the right of the uploaded receipt, click the Paper Clip icon.
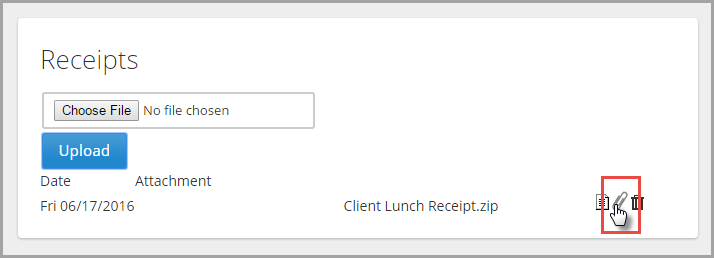
- Select the check box to the left of the expense to link the receipt to and click Save. Once attached, the paperclip image will turn gold.
- Select Submit Timesheet once you are ready to send your entire timesheet, along with your expenses, to your manager.
Was this helpful?