Reporting
Overview
Invenias contains numerous options to allow users to deep dive into their data. The Invenias reporting module utilises Dev Express Reporting tools, providing the ability to create branded and heavily customized reports.
Some users may find that by editing a List view page e.g. People List, they can create a view which provides them with the data they require outside of the reporting tools described in this article.
Our SI Partners provide a custom report builder service, to discuss your unique reporting requirements, please contact your account manager.
All of the reporting solutions in Invenias consume an "abstraction layer" of data, they do not directly query the database. At the bottom of this article, you will find a list of the Views in the Abstraction Layer as a downloadable Excel File. You can engage our Professional Services team via your Account Manager to get a quote for custom report projects.
This article covers:
- Running a Report from the Outlook Toolbar
- Running a Report from a Record
- Default Reports Explained
- Creating a New Report in Invenias
- Modifying an Existing Report
- Importing a Report
- The Abstraction Layer and the Invenias Excel Add-in
Running a Report from the Outlook Toolbar
Permission Required: Please note running a report requires the "View Reports" permission.
To access the Reporting menu, click Reporting from the Outlook toolbar:

This opens the Reporting Window shown below:
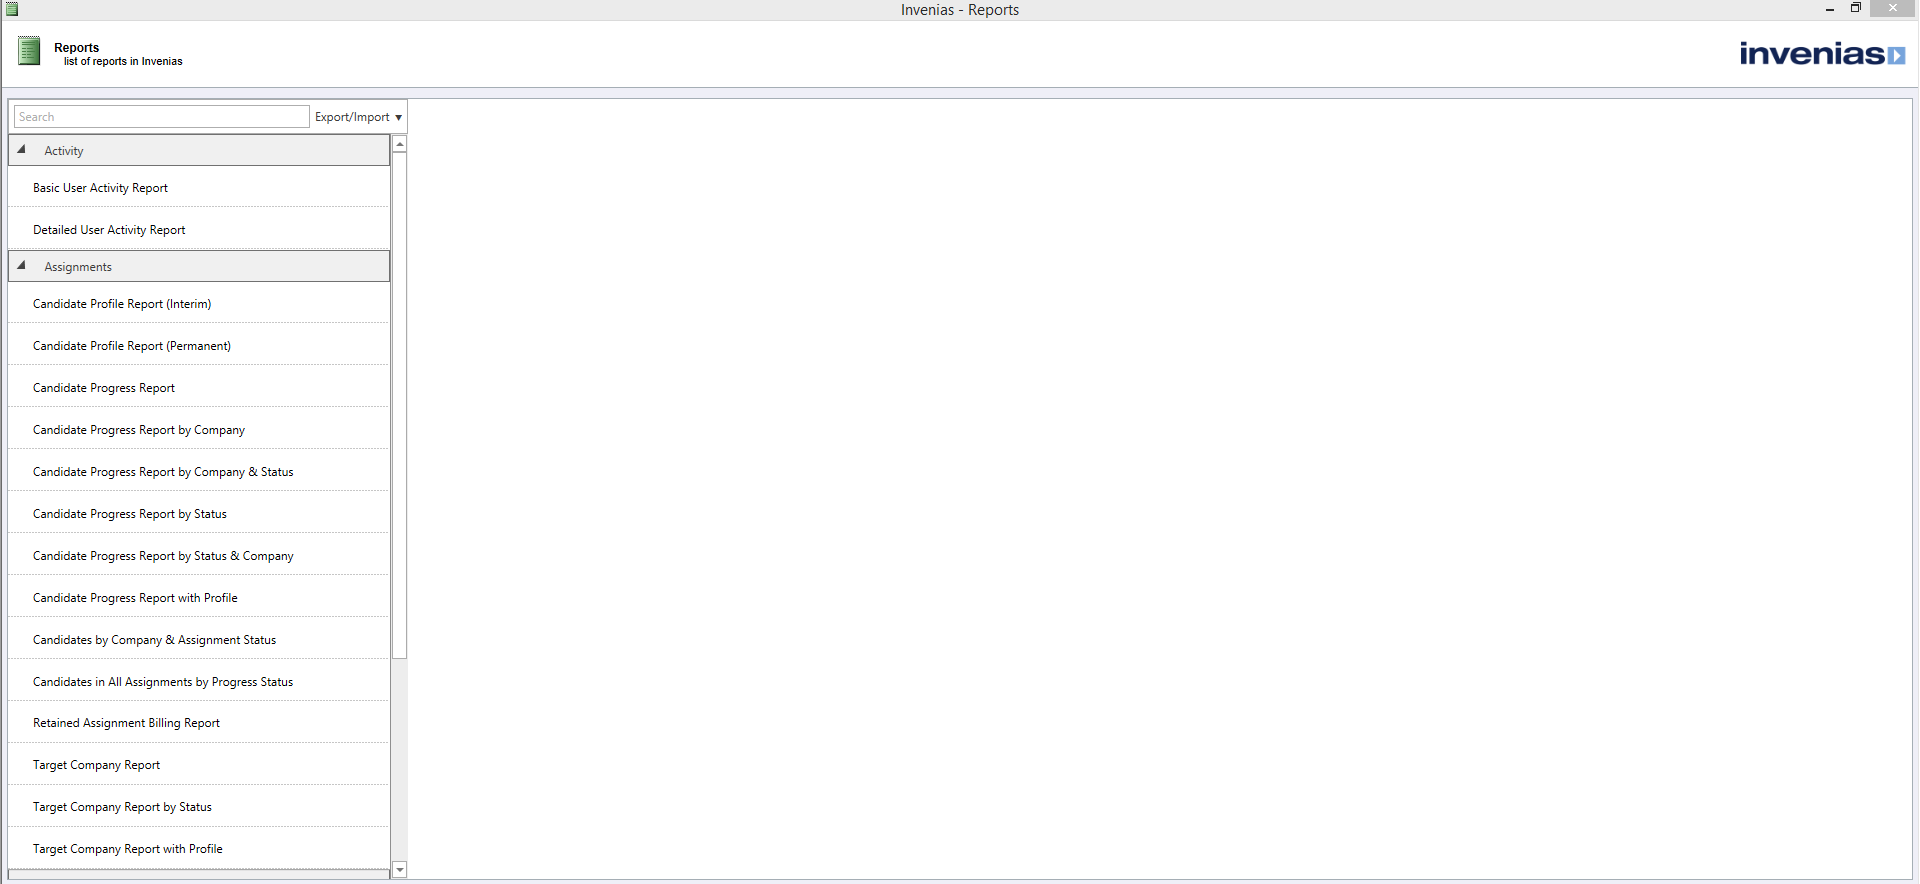
Reports are listed in the left columns, grouped by Activity, Assignments, Company, People and Placements.
To run a report, select the report on the left, in this example let's select the first report, the Basic User Activity Report:
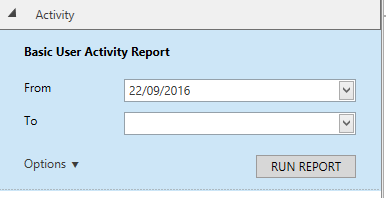
Specify the date range for this report and click RUN REPORT. If the user leaves the date FROM date blank, this will search for all historic activity which may produce a timeout error depending on the size of the database.
The report will be created and appear in the preview window on the right hand side of the page:
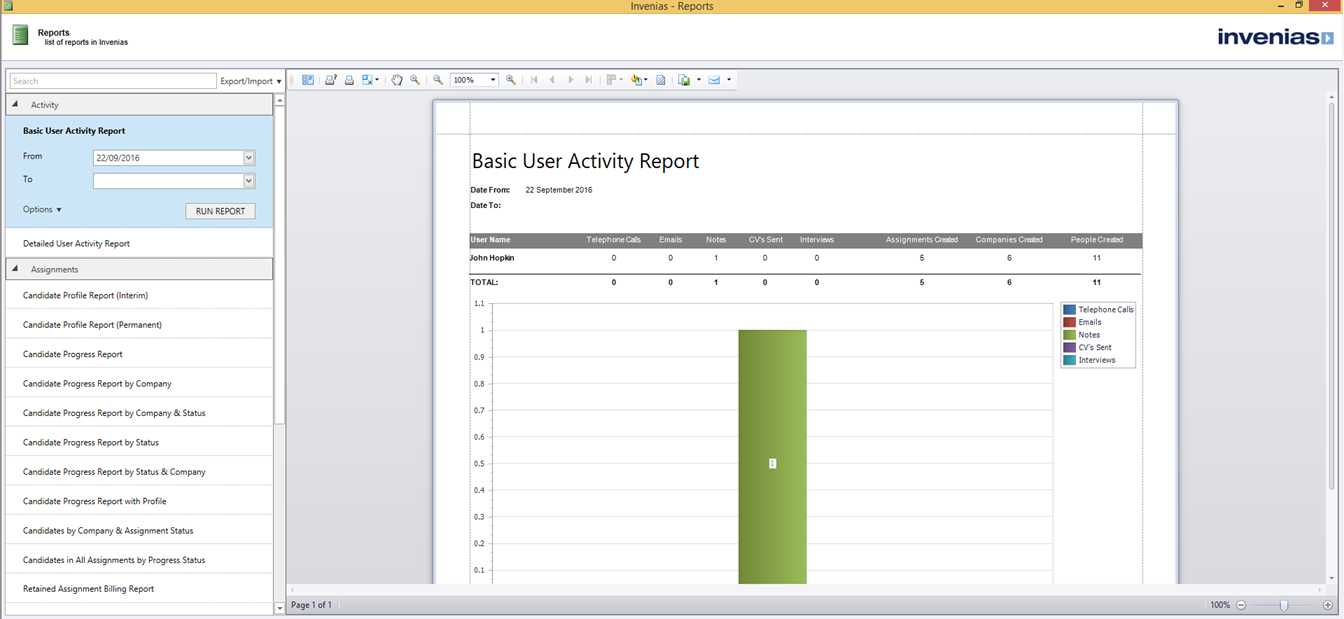
The buttons above the preview window contain the following options:

L-R:
- Shows the pages of the report in a thumbnail list view
- Print & select Printer
- Print using Default Printer
- Change the scale of the report (view size)
- Hand Tool (use a hand cursor to drag the report around)
- Magnifier to zoom in
- Zoom out
- Zoom%
- Go to first page
- Go back a page
- Go to last page
- Go forwards a page
- Show multiple pages at once
- Change the background colour of the report
- Watermark
- Export document (Use the dropdown to choose which format to export into)
- Send via email (Use the dropdown to choose which format to export into)
Permission Required: Please note to print, export or email a report requires the "Publish and Remove Reports" permission.
Running a Report from a Record
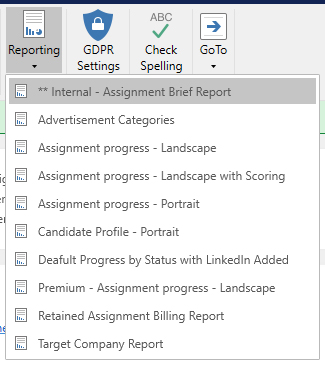
You can also access Reports from within the 4 main Record types. Open any People, Company, Assignment or Programme Record and you will see a Reporting Button in the Toolbar. The example below shows an Assignment Record:

Clicking into the button will show a dropdown with all relevant Reports for the Record type:
Clicking on a report will open the Reporting Menu described previously, the Report previously selected in the drop-down will be highlighted and the source Record will auto-populate the Record field. This means you are able to immediately run the report without having to look up the Record again.
Default Reports Explained
User Activity Reports
The basic user activity reports on activity counts for Invenias Professional users. It includes Journal actions e.g Telephone calls, emails created by each user, as well as how many Assignments, Programmes, Companies and People Records were created.
Note that in the default reports Interviews are only included after the Interview has taken place, they will not be shown if interviews have been created but have yet to occur.
The detailed user activity report lists journal activities broken down by action type on a per user basis. It also links to Assignments, Companies and People created by that user.
Candidate Profile Reports (Interim/Permanent)
The candidate profile report displays detailed information in regards to a candidate on a specific assignment e.g headline, Personal Profile, Fit to Profile (on assignment), rates, career history, education and CV.
Candidate Progress Reports
The candidate progress reports have a variety of different layouts (indicated by the title), including being ordered by Company, and Status. Some will contain Headline, Profile Picture and Personal Profile. These reports show the progress of the candidates within a specific assignment.
Target Company Reports
The target company reports list target companies on specific assignments, which can also be grouped by status and created with/without Company profile (indicated by the report title).
Off Limits Reports
There are a series of off-limits reports that list all companies and people in the database that are currently off limits.
Billing
There are a series of reports that detail billing based on a candidates placement from an assignment. These reports are divided into assignment type, and contain information in regards to the placement, the primary contact, billing information, package and fees etc.
Creating a New Report in Invenias
Permission Required: Please note to create a report requires the "Publish and Remove Reports" permission.
This guide is intended for Advanced Users. To create a new report, a User opens the reporting menu by clicking Reporting in the Outlook toolbar:

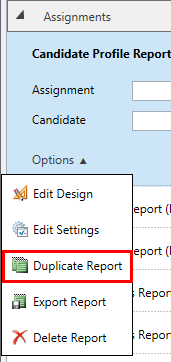
Click into the report which is the closest match to the report you are trying to create and click options and Duplicate Existing Report:
Which opens the following window:
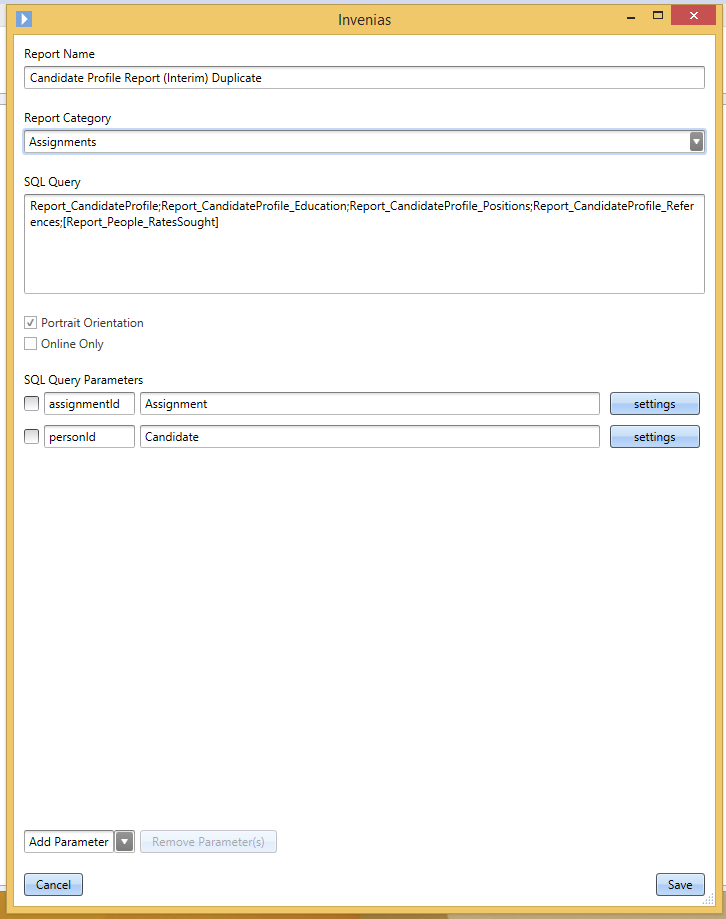
You can specify the report name, category, add an SQL query and specify the parameters for the report.
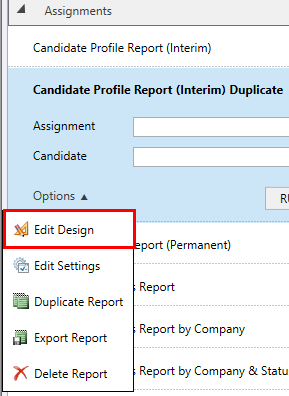
Once the options are set, click SAVE to create the report, then click into the newly created report, click Options, Edit Design:
The DEV EXPRESS reporting editor will open as shown below:
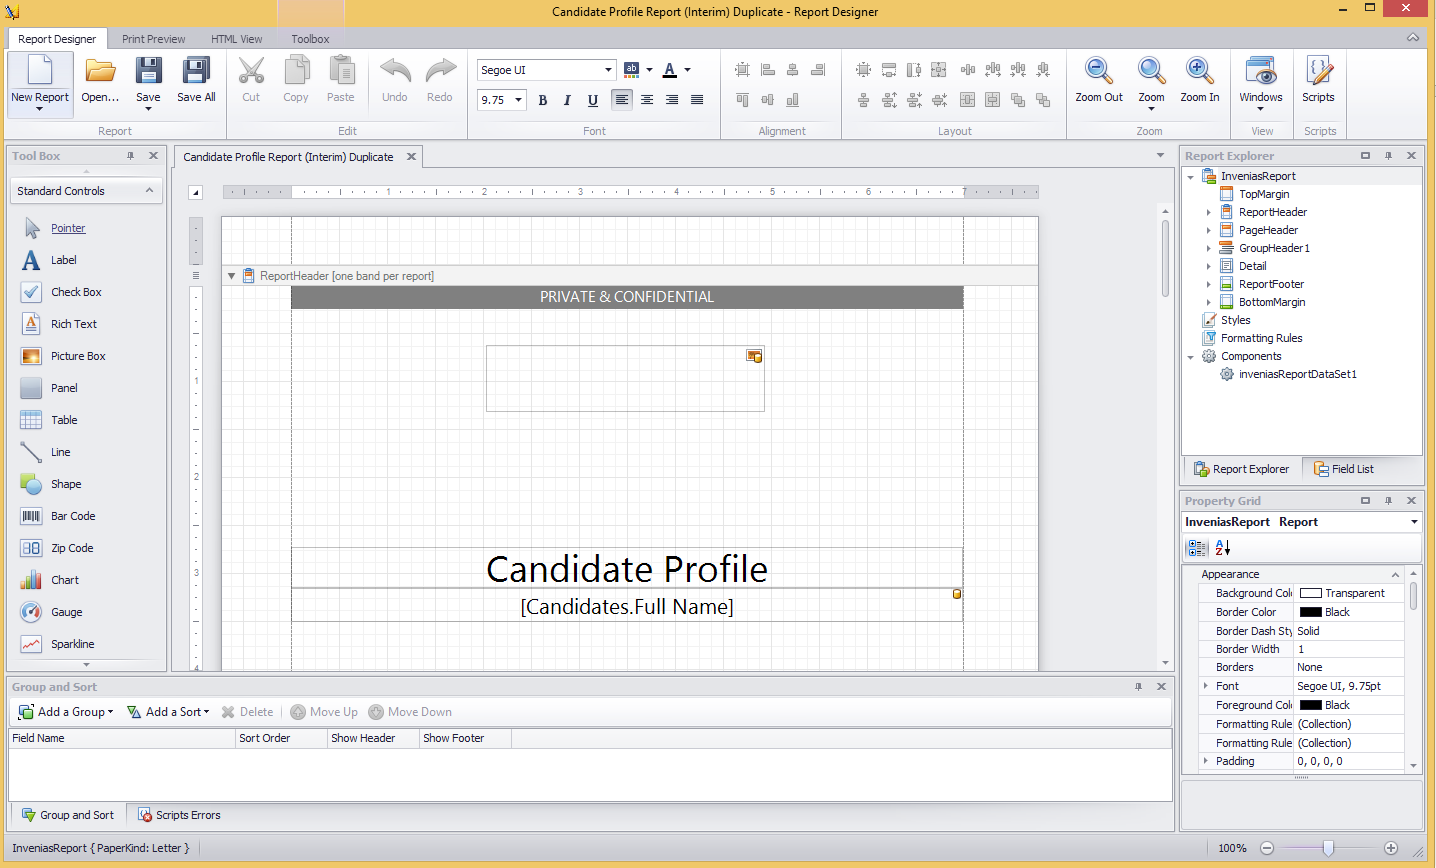
This is an advanced tool which cannot be explained within the context on this article.
For a full user guide on how to use the DEV EXPRESS Reporting editor, please click here.
Alternatively contact Invenias Professional Services (inveniassupport@bullhorn.com) who can offer a service to create custom reports to your requirements.
Modifying an Existing Report
We would advise to duplicate the report you are looking to modify and then edit the duplicate. This way if you happen to make any irreversible changes you can delete the duplicate and revert to the original. The duplication process was explained in the Create new Report section above.
Once the report has been duplicated, open the reporting menu, click into the report, then Options and EditDesign to make your changes.
Note that any edits which are made to existing default reports are not directly supported by Invenias. If a report is modified to an extent that it becomes unusable, or if you wish to revert back to the original, please email inveniassupport@bullhorn.com, and we can send the original default reports directly for re-importing into Invenias.
Importing a Report
Permission Required: Please note importing a report requires the User to be in the "System Administrator" user group.
Ensure the report you wished to report is saved to your computer.
Open the Reporting menu by clicking Reporting in the Outlook toolbar:

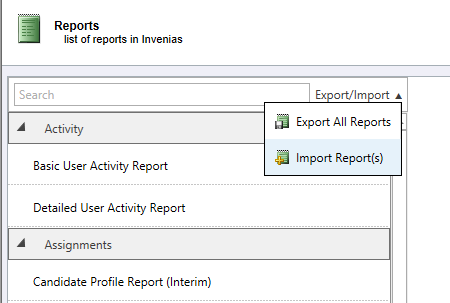
Click Export/Import and select Import Reports(s)
This will open a window to allow you to browse to the location on your PC where the report has been saved:
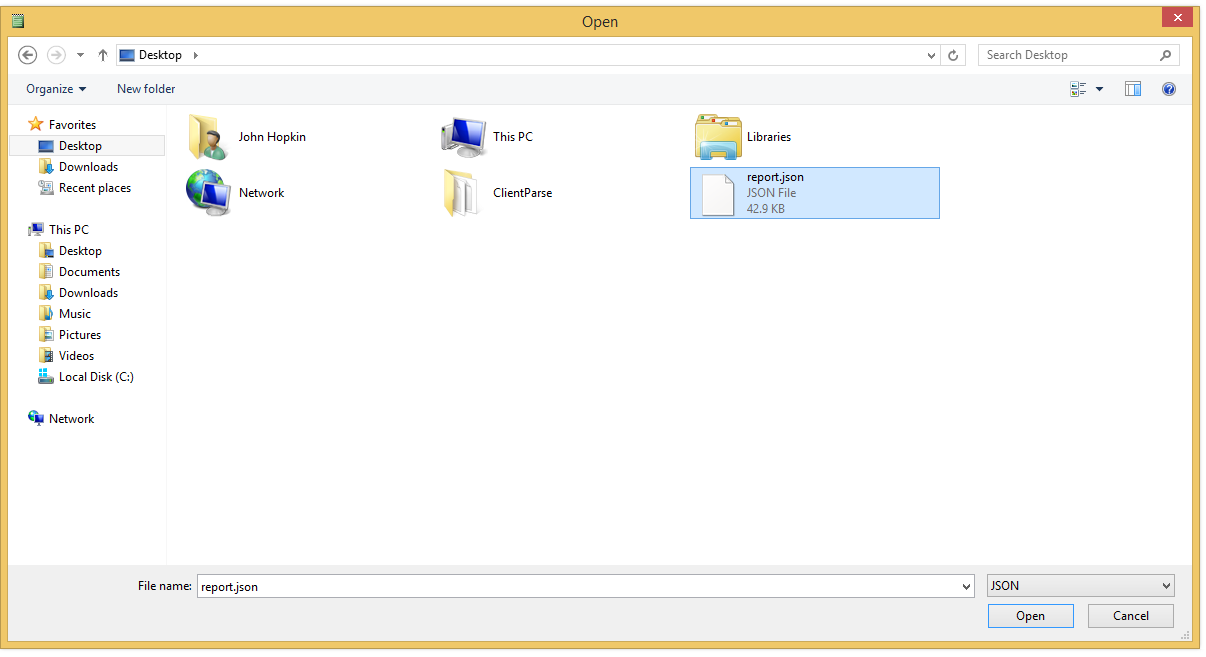
Select the location and click OPEN. This will add the report into the list of available reports. As a final step to use the imported report, you will need to select the report in the list, then click into OPTIONS and EDIT DESIGN.
Once the Editor opens, click SAVE and close the window without making any changes to the report, then close the reporting window. Now if you re-open Reports you will be able to run the newly imported report.
The Abstraction Layer and the Invenias Excel Add-in.
Permission Required: Please note to use the Invenias Excel add-in requires the "Use Excel Add-In" permission.
The Invenias Excel add-in allows users to create connections to Views in the Abstraction Layer. These are typically created by Invenias Professional Services via a paid-for project but, the Excel Add-in can be used to create those connections. As creating these Excel reports requires a good knowledge of our Abstraction Layer Views, Excel, SQL and possibly VBA, we do not provide training on how to create these reports, but connecting to one of our data tables is fairly simple. To create a connection in Excel, click the Invenias toolbar in Outlook and then:
- Click Manage Data Sources
- Click ADD
- Name your connection (this will appear as the name of the Worksheet in Excel)
- Select the Existing Dataset from our Abstraction Layer
- Click OK and the data from that Dataset will load in a table in Excel provided it doesn't exceed 10,000 rows of data
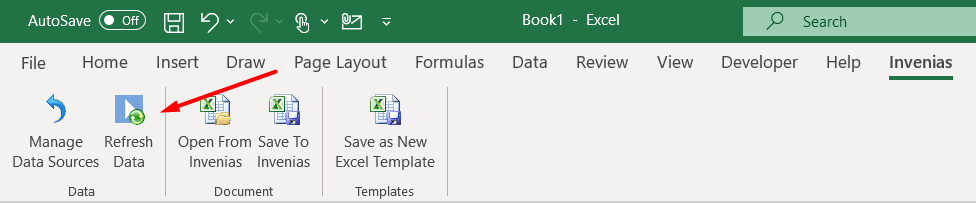
Where Invenias Professional Services have created your report, we will distribute it to you via email to save to your PC. These reports often have Macros in them to support refreshing the data as well as update any Pivot Tables in the report itself. Assuming that the above permissions are met by the User attempting to Refresh the data, you'll be able to then open the report in Excel, and press the 'Refresh' button. If you are creating your own connections using the method above, to refresh the data simply open any Excel file with a connection already set up, then go to the Invenias toolbar in Excel and click Refresh Data. This may take a few minutes, depending on the size of the data set.
The spreadsheet attachment included at the end of the article contains a list of all the views accessible through the Abstraction Layer, with a brief description of the information contained in the view. This is intended for advanced users to assist with the creation of Custom reports that access the abstraction layer.