Getting Started: Installing & Configuring Agentforce
This guide provides step-by-step instructions for a Salesforce Administrator to install and perform the initial setup of Bullhorn's Agentforce packages. Following these steps will enable powerful AI capabilities in your Salesforce org, helping your team automate tasks and access information more efficiently.
Salesforce Agentforce is required to use the agent. Without Agentforce installed, the agent cannot be configured or run.
Common Scenarios for Using This Guide
This article is for you if you are a Salesforce Administrator who needs to:
- Set up Agentforce for the first time in your production environment.
- Install and test Agentforce in a Salesforce sandbox before a full rollout.
- Enable the core AI features after purchasing Agentforce licenses.
- Understand the necessary permissions for administrators and end-users.
- Ensure all prerequisites are met before starting the installation.
Before You Begin: Prerequisites
Before starting the installation, it’s important to confirm your Salesforce org is ready. Meeting these prerequisites will ensure a smooth setup and prevent common installation errors.
- Once you receive the signed addendum:
- Review and Sign:
- In order to initiate the process, Sales creates a services-only opportunity in Salesforce.
- Sales creates the quote and the CPQ system will generate an addendum doc.
- Once the addendum is signed, Sales marks the opp as Signed, then Sales Ops will check it and mark as Closed-Won.
- When the opportunity has closed, Sales raises a support ticket to turn Recruitment Prompts on (support@talentrover.com).
- Activation: After the signed addendum is finalized, our team will activate Recruitment Prompts in your environment. We will notify you as soon as the feature is ready to use.
- Review and Sign:
- Salesforce Org Access: You must have Salesforce Administrator permissions to perform the installation and assign permission sets.
- Required Packages: The Talent Rover & Questionnaire package must already be installed in your org.
- For details on how to do that, see How to Set Up Amplify Screen for BHRC
- Agentforce Enablement: Your Salesforce org must be enabled for Agentforce, which means the necessary licenses have been acquired from Salesforce. For details see Enable Agentforce.
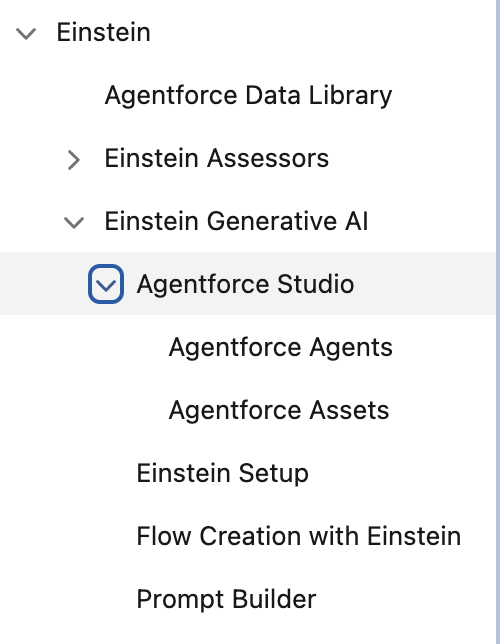
You can verify this by navigating to Setup. If you see an Einstein menu with Agentforce Studio inside, your org is enabled.
Enable Einstein and Agentforce in Salesforce
To begin using Agentforce, you first need to activate the underlying Salesforce Einstein technology. This action makes the Agentforce configuration menus visible.
-
Go to .
-
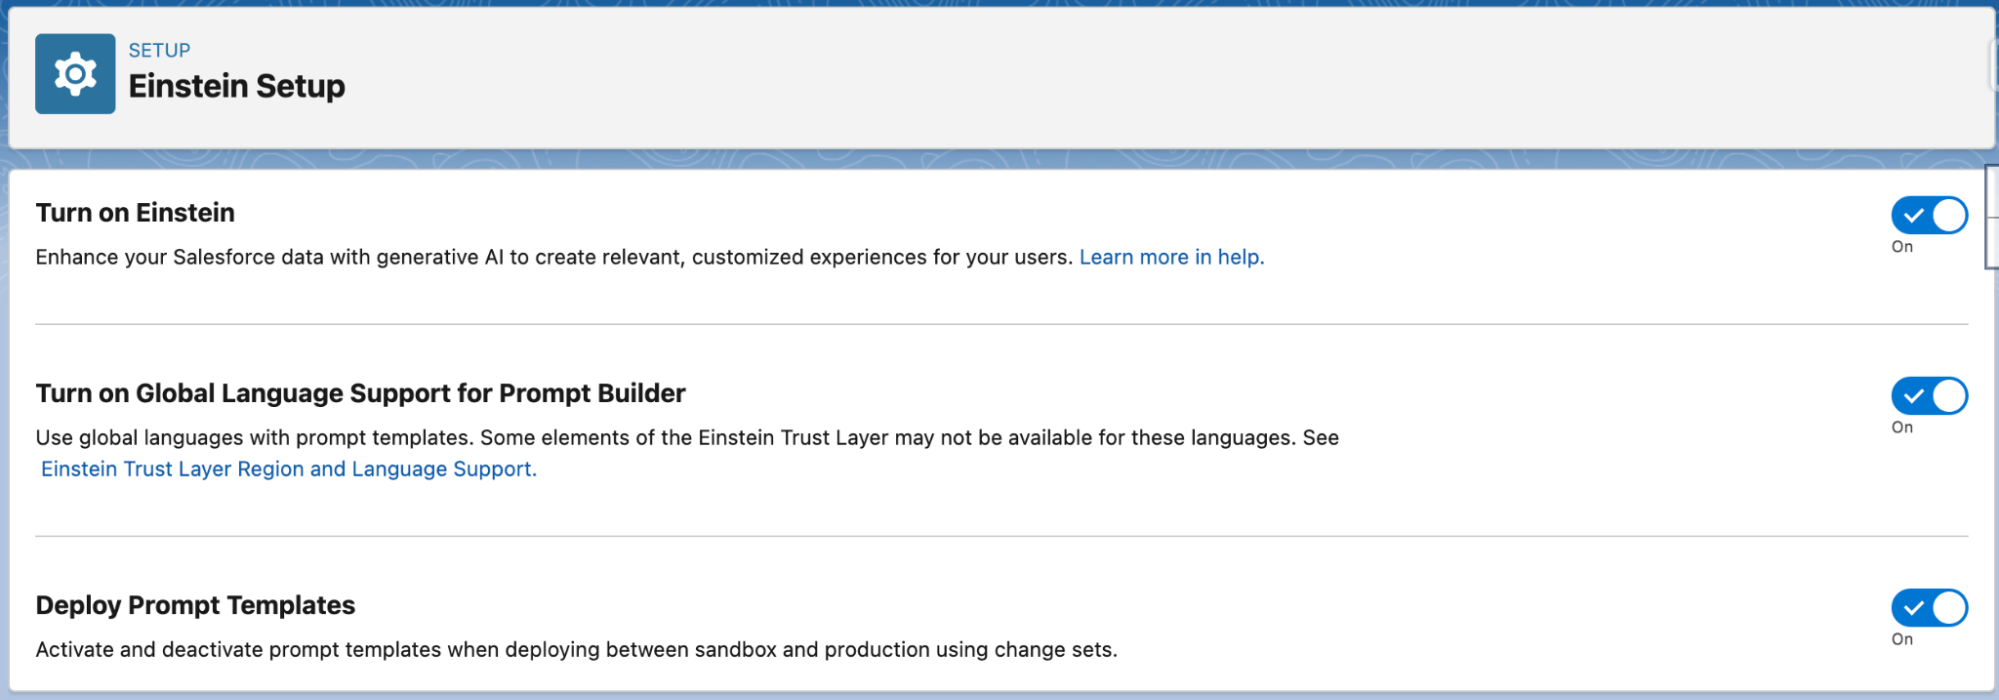
Turn on the following three settings:
-
Einstein
-
Global Language Support for Prompt Builder
-
Deploy Prompt Templates
-
-
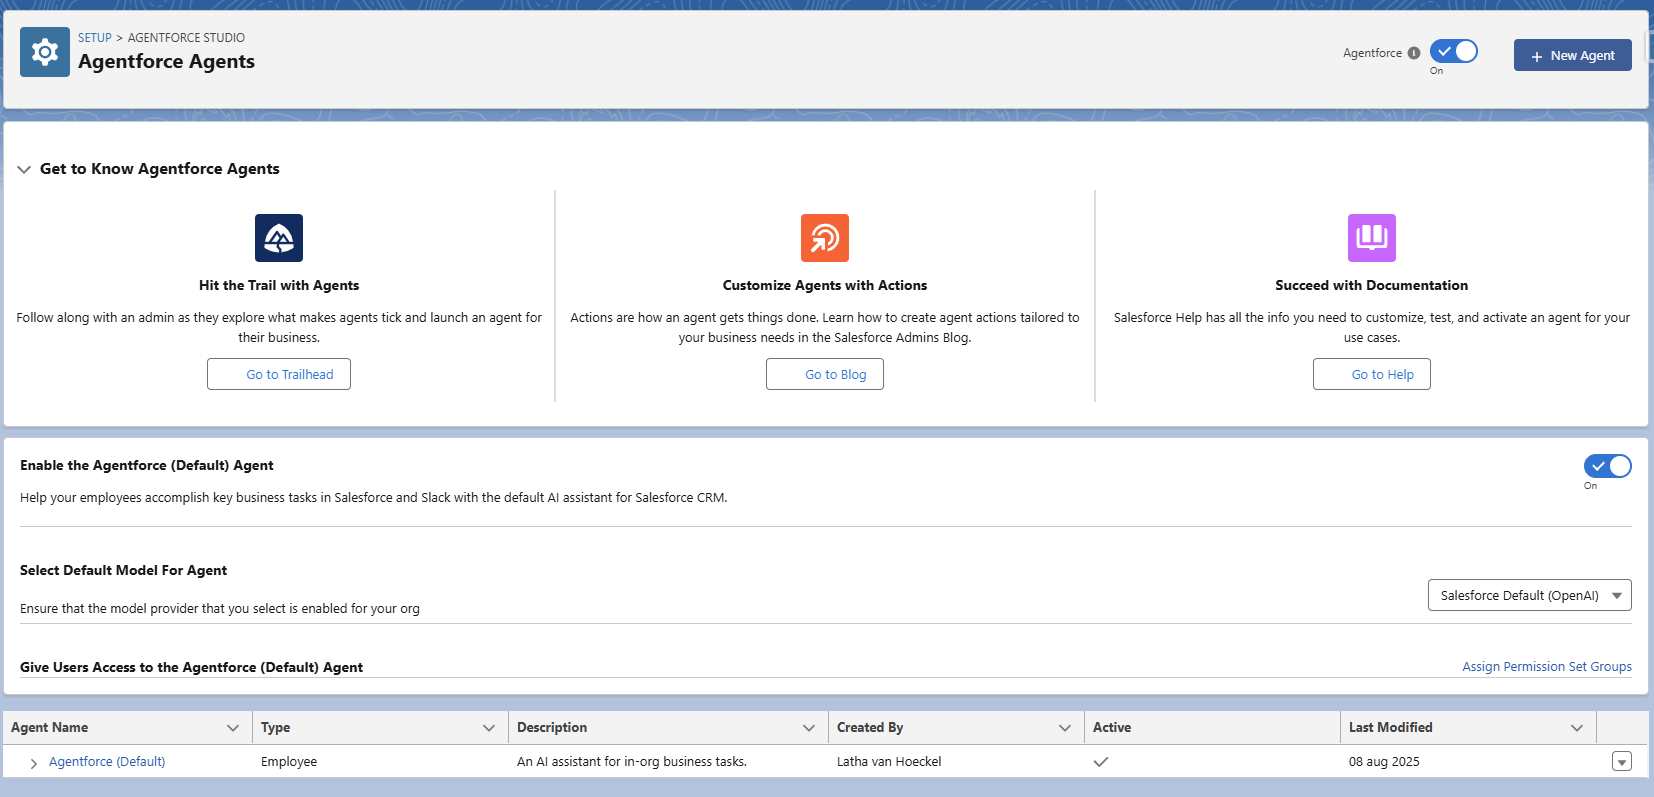
From the main Setup menu, navigate to Einstein > Agentforce Studio > Agentforce Agents.
-
Toggle the Agentforce switch to On.
-
The Agentforce menu will appear.
If you don't see the Agentforce Agent menu immediately after turning on Einstein, wait a few seconds and refresh the page.
Assign Required Permission Sets
To ensure both administrators and team members can use Agentforce correctly, you need to assign specific permissions. This step controls who can configure the agent and who can interact with it.
There are two roles to configure: the Salesforce Administrator who will manage the agent and the end-users who will interact with it.
For Salesforce Administrators
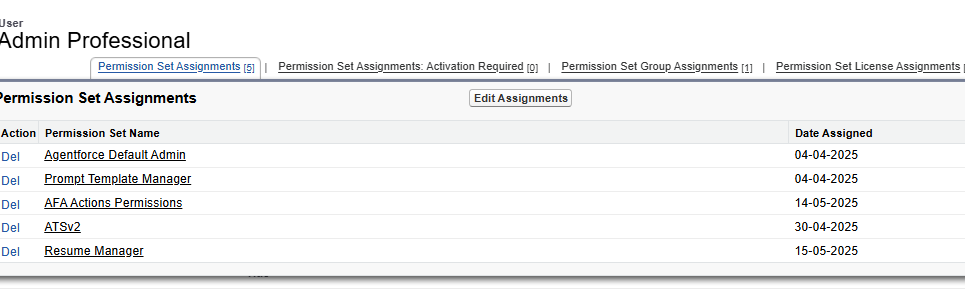
Assign the following three permission sets to any administrator who will configure or manage Agentforce:
- Agentforce Default Admin
- Prompt Template Manager
- BHRC Agentforce Actions
For Users
Assign the following two permission sets directly to users who will access and use the Agentforce assistant.
- Prompt Template User
- BHRC Agentforce Actions
Do not add these permissions to a permission set group.
If you’ve assigned the permissions accordingly, you should be able to see the Agentforce icon at the top right section of the Salesforce UI.
Install the Bullhorn Agentforce Actions Package
This package contains the essential metadata, Apex classes, and flows that allow Agentforce topics and actions to function correctly. It is a required dependency for the industry-specific packages.
-
Log in to your Salesforce org as an administrator.
-
Use the latest release installation URL to begin the installation.
-
For the latest URLs, see TR Releases and Package versions.
-
-
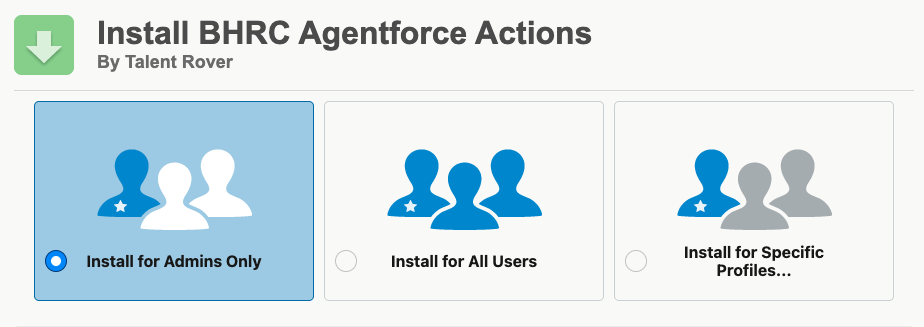
On the installation screen, select Install for Admins Only.
-
Click Install.
-
Wait for the installation to complete. You will be redirected to the Setup page when it is finished.
Install the Bullhorn Agentforce Industry Package
Now that the core actions are installed, you can install the package tailored to your specific industry (e.g., Professional, Healthcare, Executive Search). This package includes custom topics, actions, and prompt templates that provide relevant functionality for your team.
-
Log in to your Salesforce org as an administrator.
-
Use the latest release installation URL to begin the installation.
-
For the latest URLs, see TR Releases and Package versions.
We provide the following packages depending on the industry: Professional, Healthcare, Light Industrial, or Executive Search.
-
-
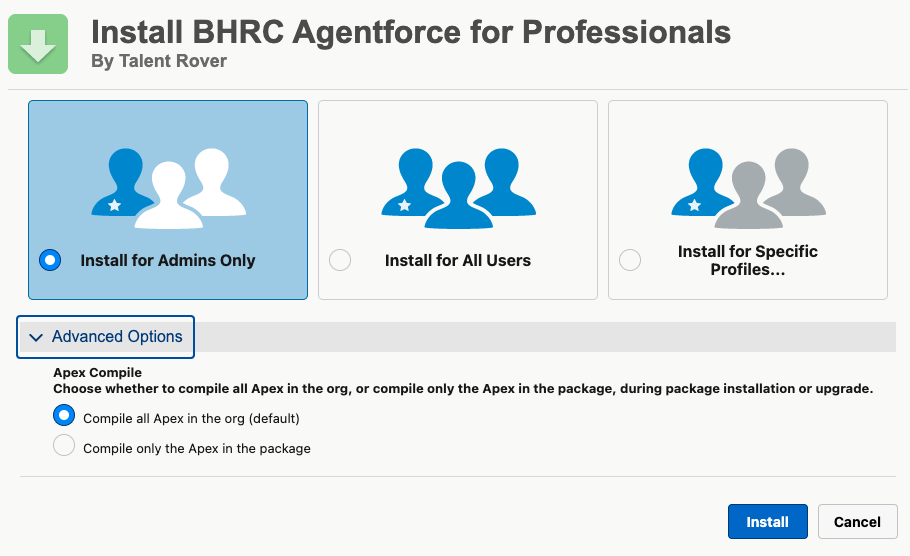
Select Install for Admins Only.
-
If shown, expand Advanced Options and ensure Compile all Apex in the org (default) is selected.
-
Click Install.
Configure Your Agent with Industry-Specific Topics
After the packages are installed, you must add the new industry-specific topics to your agent. This makes the new capabilities available to your users.
-
Navigate to .
-
Open the Agent you would like to use. This will update the default agent installed on the org.
-
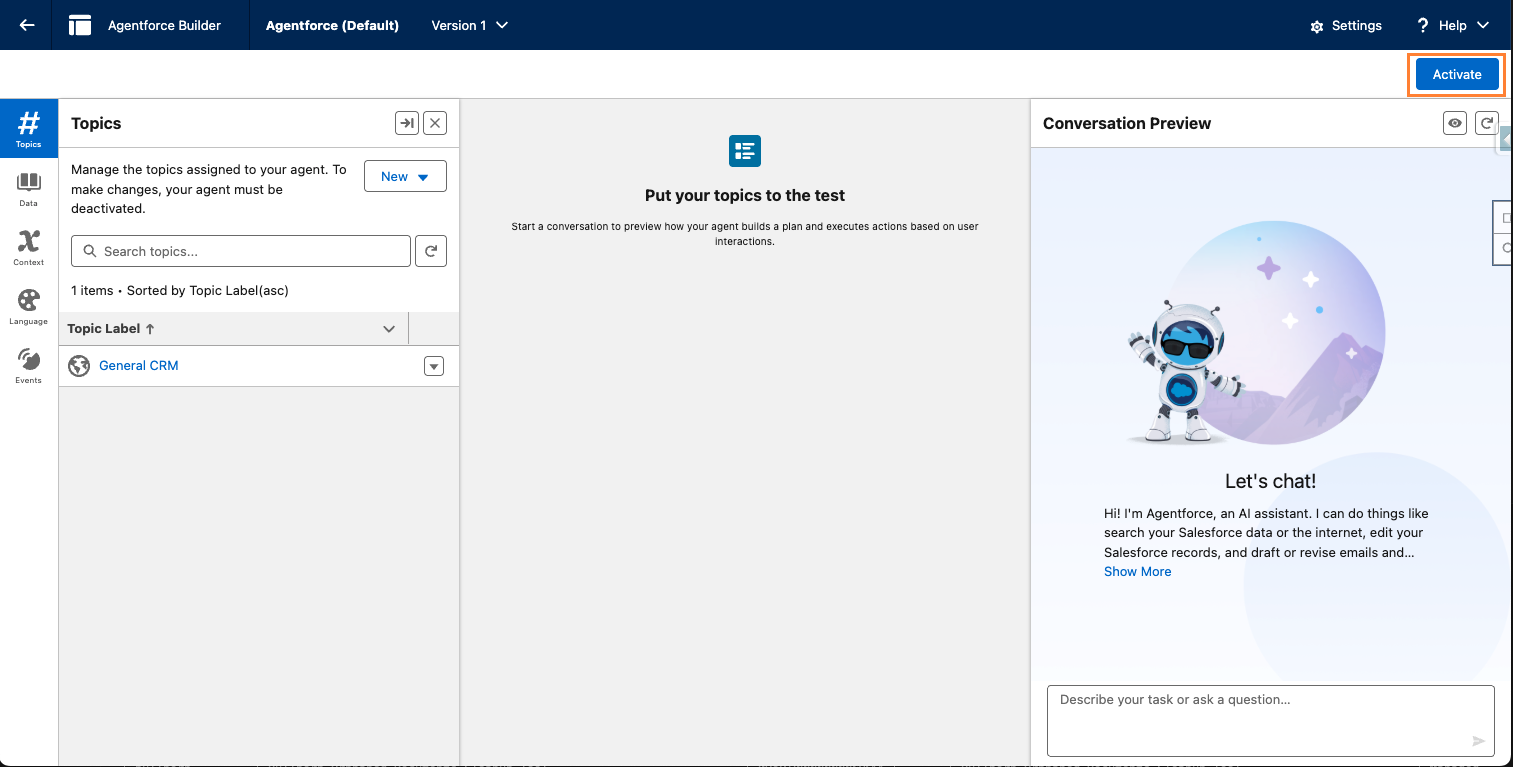
In the top right corner of the Agent Builder, check that the agent is deactivated.
The button should say Activate. If it says Deactivate, click it to deactivate the agent before making any changes.
-
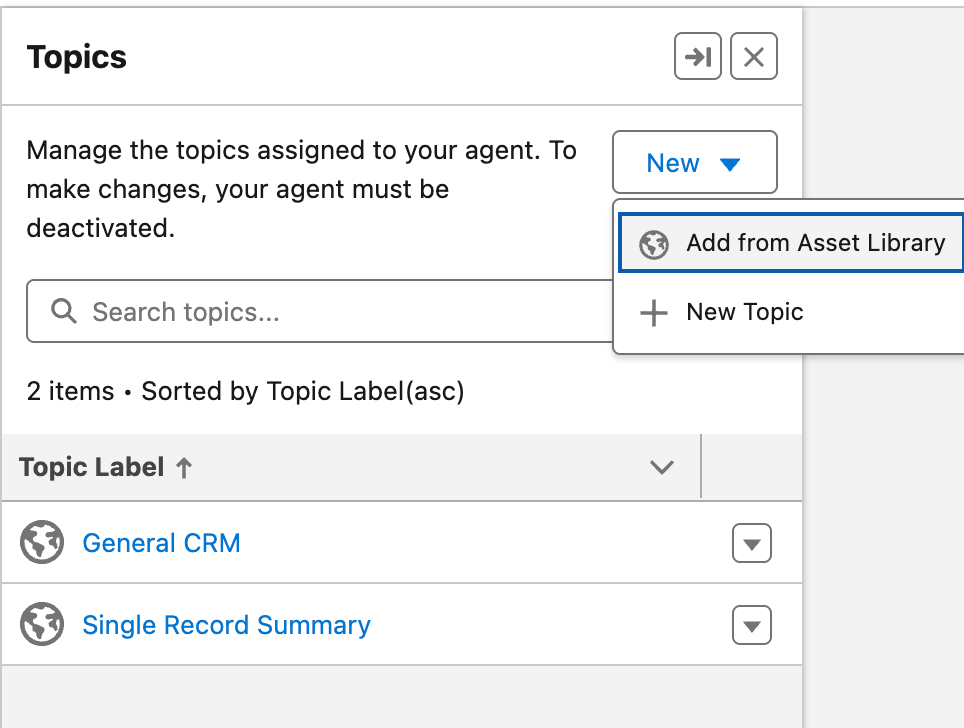
In the Topics panel on the left, click the New dropdown and select Add from Asset Library.
-
In the pop-up window, select the checkboxes for the topics you want to add (e.g., AF4PR Candidate Outreach, AF4PR Create Job Posting).
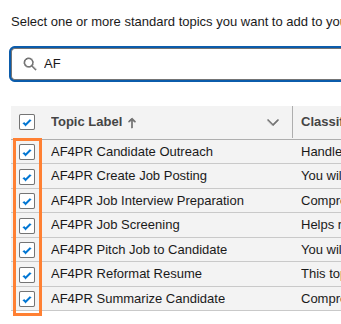
-
Click Finish.
-
In the top right corner, click Activate to enable the agent with the newly added topics.
Do not manually remove these topics from the agent later. Doing so deletes them from the org, and the only way to restore them is to reinstall the package. The recommended best practice is to create a new agent for testing rather than modifying the default one.
How to Resolve Common Installation & Configuration Issues
This section helps you resolve common issues that may occur during installation and initial setup.
- If the Agentforce Agents menu is missing: After enabling Einstein in Enable Einstein and Agentforce in Salesforce above, you may need to wait a few moments and refresh your browser page for the menu option to appear under Agentforce Studio.
- If you can't add or remove topics from an agent: The agent must be deactivated before you can make changes. In the Agent Builder, click the Deactivate button in the top right, make your changes, and then click Activate.
- If you accidentally remove a topic from the default agent: The topic is deleted from the Salesforce org. You must reinstall the industry package to restore it. To avoid this, consider creating a new agent for customization instead of editing the default.
For more details on resolving issues related to Agentforce topics and user prompts, see Troubleshooting Agentforce Responses.
FAQ
This section answers frequently asked questions about the Agentforce installation and setup process.
Q: Do I need Salesforce admin permissions to install Agentforce?
A: Yes. You must be a Salesforce Administrator to install packages and assign the necessary permission sets.
Q: Can I test Agentforce in a sandbox before installing it in production?
A: Yes. The installation process is the same for a sandbox environment. Testing in a sandbox is a recommended best practice before rolling out to your entire team.
Q: What’s the difference between the Actions package and the Industry package?
A: The Actions Package is a required dependency that contains the core technical components (like Apex and flows). The Industry Package contains the specific AI topics and prompts tailored to your business (like "Summarize Candidate" or "Create Job Posting").
Next Steps.
Now that Agentforce is installed you will need to upgrade your actions and packages using Upgrading Unlocked Agentforce Packages