Candidate : Applicant Tracking System Details
is a tool for tracking candidates within a job funnel, designed for speed, efficiency, and volume. enables quick-action movements from one stage to another in a single workspace, from sourcing to placement, including mass placement.
This article explains how to use the component available from Candidate records to track the progress for a single candidate through every job to which they have been applied.
A separate section focuses on the component available from Job records for tracking multiple candidates through a single Job cycle.
Accessing the
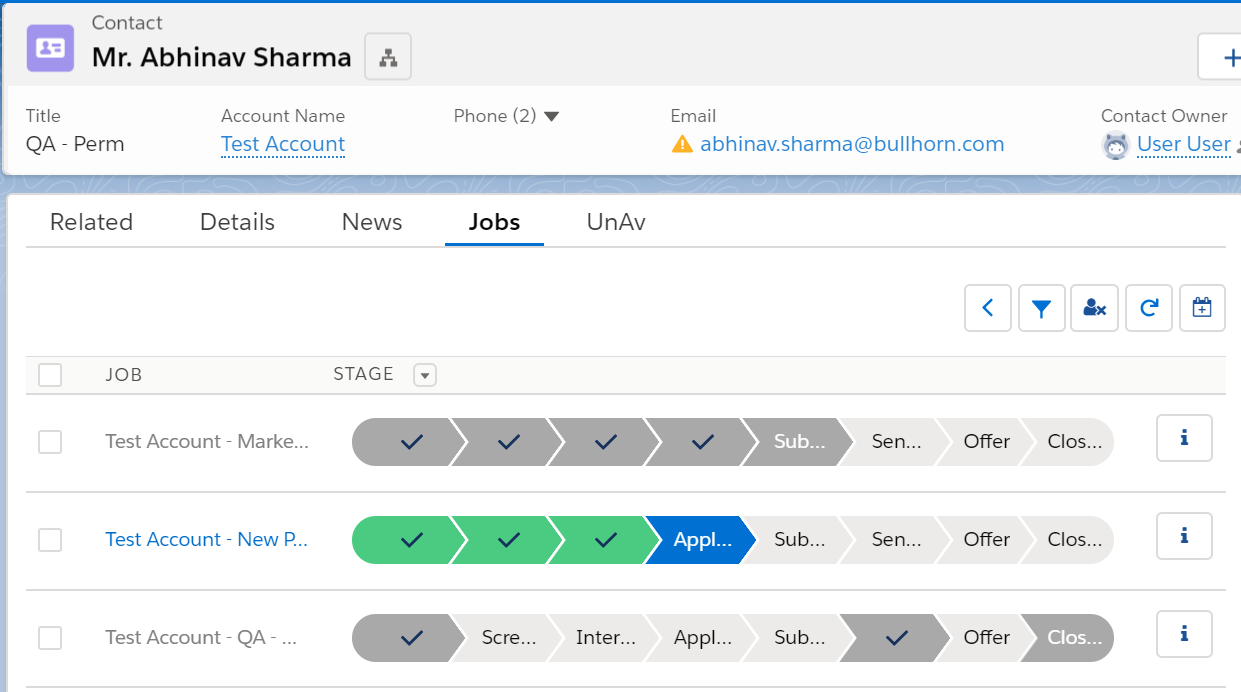
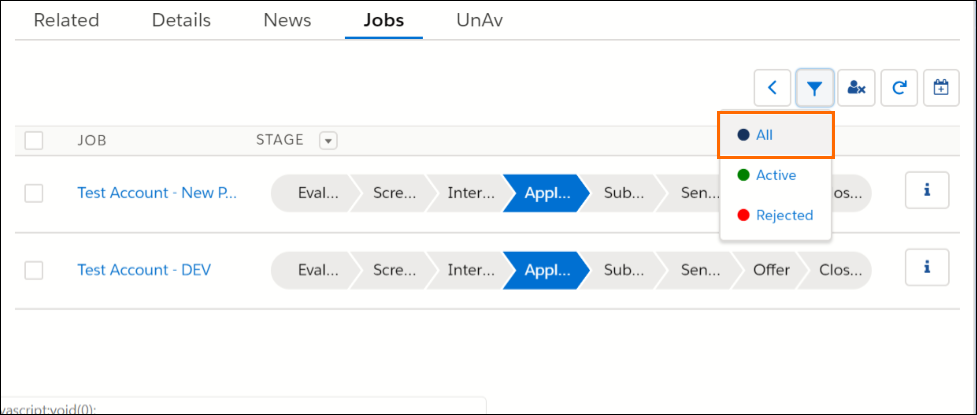
To access the Candidate , click the Jobs sub-tab from a Contact record. You will see a list of Jobs that the Candidate has applied to. Each listing displays the Job title and current Job stage, using color-coded chevrons. From the stage drop-down at the top, you can filter Jobs based on stages by clicking the stage name.
When working with multiple Jobs, use the checkbox next to the Job name to select Jobs or click the top checkbox to select all Jobs on the page.
Admin Note:
Below are two customization options available for the :
- Two Columns are displayed out of the box: Job and Stage. It's possible to add more columns by editing the following Field Set:
- Setup > Build > Create > Objects > Application V2 > Field Sets > Lightning List Tab.
- The number of Jobs visible on the page is customizable. To update this, go to Setup > Custom Settings > ATS Configuration Settings and enter the preferred number in records size.
For best performance, we recommended that you do not display over 50 Jobs per page.
Key Features
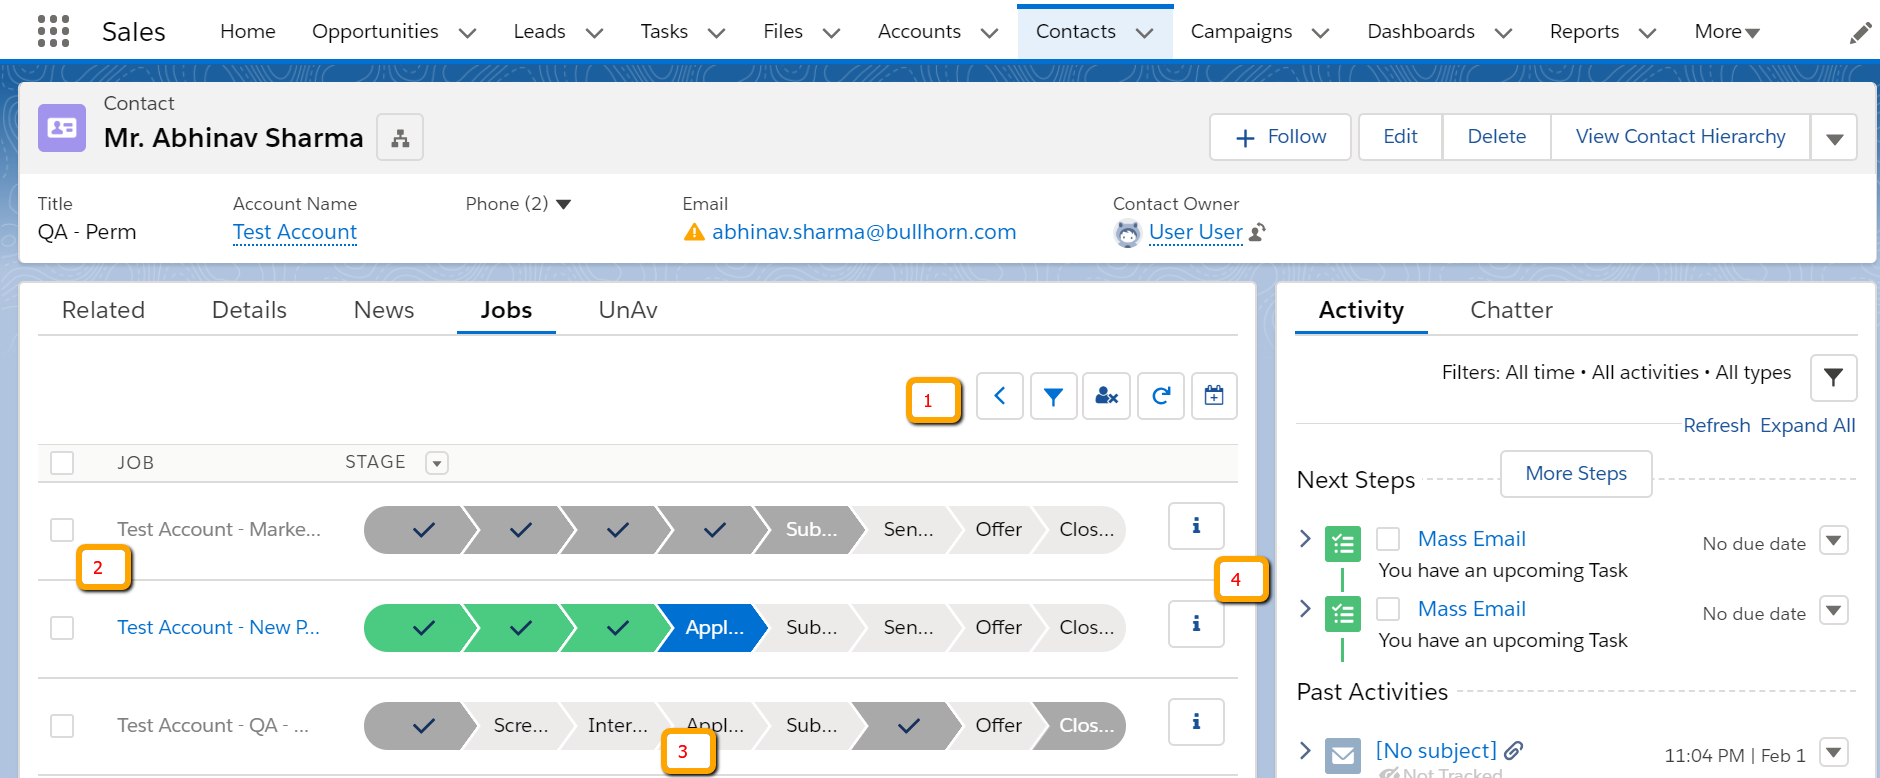
- Actions Toolbar: Buttons for taking action to move the Candidate through the various stages.
- Job Name: You can click the name of the Job to view the Job record.
- Job Stages: Quickly see which stage the Candidate is in for each Job.
- Application Details: Click the Information icon to view a pop-up window that shows the record.
Job Stages
The standard Application stages included in the package are customizable.
- Application: The Candidate has been identified as being suitable for the position.
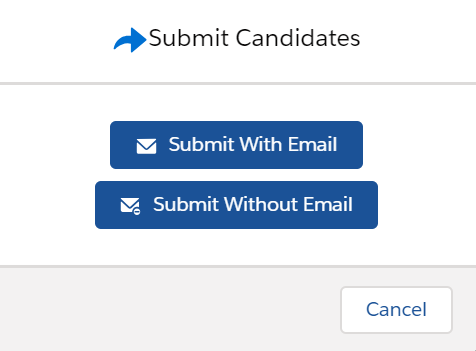
- Submittal: The recruiter submits a Candidate to the client. You can move the Candidate to Submittal or choose the option to send an email (with attachments) while moving the Candidate.
- Send Out: The Candidate has been selected for an interview with the client. Interview details are entered.
- Offer: The Candidate has received an offer.
- Closing Report: The Candidate has accepted the client offer and agreed to all the terms. The Placement of the Candidateis the end of the recruiting process.
Color Coding
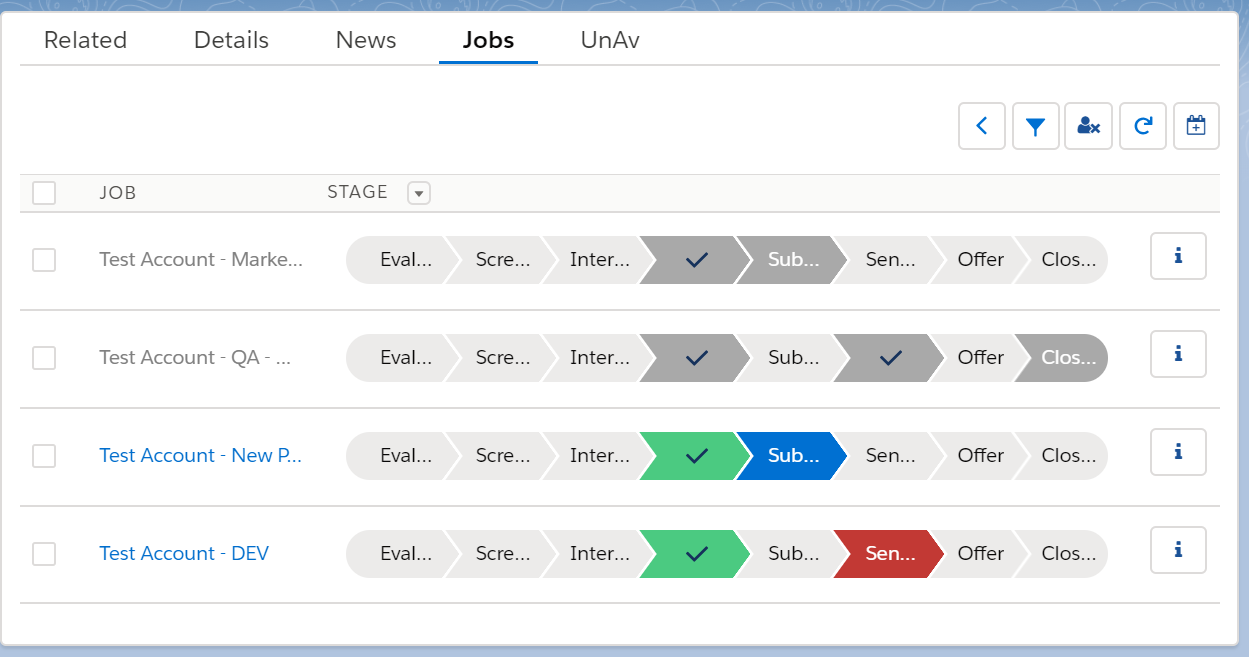
If a Job is closed, then that Job row (the Job name and chevron) will appear in gray.
In the , the stages are color coded as follows:
- Blue: The current stage.
- Green: The previous stage(s).
- Red: Stage in which the Candidate has been rejected.
- Gray: Skipped stages.
- Note that Candidates do not need to go through every stage. Candidates can be entered at any stage and moved to any stage.
Actions Toolbar
Applied Filter
Use the Filter icon  to restrict the Job listing to only display active Jobs (or only rejected Jobs). To see the full list of Jobs for the Candidate, select All from the filter.
Reject / Unreject
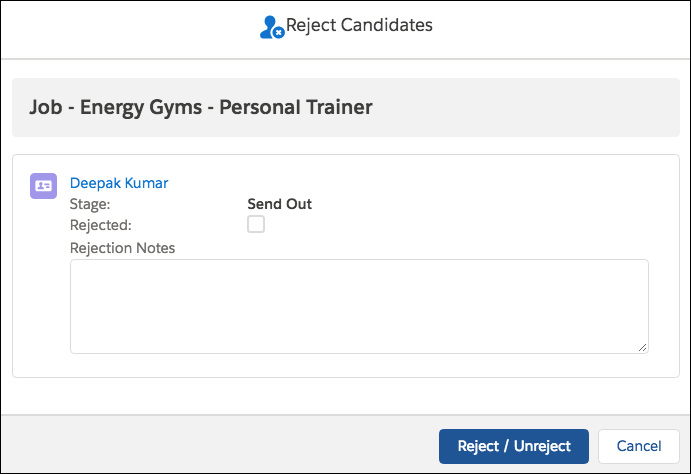
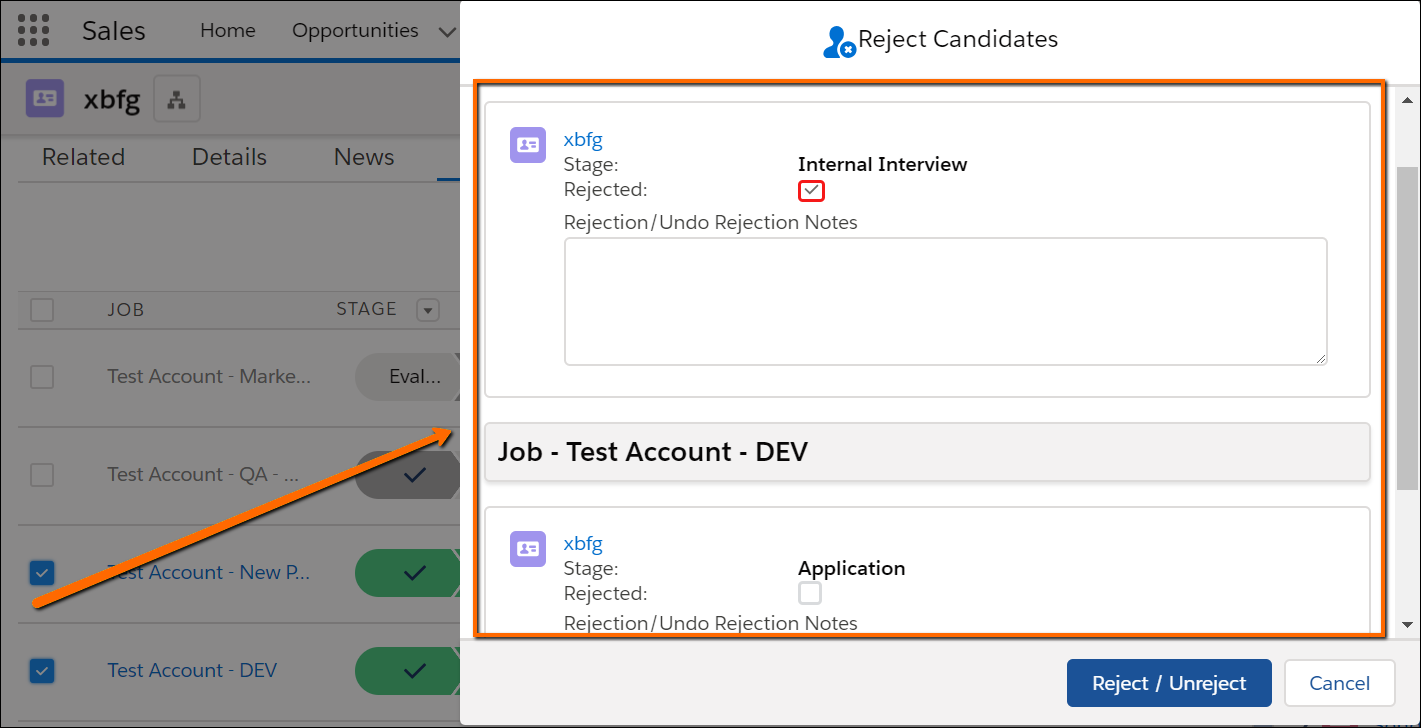
To reject one or more Jobs, select the desired Jobs and then click the Reject/Unreject icon  . In the pop-up window, review the name of the Job, enter a Rejection Note (optional), and click the Reject/Unreject button. It is possible to send an Email during this Rejection process. This pop-up page can be customized.
Admin Note:
To select the fields you want to see on the Reject/Unreject pop-up page, add or remove from the following Field Set:
- Setup > Build > Create > Objects > Application V2 > Field Sets: ApplicationRejectionFieldSet.
In the out of the box configuration, the Rejection Notes field is a text field and and the value entered there is stored on the record. This field gets updated every time reject/unreject is used (the previous value is overwritten), but historical data is saved on an Application History record in the background for every reject/unreject action. This is where the Rejection Notes are captured.
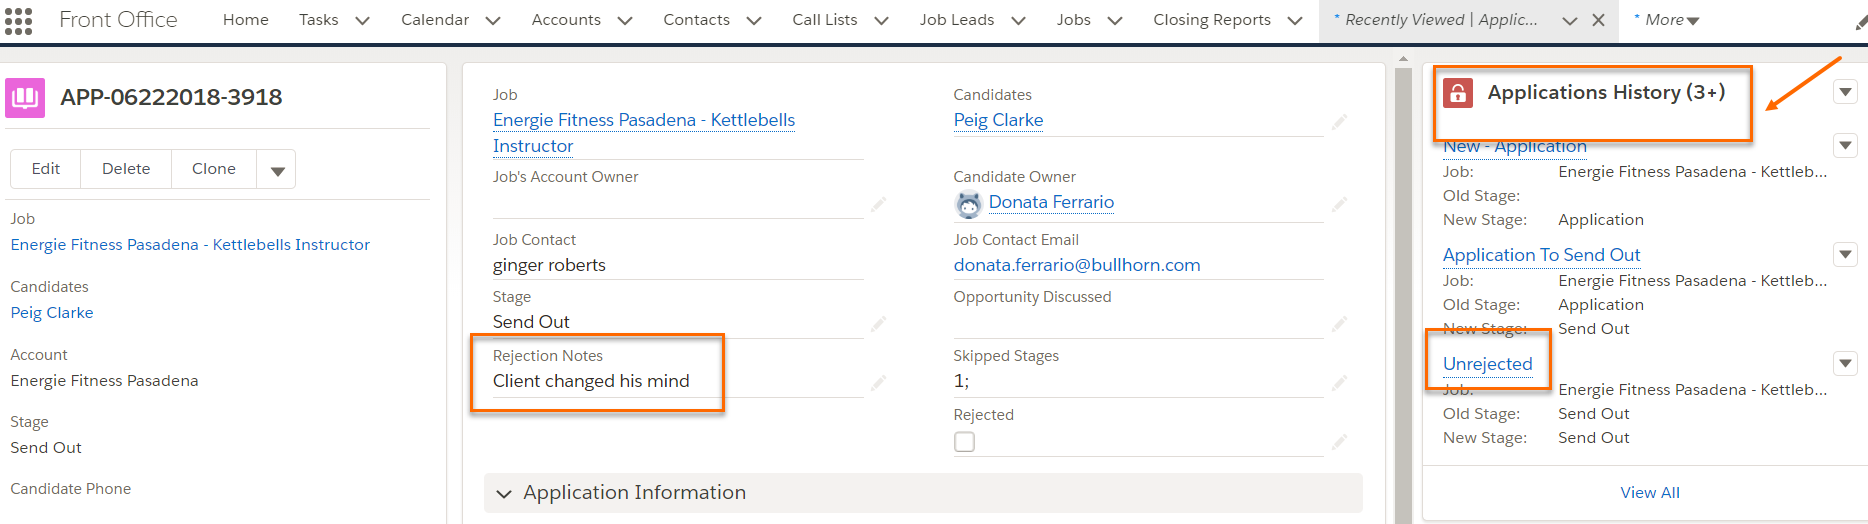
If you replace the TR1__Rejection_Notes__c text field in your configuration, ensure that you have the same field on the page layout and Application History page layout to have the data mapped correctly.
To undo a previous rejection and restore the Job, mark the checkbox for the Job and click the Reject/Unreject button. To confirm that you want to restore the Job, click the Reject/Unreject button in the pop-up window. Optionally, add a Note to explain the reason for reverting the rejection.
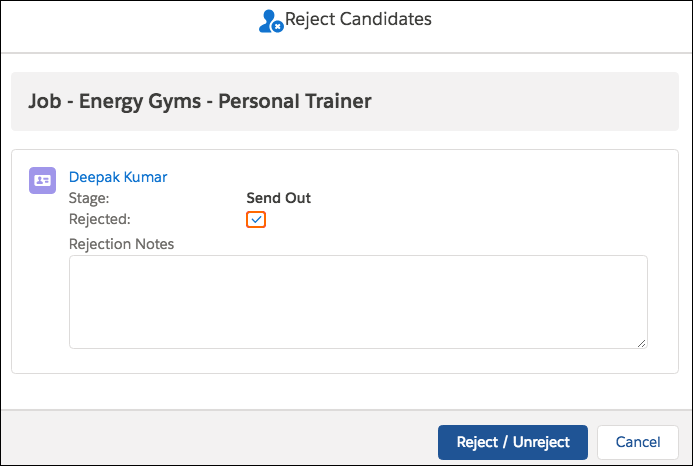
It's possible to select multiple Jobs for the Reject/Unreject action and to include Jobs that are rejected that need to be unrejected. The pop-up window will have a sections for each selected Job and will track the status of each Job. When the Reject/Unreject button is used, the correct action will be performed for each.
Reject/Unreject is not possible for Candidates in the Closing Report stage.
Refresh
Click the Refresh icon  to ensure that all relevant updates are reflected in the listing.
View Interview Schedules
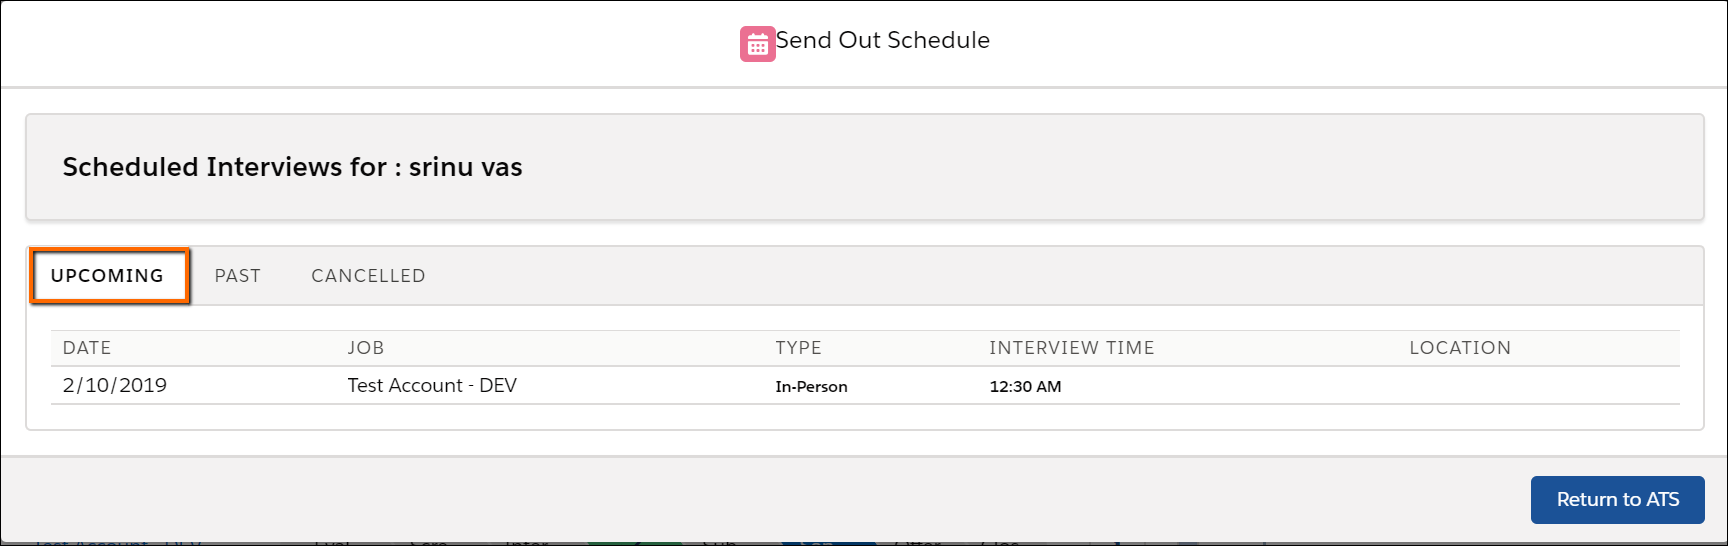
In the ATS, click the View Interview Schedules icon  to see upcoming, past, or canceled interviews for a Candidate. Click the Return to ATS button to return to the JobsList at any time.
The default view displays Upcoming interviews:
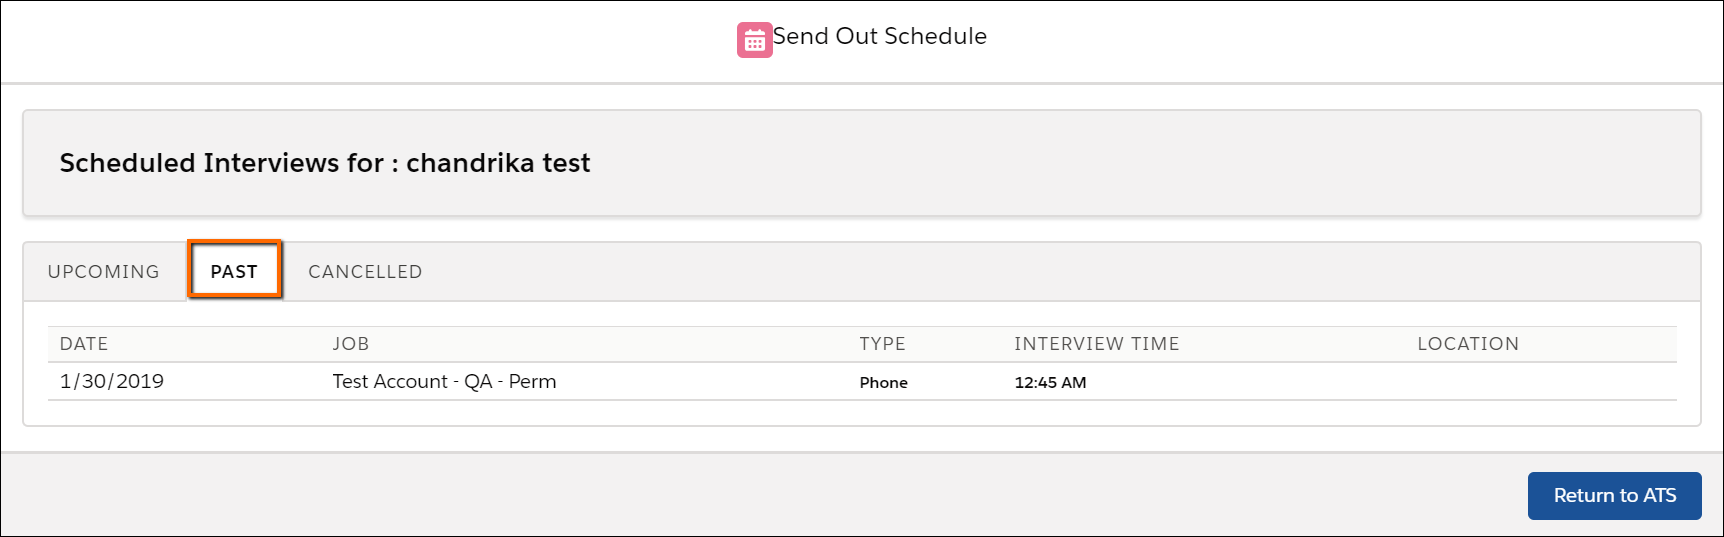
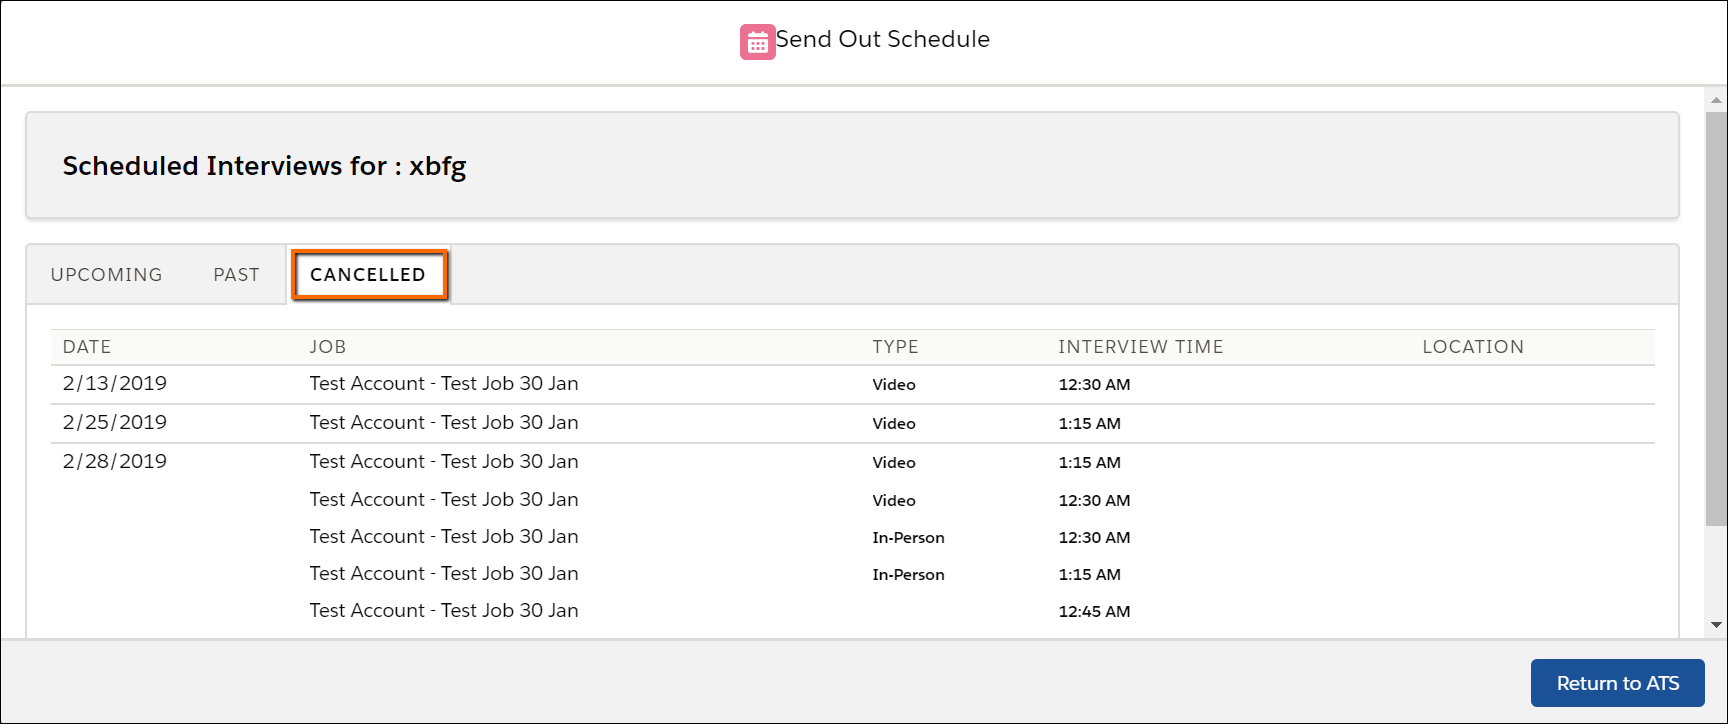
Click the Past tab to see all past interviews for the Candidate. Click the Canceled tab to see if any interviews have been canceled:
Move Back / Move Forward
The Move Back and Move Forward icons  are used to move the stage forward or back for one Job. To use this, select the checkbox next to the name of the Job, click the Move Back or Move Forward button, and select the desired stage.
Move Back is not possible for Candidates in the Closing Report stage.