Creating Custom Attestations
Custom Attestations allow you to create custom messages for employees during time entry. These messages can be used to announce things to candidates, remind them of policies, ask questions, and more. Attestations are set up in the Time Management Console (TMC) and pushed to employees through their time entry method.
This feature is currently only available for Tempo clocks and Web Time Entry (WTE).
- In the Time Management Console (TMC), navigate to .
You must have Allow Attestation Configuration turned on in your Role settings to access the Attestation Configuration screen.
- Click the Add New Attestation Group button.
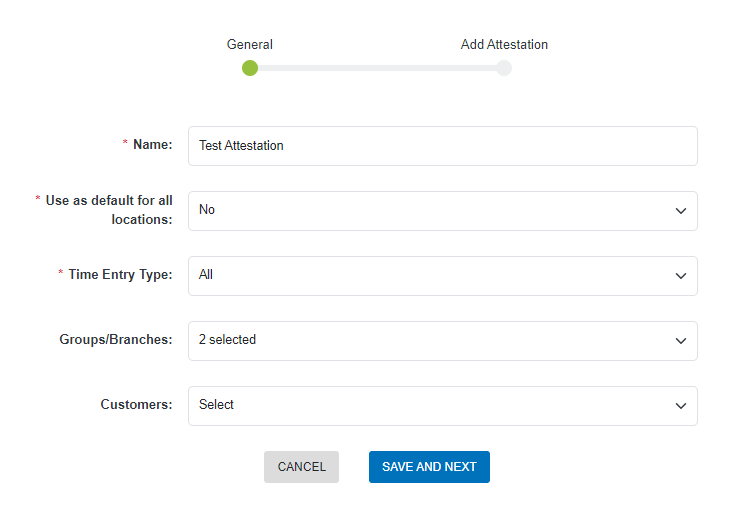
- Fill out the following information on the General screen:

- Name: Enter a unique name (up to 50 characters) for your attestation group.
- Use as default for all locations: If you select yes, this attestation group will apply to all locations as the default.
- Time Entry Type: Select the Time Entry Method the attestations in this group will be pushed to.
- Clock: The attestation you create will only apply to Tempo clocks.
- Web: The attestation you create will only apply to Web Time Entry (WTE).
- All: Includes all of the above.
- Groups/Branches: Search for and select the groups/branches that this attestation will be active for.
- Customers: Search for and select the customers this attestation group will apply to.
- Click Save And Next.
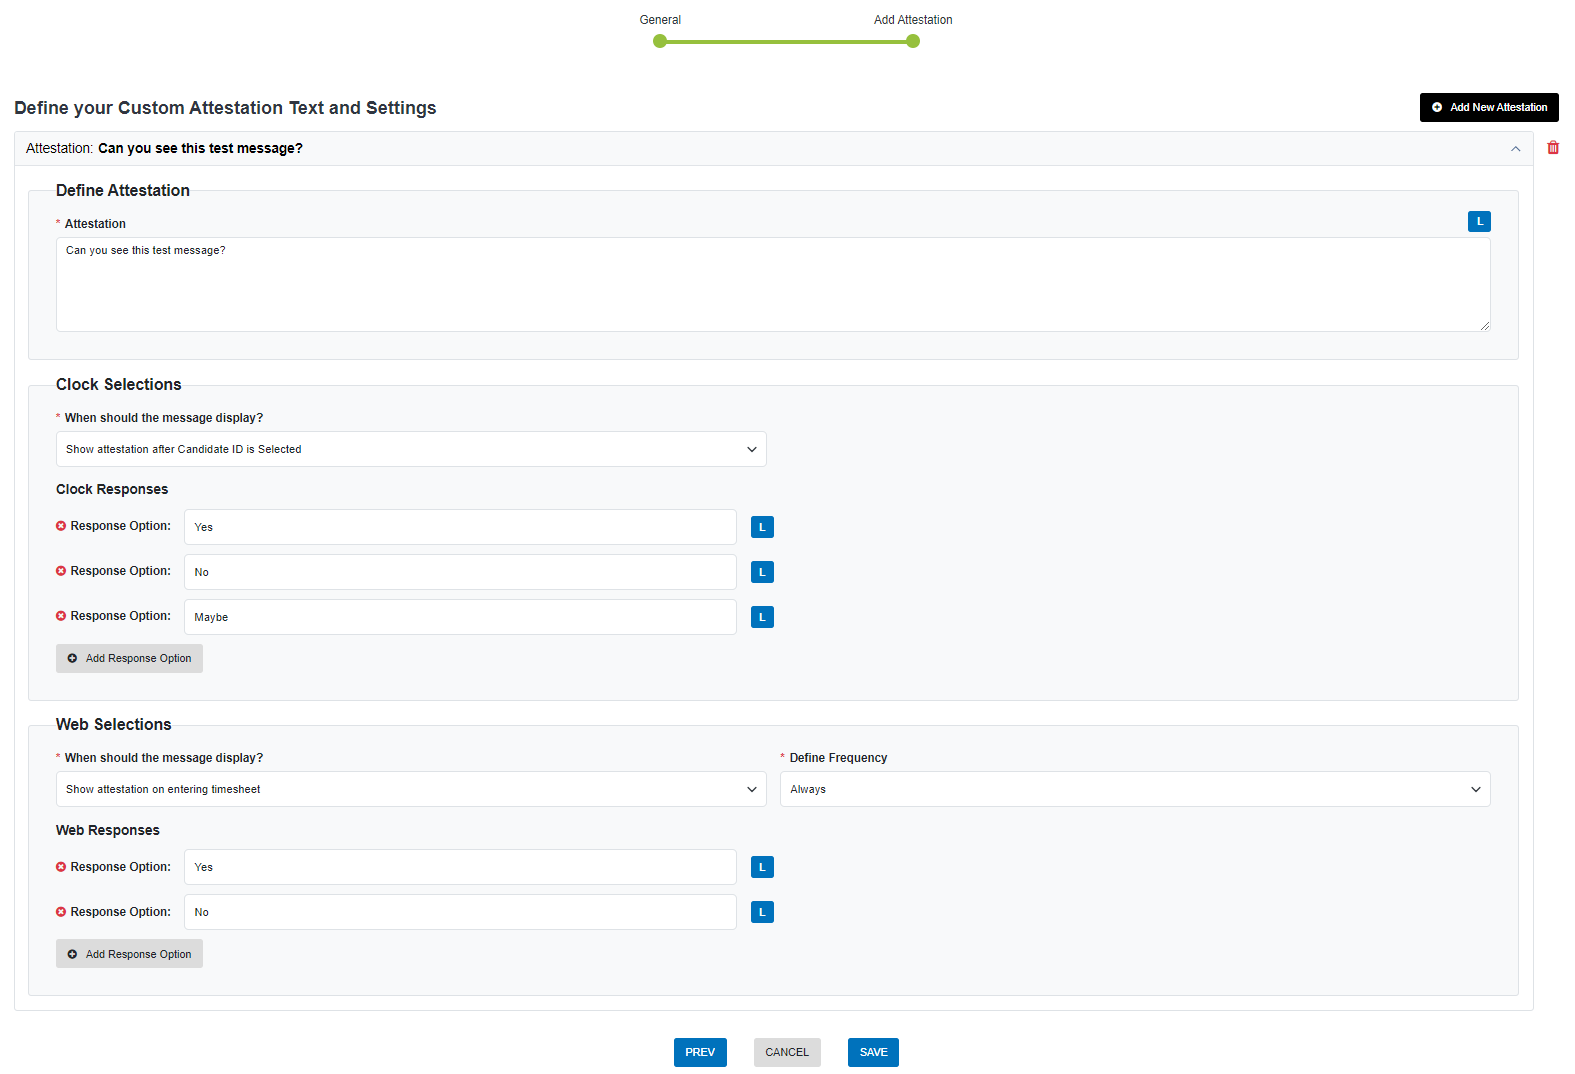
- Fill out the following sections on the Add Attestations screen:

- Define Attestation: Enter the copy for your attestation. This is the exact wording that will show on the clock screen. This field supports up to 500 characters.
 Clock Selections
The following fields are applicable to Tempo attestations.
- When should this message display: Select one of the following options.
- Never: The attestation will never show on the Tempo.
- After Candidate ID: The attestation will appear after the employee punches in their pin, but before they are able to make a punch.
- After In/Out selection: The attestation will appear after a punch is made.
- After end of day: The attestation will appear after the employee has indicated that they are punching out for the day.
- Clock Responses: Fill out the response options employees can choose from. These fields support up to 25 characters.
- Click Add Response Option to add additional lines. You can add up to five responses.
- When should this message display: Select one of the following options.
 Web Selections
The following fields are applicable to WTE attestations.
- When should this message display: Select one of the following options.
- Never: The attestation will never show via WTE.
- Show attestation on entering timesheet: The attestation will appear after the employee clicks on a weekending date to enter a timesheet, but before they are able to enter any time.
- Show attestation after submission of timesheet: The attestation will appear after the employee clicks Submit on their timesheet.
- Define Frequency: The amount of times the attestation appears for employees.
- Once per pay period: The attestation will only appear once for the candidate per week ending date.
- Always: The attestation will always appear based on the When should this message display field.
- Web Responses: Fill out the response options employees can choose from. These fields support up to 25 characters.
- Click Add Response Option to add additional lines. You can add up to five responses.
- When should this message display: Select one of the following options.
- To add additional attestations to the group click the Add New Attestation button.
- When you are done, click Save.
The new attestation group will show on the Custom Attestation Configuration screen in a list format. For information on editing attestations see Modifying Custom Attestations.