Building an Amplify Present Template From Scratch
You need Bullhorn Amplify Edition to use this feature.
In this article, you’ll learn how to create, design, and customize an Amplify Present template from scratch. Templates define what information appears in your candidate documents and how it’s formatted, helping you deliver polished, professional materials in seconds.
Looking to get started quickly? Learn how to use Amplify Present Pro Templates to start with a prebuilt design.
Adding a New Template
-
In Bullhorn ATS, go to Admin > Amplify Admin.
-
Click the Amplify Present tab.
-
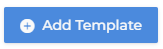
Click Add Template.
-
Select Start from Scratch to start with a blank template.
-
If you'd prefer to start with a prebuilt template, select Pro Templates. See Amplify Present Pro Templates for a guide.
-
-
Fill in the following details:
-
Type: Select the template type (e.g., Resume, Cover Letter).
-
Name: Enter a name for your template.
-
Preview Text: Add a short description to help users understand the template’s purpose (e.g., “Standard resume with education and work history”).
-
Click Create Template to open the build area.
Template Options
At the top of the build area are several options to help you manage your template:

-
Zoom: Click the 100% drop-down to change the zoom level.
-
Show Grid: Turn gridlines on or off to help align your content.
- Select Candidate to Preview: Select a candidate to populate the template with their details. This lets you preview how the layout looks with real or test data.
Template Properties
Use the properties panel on the right side of the screen to build your template, adjust styling, and configure settings.
The panel is split into three sections:
-
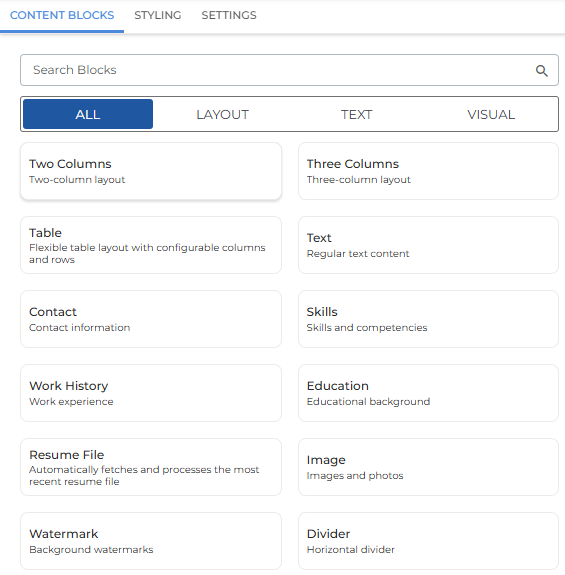
Content Blocks: Add and organize building elements such as text, tables, columns, and images. (See Adding Content Blocks for details).
-
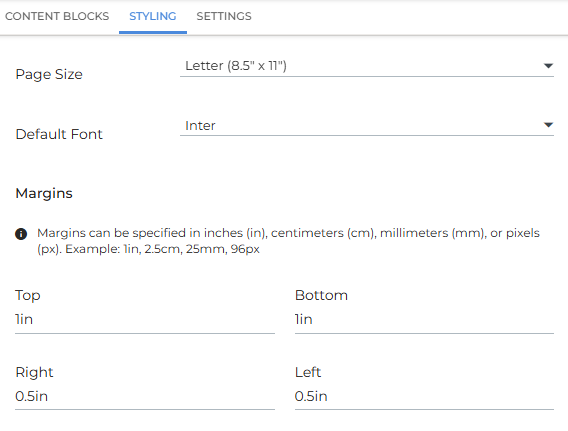
Styling: Define page size, default font, and margins.
-
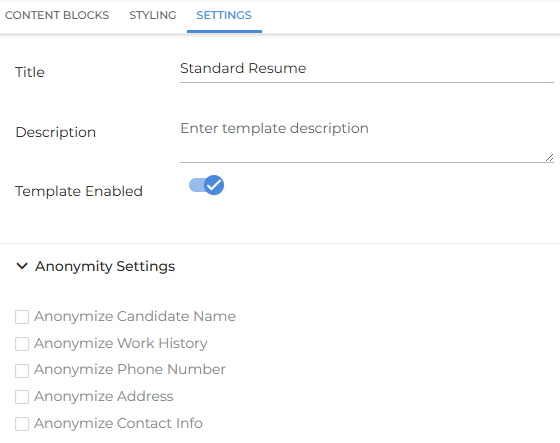
Settings: Update basic template details like Name, Type, and Description at any time, and use Anonymity Settings to hide specific candidate details automatically.
Adding Content Blocks
Content blocks are the building pieces of your document. Browse or search for a block, then click to add it to your template.
Once added, you can drag blocks to reorder or use the arrow icons to move them.
Layout Blocks
Use layout blocks to structure your document. Choose a two-column or three-column layout, or insert a table.
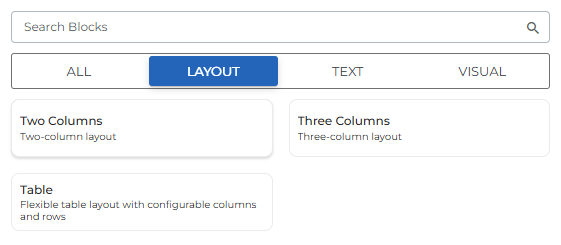
-
For tables, select the number of rows and columns.
-
You can add other content blocks (like text or images) inside table cells or columns.
Text Blocks
Use text blocks to add written content.

You can:
-
Choose from prebuilt merge tag sets (e.g., Contact, Work History, and Skills).
-
Use the Text block to enter free text.
-
Insert Merge Tags and Amplify Sections (AI-generated text) for personalization.
-
Include the candidate’s most recent resume with the Resume File option.
-
This is useful if you want to quickly add a watermark or anonymize the candidate’s existing resume without rebuilding the document from scratch.
-
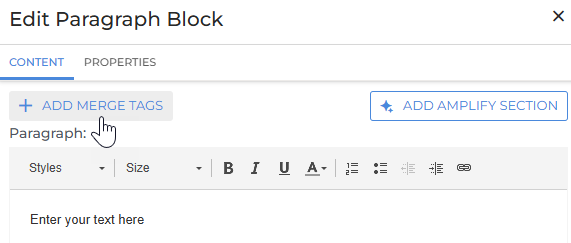
Add Merge Tags
Click Add Merge Tags to pull in specific fields from the candidate record (for example, First Name, Current Job Title).
If a merge tag field is empty for a particular candidate, that field will simply be hidden on the generated document. It won’t display a placeholder.
Using Fallback Merge Tags
You can use fallback merge tags to define alternative fields when data is missing.
Use ?? between merge tags to create a fallback chain.
{nickname}??{firstname}
→ Uses the candidate’s nickname if available. If the Nickname field is empty, it falls back to First Name.
You can also chain multiple fallbacks:
{mobile}??{phone}??{workphone}
→ Uses Mobile if available, otherwise Phone, and if both are empty, Work Phone.
Fallbacks are a great way to ensure your generated documents always look complete, even when some candidate data is missing.
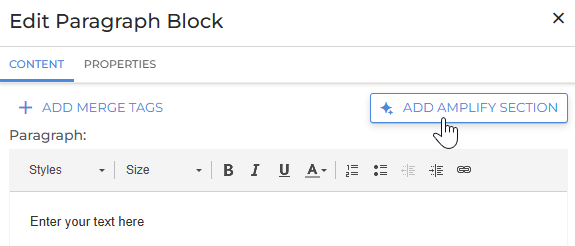
Add Amplify Section
Click Add Amplify Section to add AI-generated text to your document. You can select a prebuilt prompt (Executive Summary, Work History, or Skills) or enter your own custom prompt.
To manage what context Amplify can use to generate content, click Sources and use the checkboxes to include or exclude specific data points.
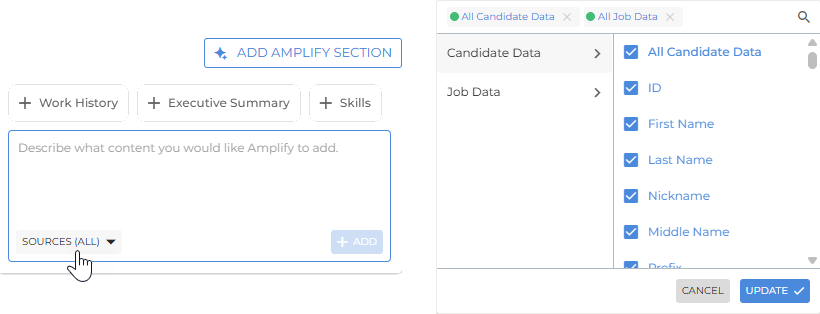
If you add multiple Amplify Sections within one text block, they share the same context. To use different contexts, create separate text blocks for each section.
Visual Blocks
Use visual blocks to add images, dividers, or watermarks.
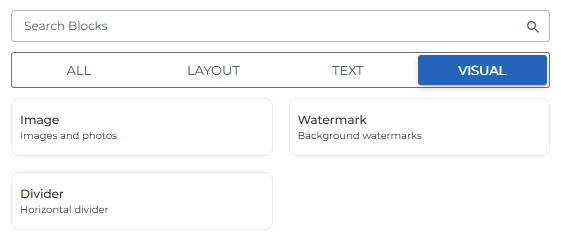
-
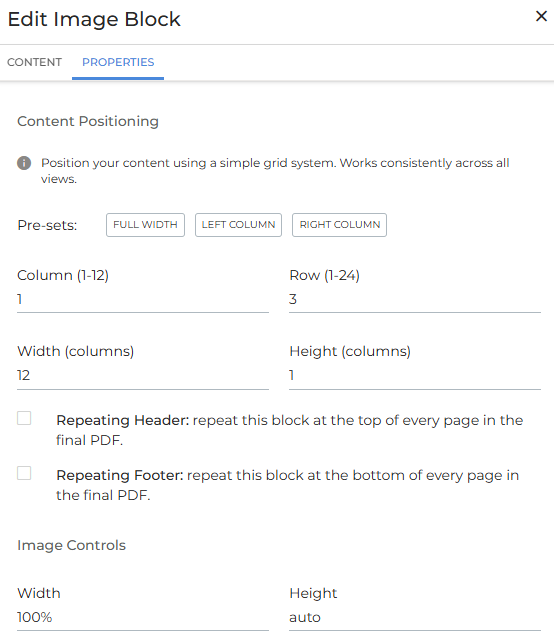
After uploading an image, open the Properties tab to adjust the image size and positioning.
-
Select Repeating Header or Repeating Footer to display an image on every page of the document.
-
You can also drag and resize images directly in the document preview.
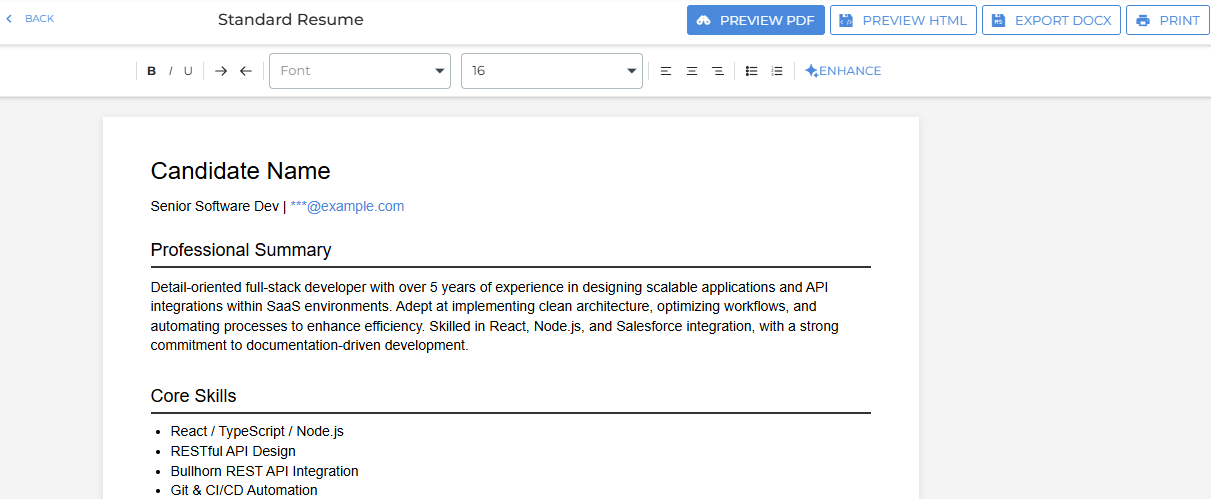
Previewing and Saving Your Template
When you’ve finished designing your template, click Preview in the top-right to generate a sample of your document.

On the preview screen you can adjust formatting and switch between different output types such as PDF and HTML.
-
Click Back (top left) to return to the build area.
-
When satisfied, click Save at the bottom-right of the build area to finalize your template.
Generating a Document
Once your template is saved, any ATS user can generate documents directly from a candidate record. See Generating an Amplify Present Document for detailed steps.