Creating, Customizing, and Editing s
When you access s, you see only the records that you own or to which you have read or write access, and records shared with you. You can see only the fields that are visible according to your page layout and field-level security settings designated by your .
Accessing s
- Navigate to the desired Object tab (e.g. s tab).
- Once you select an Object, a list of Recently Viewed records displays.
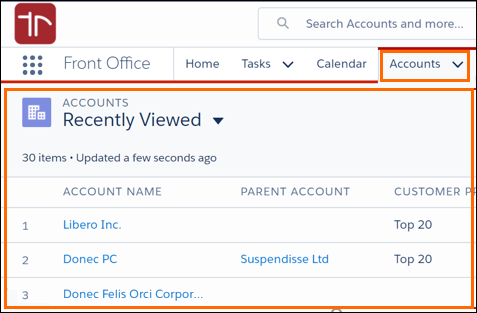
After clicking on the Contacts tab, you’ll see all your recently viewed client and candidate records. You are viewing the List View of the most Recently Viewed Contacts.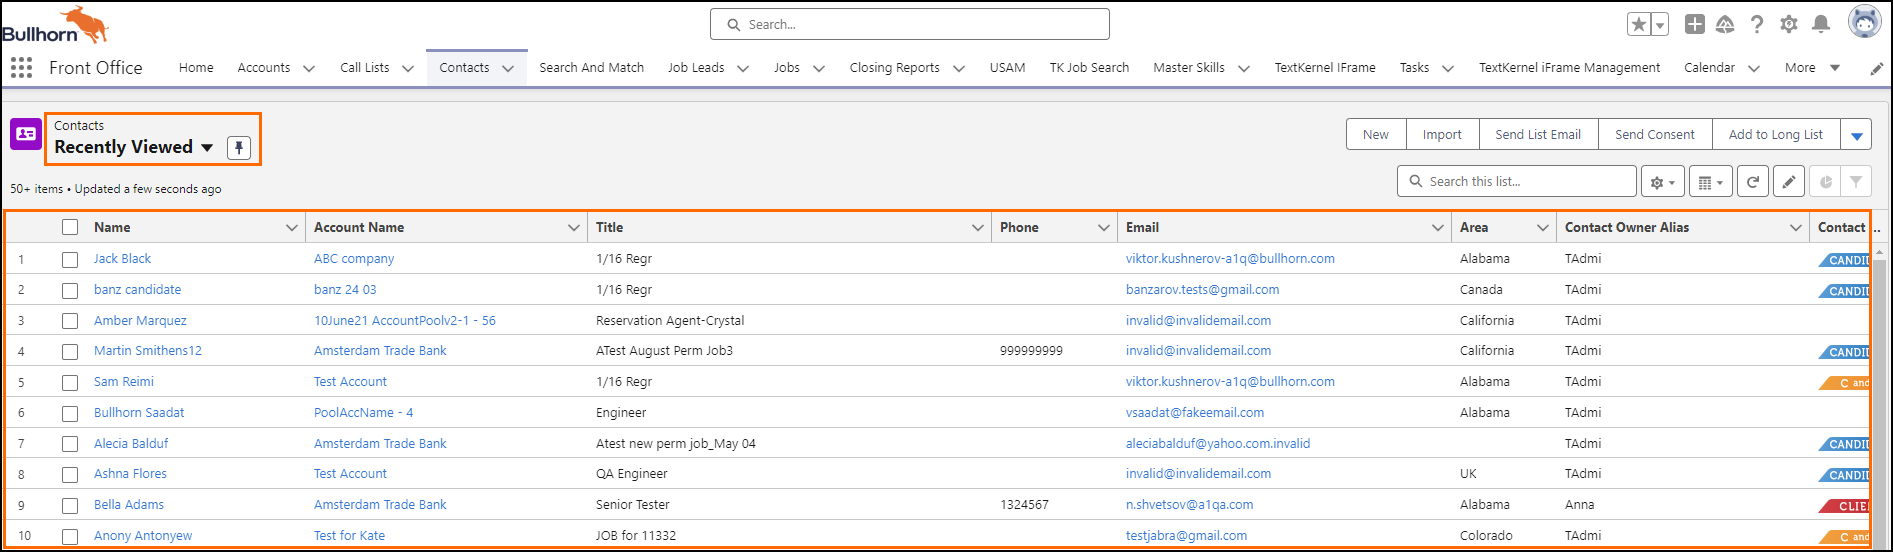
The data in this List View may be short if you’ve only accessed a few records since logging in.
The Recently Viewed List View displays the latest 25, 50, 100, or 200 records you have either added, viewed, or edited.
Switch s
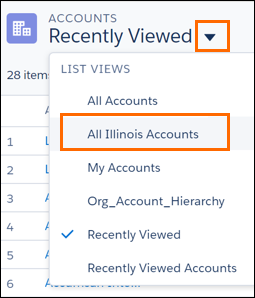
If you want to see more data, click the drop-down arrow next to the List View name and select from the predefined list.
- Select the Recently Viewed drop-down.
- Choose a other than the Recently Viewed.
Return to a
To keep seeing the same List View after switching tabs, click the Pin icon to save it. The next time you return to this page, your saved view will automatically appear.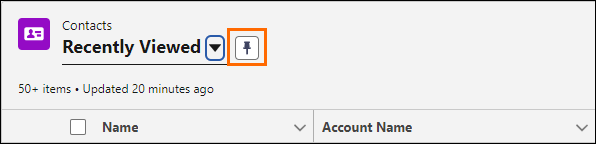
Create & Customize s
To make it easier to find the information you need and support your workflows, you can create custom List Views that show only the data relevant to you.
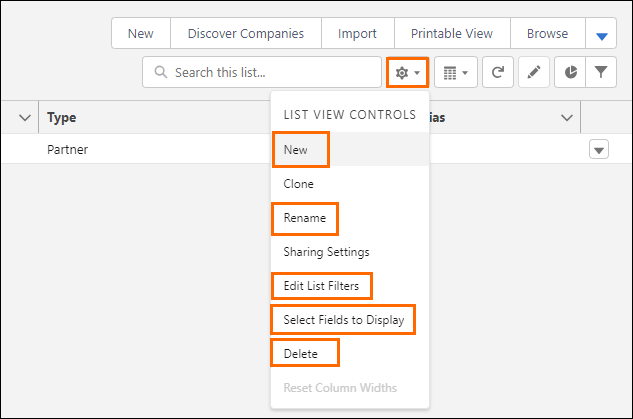
From the Controls menu you can create new views and edit existing ones.
Your options from the s Controls menu are:
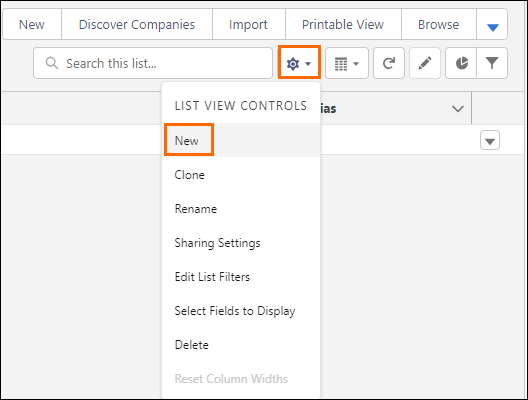
- Open the s Controls menu.
- Create a New .
- Rename the current .
- Edit List Filters for the current .
- Select Fields to Display in the current view.
- Delete the current .
Create New
- Select the Controls drop-down.
- Choose New.
- Enter a List Name (e.g. Hawaii Accounts).
- Set your desired permissions for Who see this ?.
- This option is only visible to s.
- Save your changes.
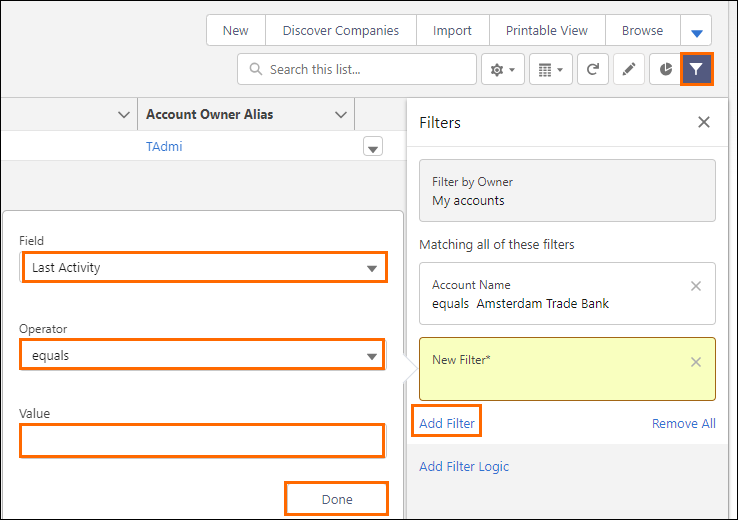
Edit Filters
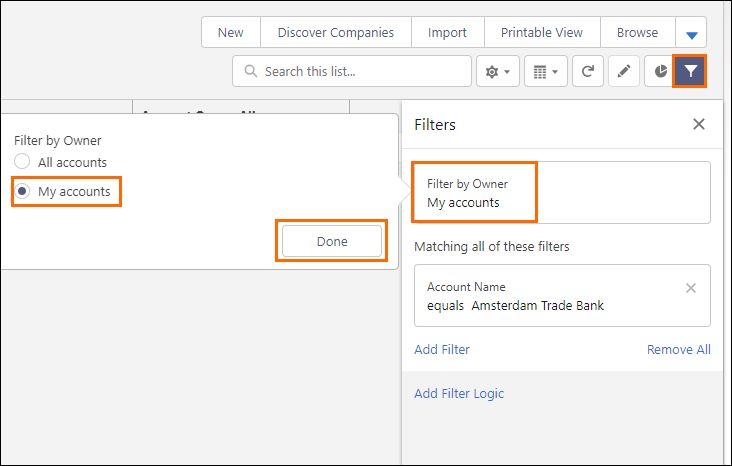
- Select the Filter
 icon.
icon. - Click Filter by Owner.
- Select My Accounts radio button.
- Click to Done.
Further filter criteria for the can be edited as follows:
- Select the Filter icon.
- Click Add Filter.
- Click the Field drop-down and select the field you'd like to filter by, for example, State/Province.
- Click the Operator drop-down and choose what operation you'd like the filter to implement.
- Enter a value you'd like to filter by, for example, “Hawaii”.
- Click Done.