Site Level Settings
Overview
After you select the client where the individual site is listed, you can then make changes to the Break Exception Rules and Default Waiver Settings for sites.
Steps
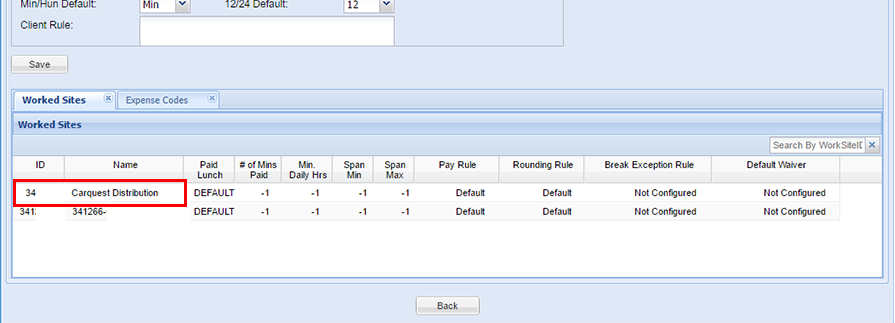
- Locate the Worked Sites section.
- This section lists the clock sites within the client you selected.
- The name and ID for each client is listed as well as any exception or waiver rules in place.
- Double-click a site name you wish to adjust.
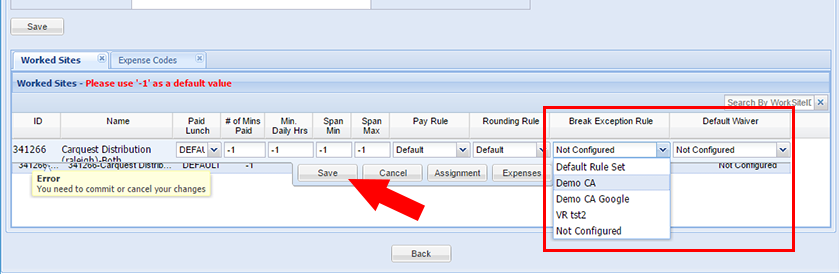
- In the Break Exception Rule column, select a rule from the drop-down menu.
- In the Default Waiver column, choose one of the options listed:
- No Waiver - This indicates you do not plan to give employees any waiver options.
- All Meal Periods - This indicates that employees should be able to waive all possible exceptions.
- Meal Period - Choose an individual option to provide a waiver only for that specific exception. You may only choose one option here.
- When you're done making changes to the rules and settings, click Save to update the site.
- Check out Break Exception Configuration Menu to verify that the site has been added.
Was this helpful?