Removing the Did Not Work Status from a Timesheet in ATS
This is Time & Labor functionality. To have Time & Labor enabled, contact your Account Manager.
The Did Not Work feature allows you to mark timesheets as Did Not Work, indicating that the Candidate did not work any hours during the work period.
This feature is used as a flag when you're chasing down timesheets. If you know a candidate didn't work, the Did Not Work status tells you that the candidates doesn't need to be sent any time entry reminders, giving you peace of mind during the payroll process.
In some cases, you may need to remove this flag to add time to a timesheet. Follow the steps below to remove the Did Not Work status on a timesheet in .
-
In , navigate to the timesheet you need to mark as Did Not Work.
-
From the Actions dropdown, select Remove Did Not Work Status.
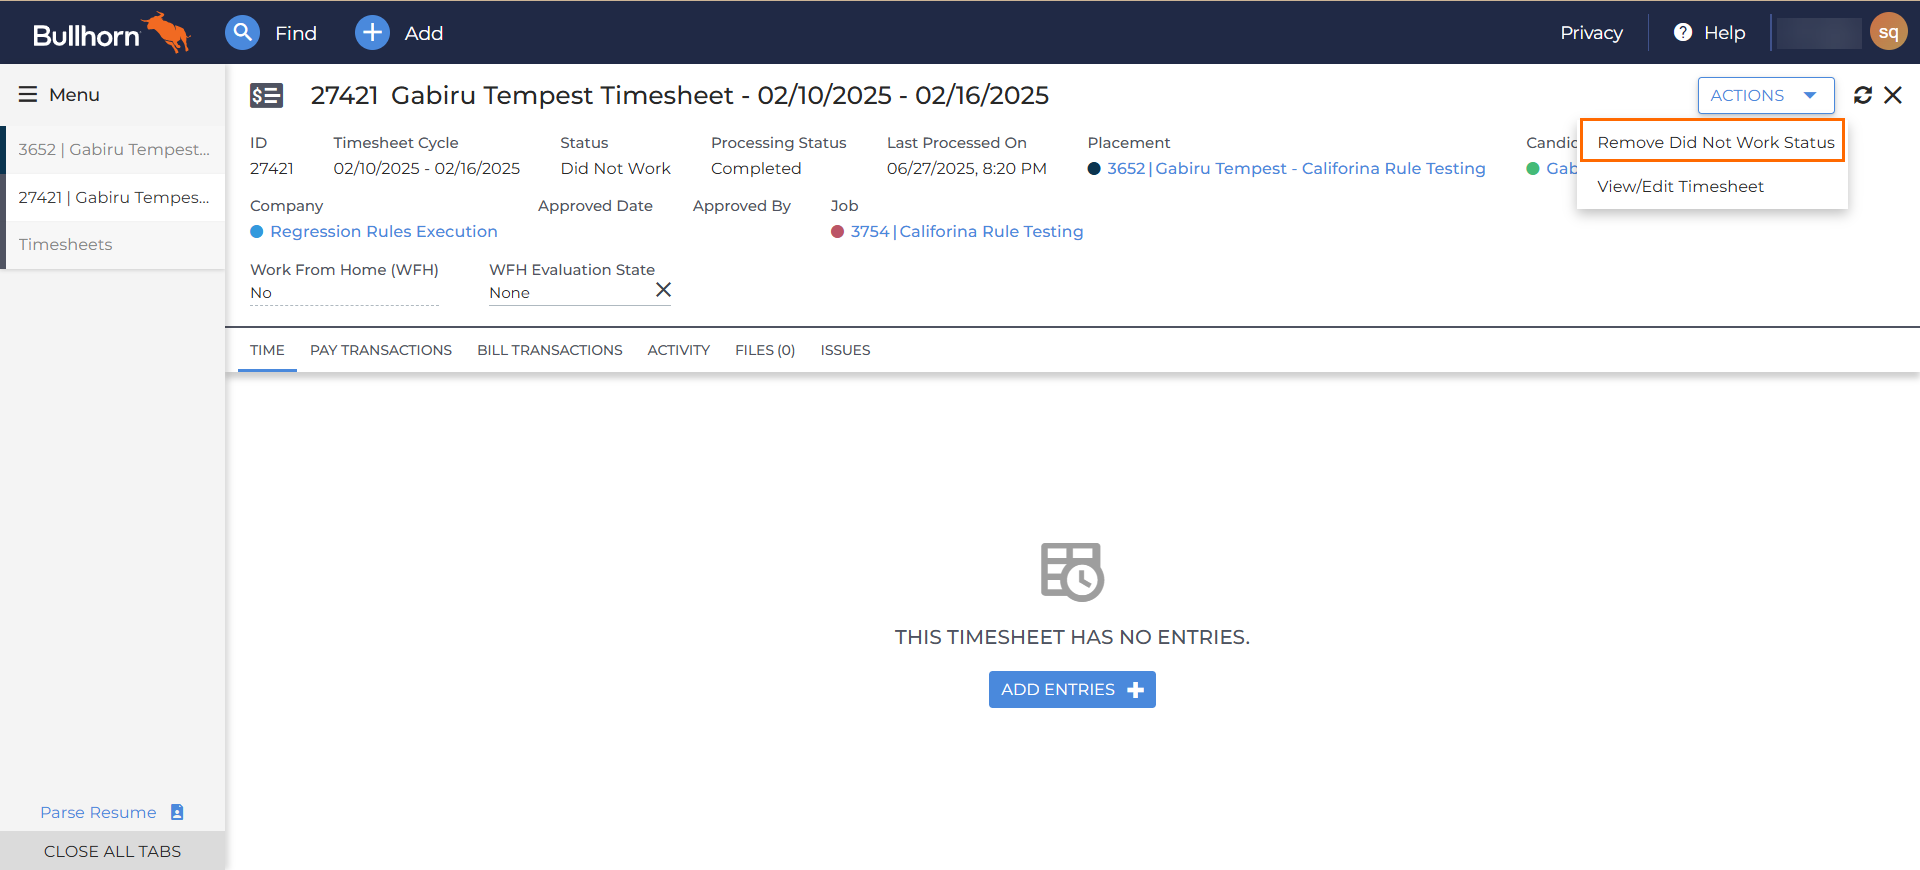
This is the only option that will appear if the timesheet status is set as Did Not Work. This option is not available if the timesheet status is not Did Not Work.
-
A pop up will appear stating, "This action will remove the Did Not Work status on this Timesheet. Do you wish to continue?" Select Continue.
The timesheet will refresh and the Did Not Work status will be removed from the Status field at the top of the timesheet. This action flows back to BTE, ensuring that the timesheet status is the same in BTE and ATS.
For a full list of timesheet statuses see Timesheet Statuses: BTE & ATS. For information on updating the status back to Did Not Work, see Setting a Timesheet as Did Not Work in ATS.
In order to complete the steps above, you need the appropriate usertype entitlements. Contact Support to update your access.