Rules: THEN Types
's Rules engine allows administrators to apply client-specific business logic to positions during the sync process. Rules are structured as If/Then statements and run after company, skill, and flex mappings have been applied. Rules can be assigned either account wide or at the credential level, and each rule is assigned a priority number that determines the order in which rules are applied.
Administrators with elevated permissions can create, edit, and delete rules directly in VMS Sync Admin Tools without contacting VMS Sync Support.
This type of rule can be used on its own or in conjunction with Rules: IF Types. THEN type rules make use of multiple different functions or "Types". This article outlines each of those types with a brief description of what each one is.
There are some THEN type rules that require an IF type rule to function. Those rules are outlined in this article.
Types of THEN Rules
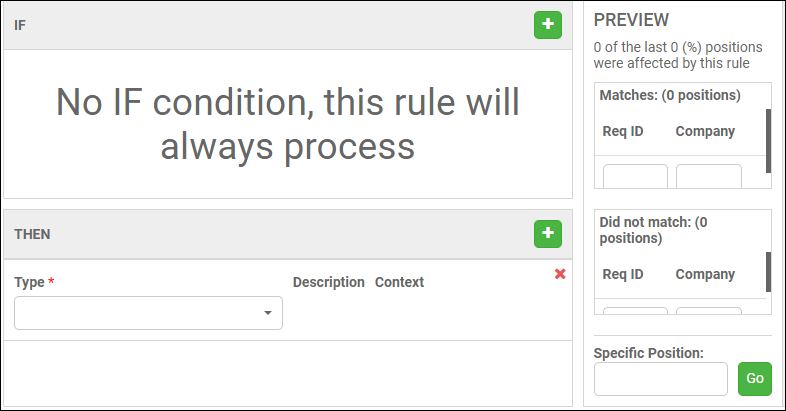
The first thing to note, is that if there is no IF statement in your rule, then your THEN portion will always execute. The IF statement sets additional criteria that needs to be met in order for the THEN statement to be executed.
- Example: IF firstName = ‘Ted’ THEN populate lastName.
- Example: (NO IF) THEN populate lastName
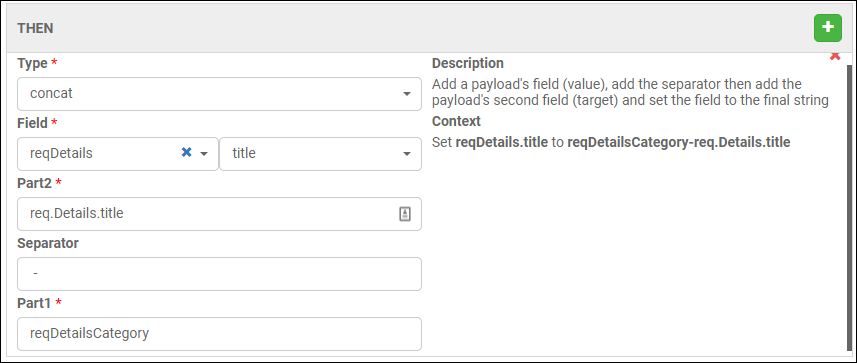
- Concat: Add a payload's field (value), add the separator then add the payload's second field (target) and set the field to the final.
- In the screenshot below, you can see the "Context" is "Set reqDetails.title to reqDetailsCategory-req.Details.title".
- This concatenates both the "reqDetailsCategory" and the "req.Details.title" fields from the req payload into the "reqDetails.title" field in the ATS Submission separated by a "-".
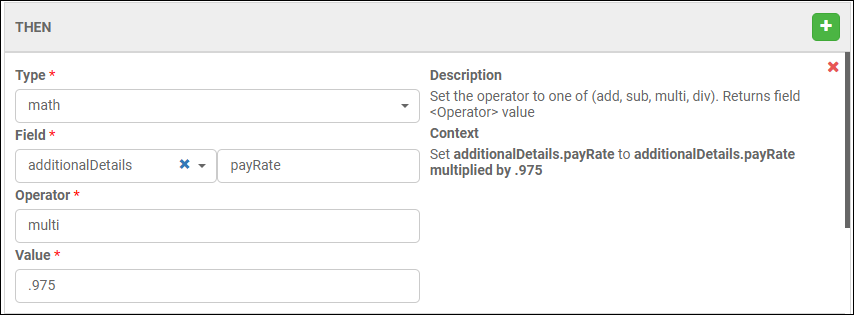
- Math: Set the operator to one of (add, sub, multi, div). Returns field <Operator> value.
- This allows you to execute a mathematical equation based on a field which holds an integer (number value).
- This allows you to execute a mathematical equation based on a field which holds an integer (number value).
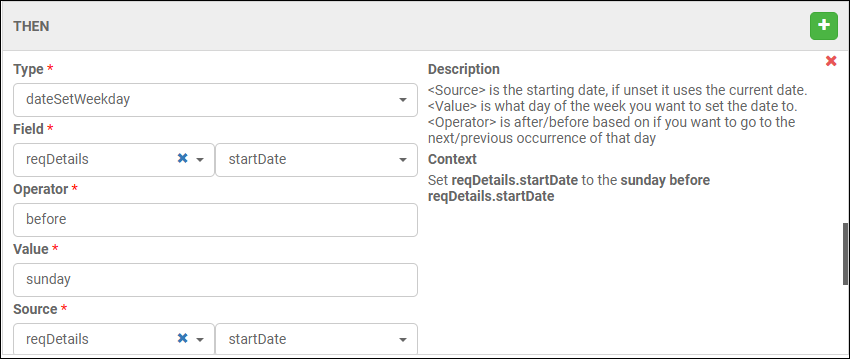
- dateSetWeekday: <Source> is the starting date, if unset it uses the current date. <Value> is what day of the week you want to set the date to. <Operator> is after/before based on if you want to go to the next/previous occurrence of that day.
- This allows you to alter the date based on a date in the Req details.
- This is an infrequent rule "THEN" type, so it will not be used too often.
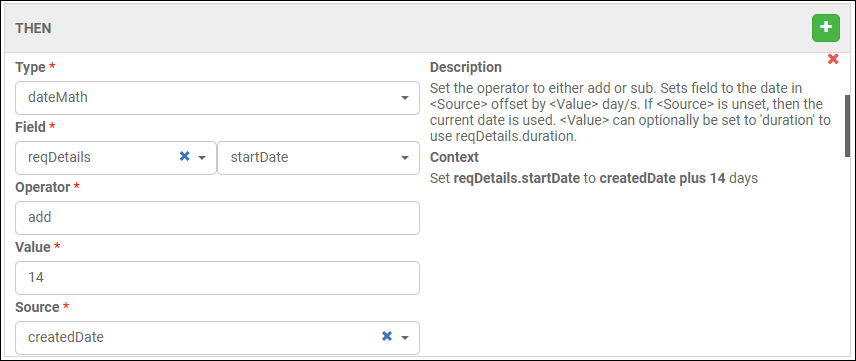
- dateMath: Set the operator to either add or sub. Sets field to the date in <Source> offset by <Value> day/s. If <Source> is unset, then the current date is used. <Value> can optionally be set to "duration" to use reqDetails.duration.
- This type allows you to add a set number of days to a defined date field.
- This type allows you to add a set number of days to a defined date field.
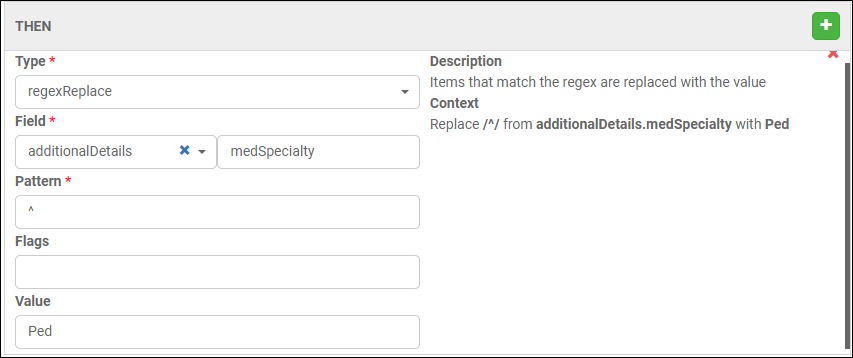
- regexReplace: Items that match the regex are replaced with the specified <Value>.
- This is mainly used to remove special characters from certain fields.
- This is also used to replace any value from a string with another value.
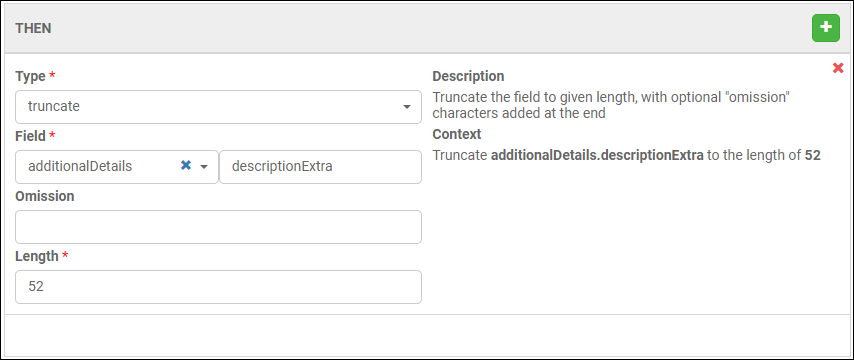
- Truncate: Truncate the field to a given length, with optional "omission" characters added at the end.
- Example: The client wants to insert a value into a field in their ATS that is behind the ATS’ defined field length. You can use "Truncate" to limit that value to abide by the defined field length in the ATS.
- Example: The client wants to insert a value into a field in their ATS that is behind the ATS’ defined field length. You can use "Truncate" to limit that value to abide by the defined field length in the ATS.
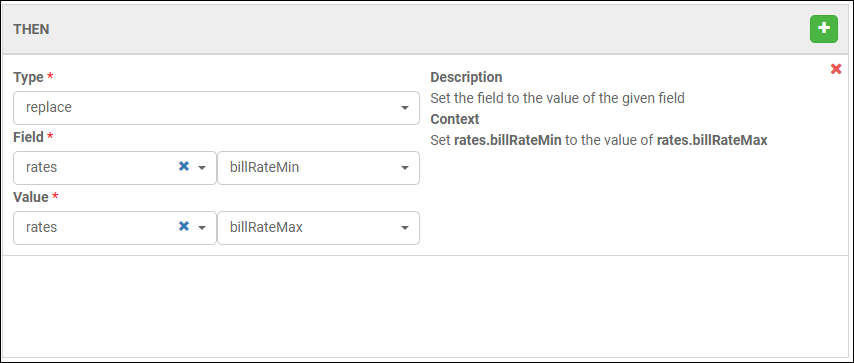
- Replace: Set the field to the value of the given field.
- This allows you to replace a value in a field with a value in another field.
- This allows you to replace a value in a field with a value in another field.
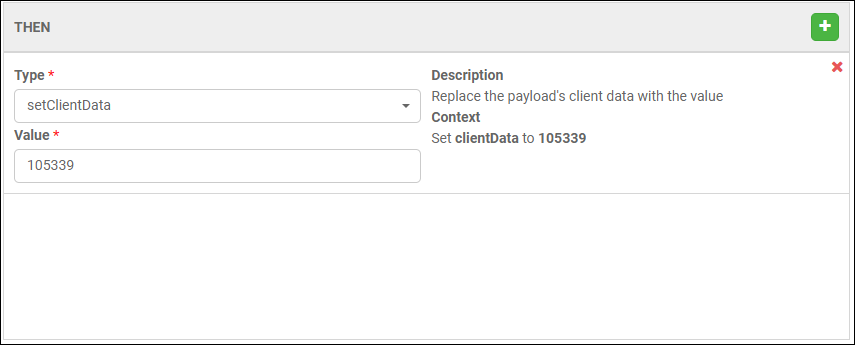
- setClientData: Replace the payload's client data with the value.
- This is used to change the ‘Client Data’ field on the credential.
- This is usually requested when a customer has a VMS setup for a specific client/buyer but then additional clients/buyers start feeding positions through that VMS.
- Changing the "Client Data" based on the "Company" is usually what this is used for to account for multiple clients/buyers coming through one "dedicated" VMS account.
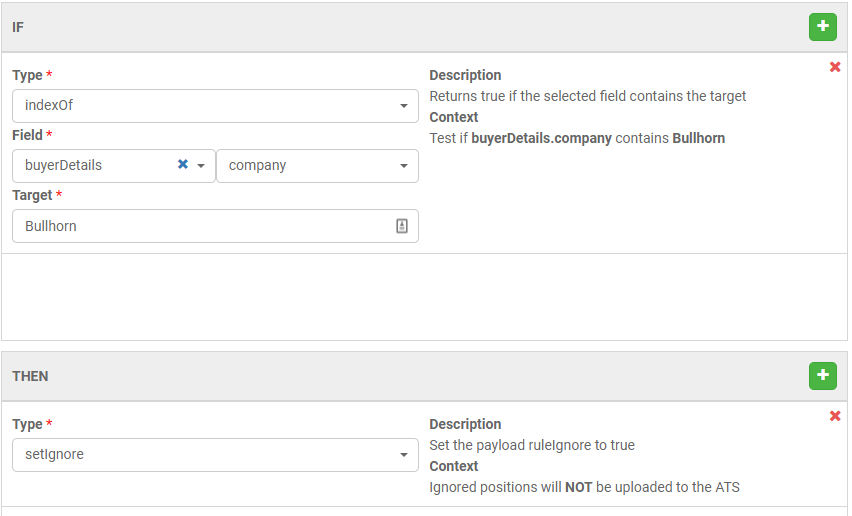
- setIgnore: Set the position ruleIgnore to true.
- This can only be used with an "IF" statement.
- This allows you to ignore positions that meet the criteria defined in your ‘IF’ statement.
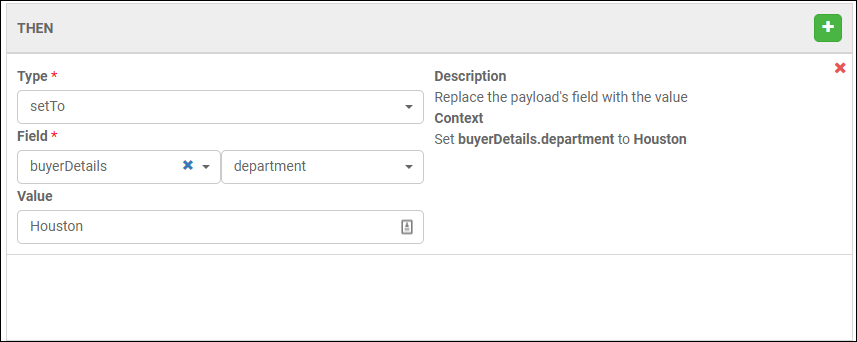
- setTo: Replace the payload's field with the value.
- You can set any field to any static value or value from another field from the position payload.
- You can set any field to any static value or value from another field from the position payload.
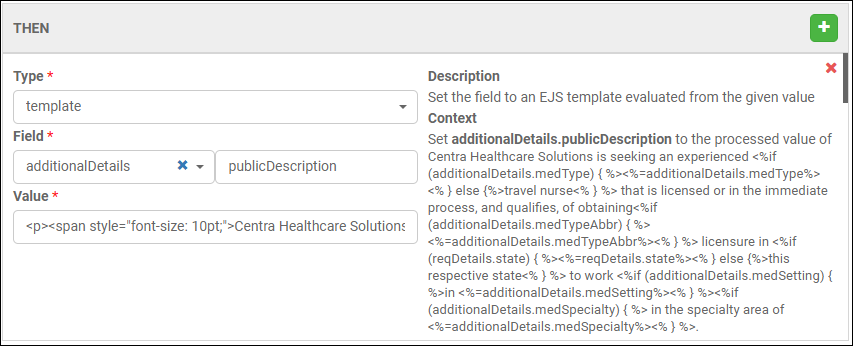
- template: Set the field to an EJS template evaluated from the given value.
- This is one of the more complex rules as EJS stands for "Embedded JavaScript".
- This allows you to build rules using EJS.
- A typical example would be adjusting the description of jobs to pull in additional fields from the payload.
- When creating a new template, it is best to find one that was already created and use that as a guideline to build out your own rule.
These are arguably the most difficult types of rules to build because you are coding it out yourself and one wrong character can break the rule. Referencing a pre-existing template rule will help greatly in building your own.
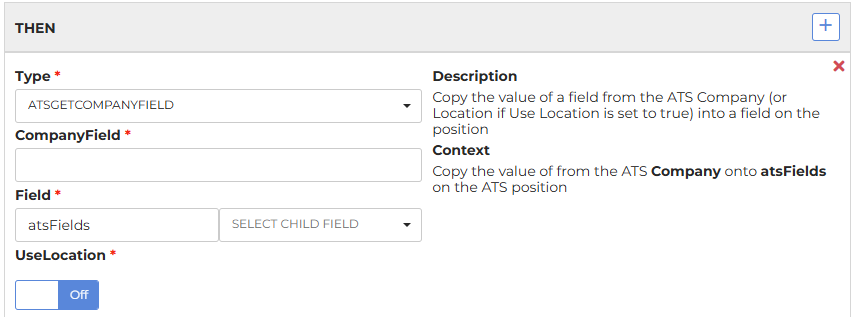
- atsGetCompanyField: Copy the value of a field from the ATS company into a field on the position.
- This is a very straightforward rule type where it allows you to populate data onto new jobs that come through VMS Sync that is populated on the ATS company record associated to that job.
- This is a very straightforward rule type where it allows you to populate data onto new jobs that come through VMS Sync that is populated on the ATS company record associated to that job.
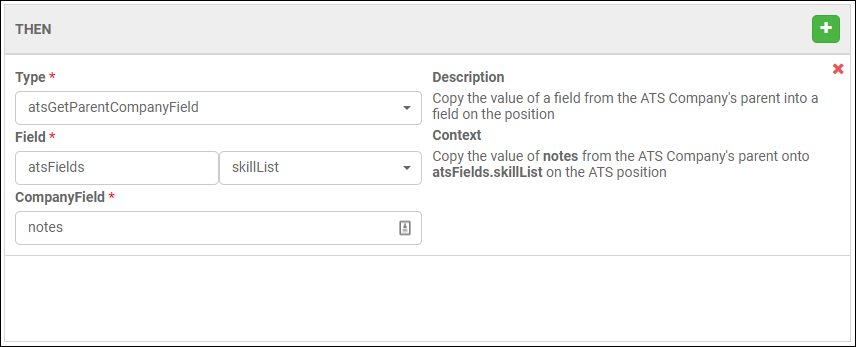
- atsGetParentCompanyField: Copy the value of a field from the ATS company's parent into a field on the position.
- Very similarly to the rule previous to this one, it pulls a field from the ATS company but in this case, if a parent company is set up, it will allow you to pull from the parent record.
- Very similarly to the rule previous to this one, it pulls a field from the ATS company but in this case, if a parent company is set up, it will allow you to pull from the parent record.
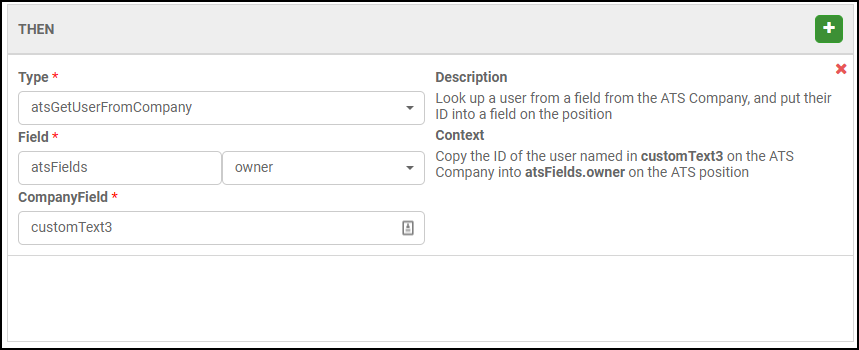
- atsGetUserFromCompany: Look up a user from a field from the ATS company, and put their ID into a field on the position.
- This allows you to pull a user from a field defined on the associated company record.
- Medical clients tend to use this and build additional rules on top depending on other values on Req to pull the appropriate userID into a specified field.
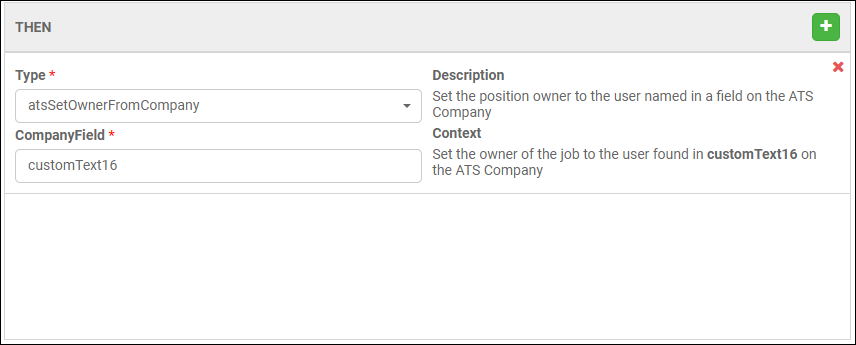
- atsSetOwnerFromCompany: Set the position owner to the user named in a field on the ATS company.
-
This is also something used by medical companies to set the owner of a position based on other information defined on the Req.
-
This is also something used by medical companies to set the owner of a position based on other information defined on the Req.
- atsSetOwnerFromDepartment: Set the position owner to the default owner of the ATS department.
- This rule is ATS dependent as Bullhorn for instance does not have default owners for departments.
- This will be one of the least frequent rule type requests.

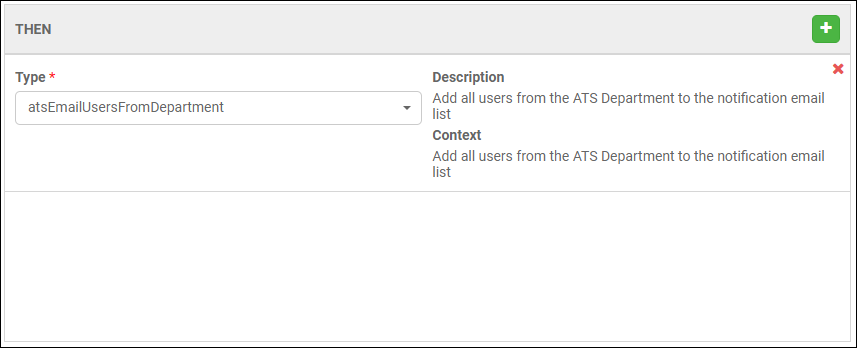
- atsEmailUsersFromDepartment: Add all users from the ATS department to the notification email list.
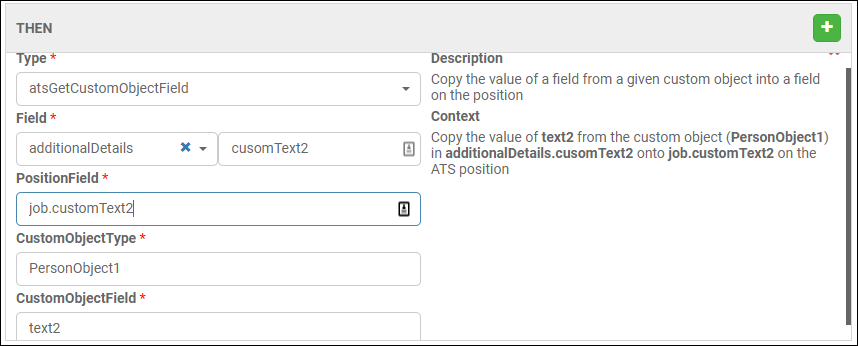
- atsGetCustomObjectField: Copy the value of a field from a given custom object into a field on the position.
-
This allows you to pull data from custom objects into rules.
-
This allows you to pull data from custom objects into rules.
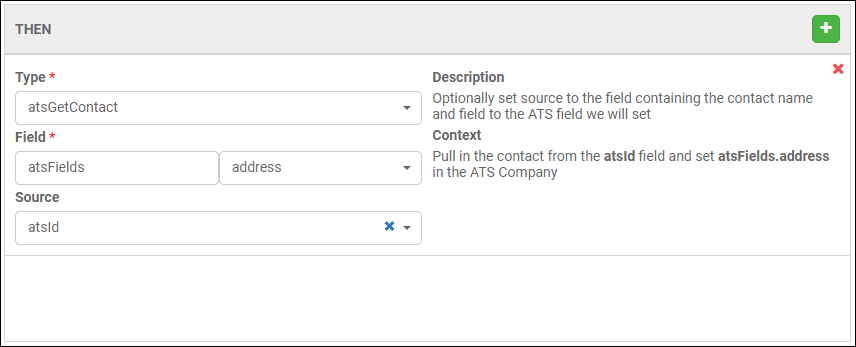
- atsGetContact: Optionally set source to the field containing the contact name and field to the ATS field we will set.
- This allows you to pull information from the contact associated to the position and populate it onto a field within that position.
- This allows you to pull information from the contact associated to the position and populate it onto a field within that position.