Entering Time the "Hours" Method
If you have multiple assignments, select the name of the assignment from the drop-down at the top of the portal.
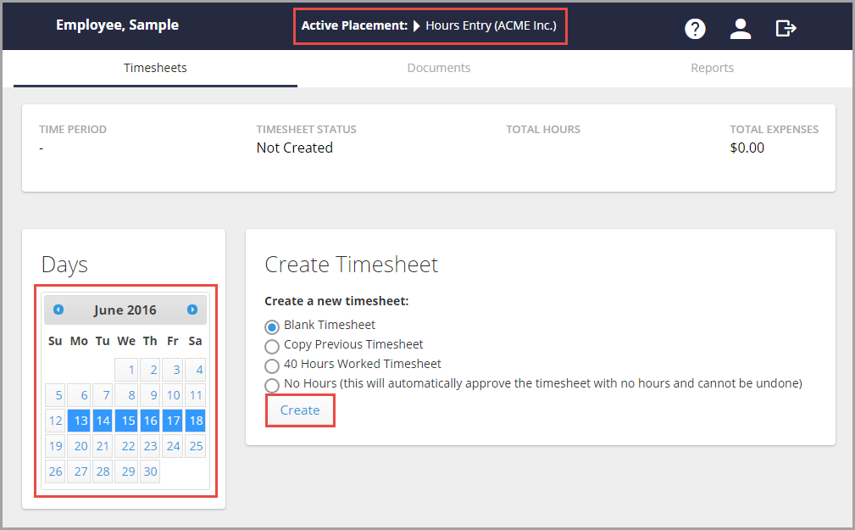
From the calendar on the left, select the week to enter time for.
Select how you want to create the timesheet and select the Create button.
Select the day to enter time for on the left.
In the Hours and Minutes fields that appear to the right, enter your total hours and total minutes for that block of time.
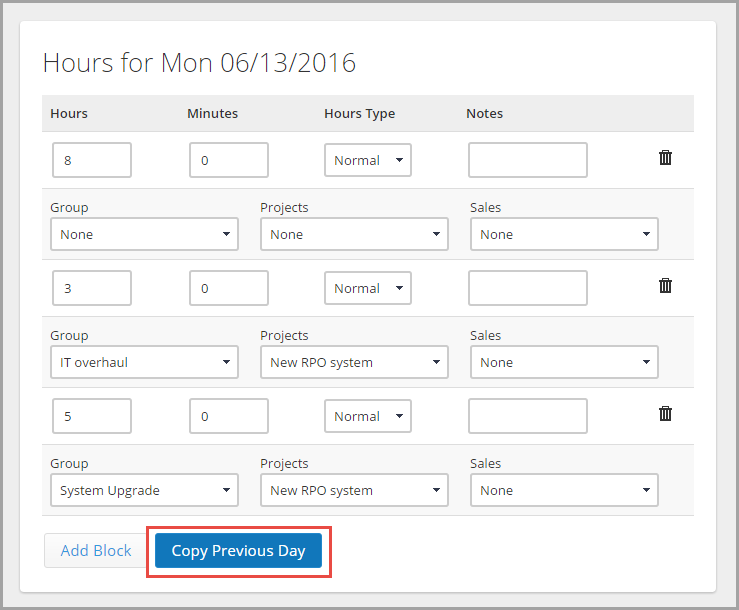
- Add multiple blocks for the day (when accounting for breaks, PTO, etc) - You can add as many blocks of time as you would like.
- To delete a block of time, simply select the trash can, and confirm that you want to delete in the popup.
Example: if you worked from 8am-5pm and took a one hour lunch during the day, you would enter 8 Hours and 1 Lunch Hour.
If necessary, select the Hours Type from the drop-down.
Note: You may only have normal as an option in this dropdown, depending on how your firm requires you to enter time. There will be other options if you are required to account for break time, meal time, or other paid and non paid time off.
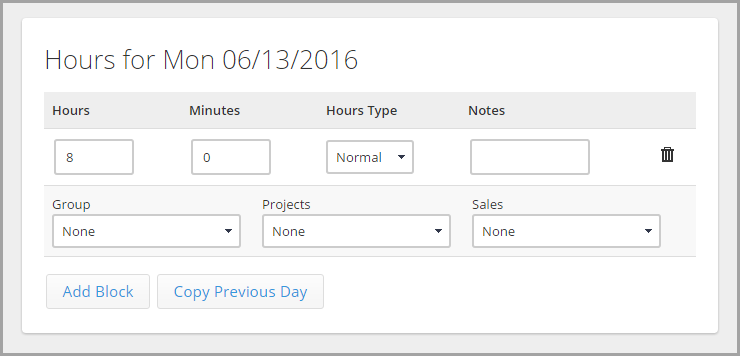
- If necessary, select the Group and Project you are specifically entering time for.
If you work the same schedule each day, select the day worked and select Copy Previous Day and the hours entered previously will be copied onto that day and saved.
Once finished entering hours for the week, select the Submit Timesheet button at the bottom of the page. Accept any Notifications that pop up.
- You can also view your timesheet by selecting the View Timesheet button.