Managing Consent via Dashboard (Salesforce Lightning)
Overview
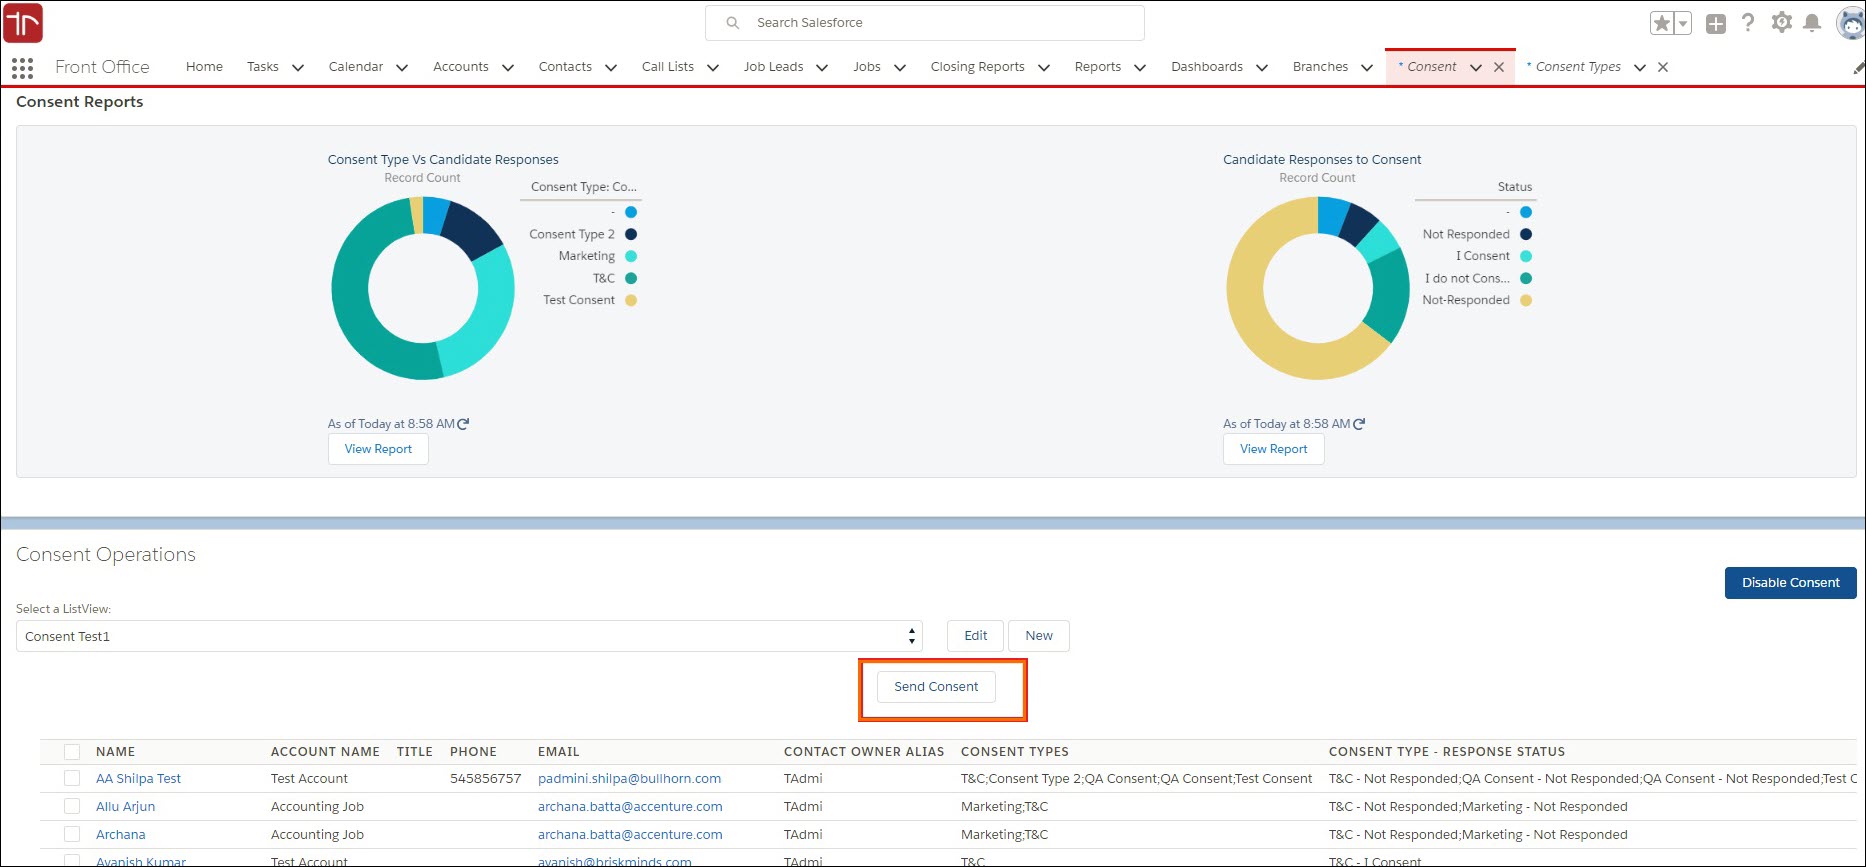
A new button called Send Consent![]() In Bullhorn Recruitment Cloud, Consent is used in the context of GDPR or similar data privacy processes. Candidates or Clients are usually asked to consent to the storage or sharing of their personal data. has been added to the Consent page to allow users to send Consent requests to one or more Candidates
In Bullhorn Recruitment Cloud, Consent is used in the context of GDPR or similar data privacy processes. Candidates or Clients are usually asked to consent to the storage or sharing of their personal data. has been added to the Consent page to allow users to send Consent requests to one or more Candidates![]() A person looking for a job. A candidate can also be referred to as a Job Seeker, Applicant, or Provider. from a .
A person looking for a job. A candidate can also be referred to as a Job Seeker, Applicant, or Provider. from a .
Dashboard View
- Navigate to the Consent tab.
- Click Enable Consent.
- All s will be displayed.
- If there are no active s, a message will be shown to Create Consent s.
Create a new
- On the Contact page click Create New View.
- Enter a Name and desired filters.
Search for Candidates who have been sent a specific
- Click Edit next to a or create a new view
- Add a Filter for the Consent Type field
- Example: includes "ConsentType1"
View Candidate responses status for a specific
- Click Edit next to or create a new view
- Add a Filter for the Response Status field
- Example: Response Status includes "ConsentType1 – I Consent"
Send an Email with a Consent Request
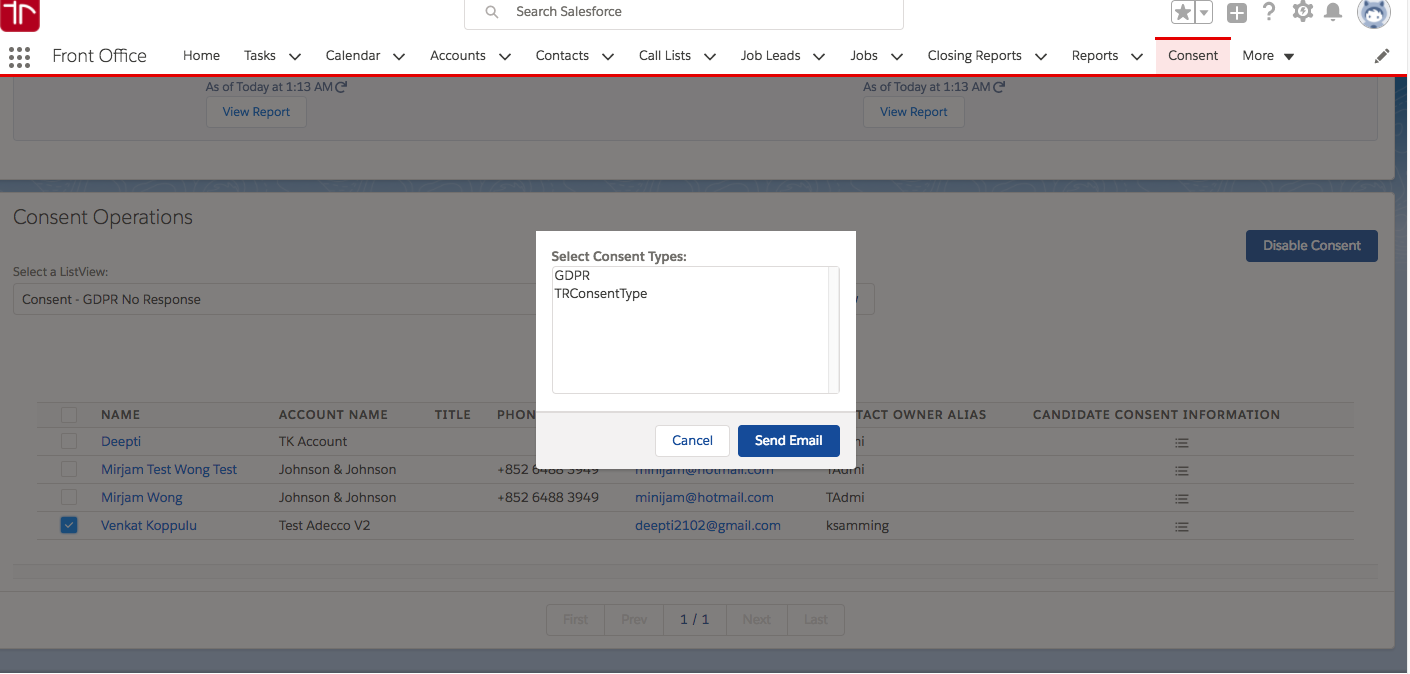
- Select the desired Candidates.
- Click on theSend Consent button, it will show a popup to select the s.
- Select the s and click Send Email.
View Candidate Consent History
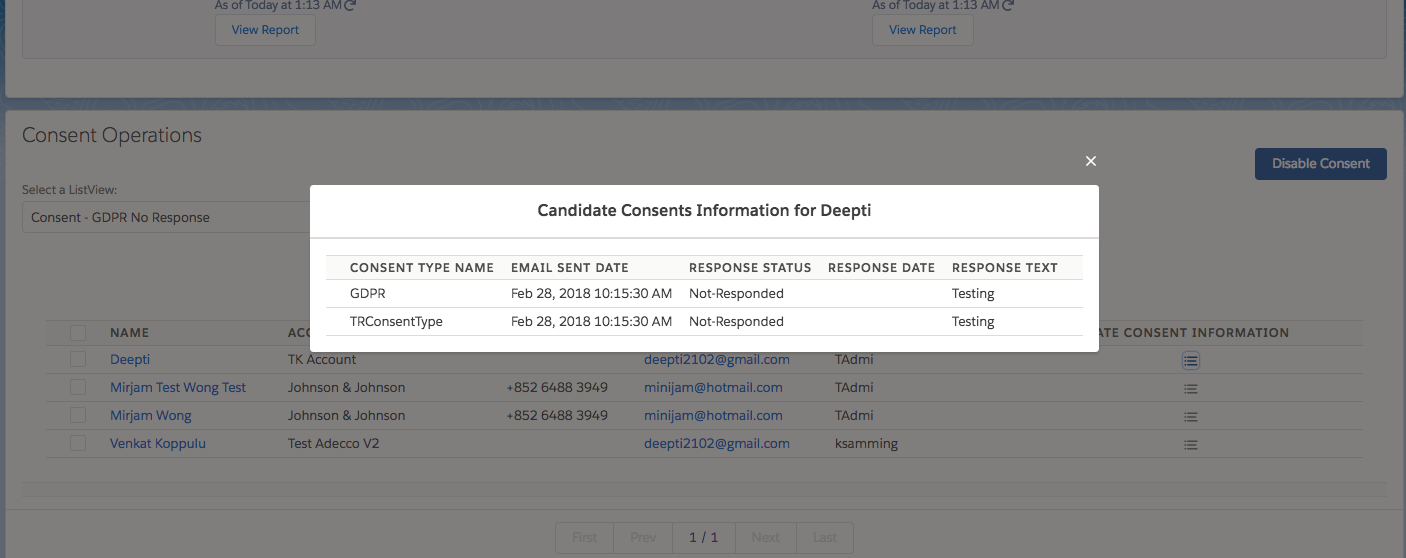
- Click the Consent History button to the right of the Candidate
 A person looking for a job. A candidate can also be referred to as a Job Seeker, Applicant, or Provider. name
 - View history of requested consent and response

Was this helpful?

