Adding Credentials in Talent Platform
When candidates need to provide a list of their credentials, you can create a list of optional credentials along with key info like expiration dates, license numbers, and a file upload.
Credentials are synced from the ATS in the System Configurations step during implementation. Credentials added into Talent Platform can be mapped to credentials in the ATS in Company Settings > Integrations, which will sync data from Talent Platform to the ATS.
Steps
- From the Main Menu, select Configuration> Credentials.
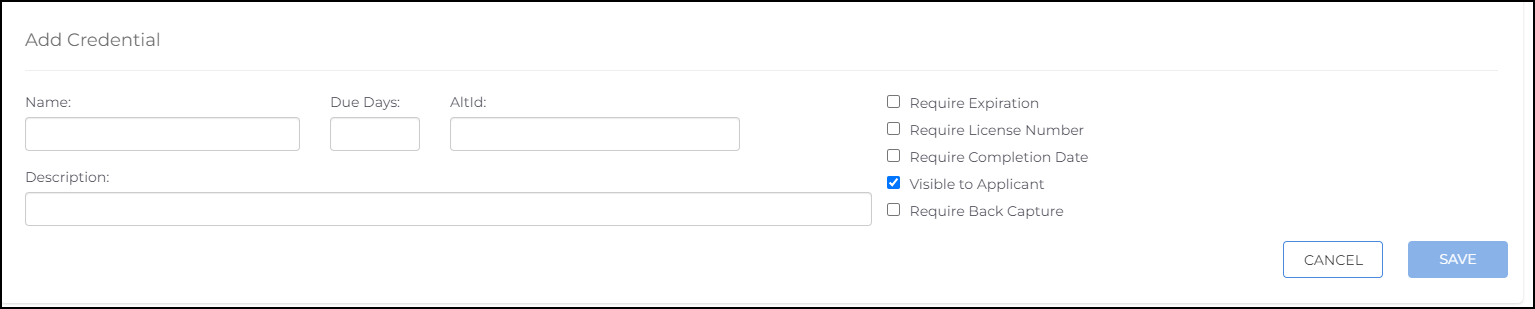
- Select Add Credential
 A record of qualification and/or clinical practices history. Example for Light Inustrial: Fork Lift Certification
Example for Healthcare: Nursing License.
A record of qualification and/or clinical practices history. Example for Light Inustrial: Fork Lift Certification
Example for Healthcare: Nursing License. - Complete the following fields:
- Name: Enter a brief and clear title for the credential.
- Due Days: Enter how many days the candidate has to provide information about the credential.
- Description: Enter any instructions, such as whether you require an uploaded file.
- AltID: Enter the ATS credential ID.
- This is found in the ATS by navigating to Admin > Credentials > ID column.
- Configure the credential as desired:
- Require Expiration: Select to require an expiration date for the credential.
- Require License Number: Select to require a license number for the credential.
- Require Completion Date: Select to require the date the credential was awarded.
- Visible to candidate: Select to show this credential to candidates. When this setting is enabled the candidate can see the credential for self-service. If it is being mapped to a form then it should not be enabled.
- Require Back Capture: Select to require a copy of the back side of the credential.
- When you are satisfied, select Save. The credential now displays in the candidate’s profile for them to manage.
You can let candidates upload their credentials at any time in their profile, or you can require credential info as part of an application.
Mapping Credentials
Once the credential is added it will need to be mapped to its ATS counterparts. These are one to one mappings and the same credential requirement cannot be mapped twice.
Do not map credentials that shouldn't be sent to Candidates as it will trigger the automation. This would include things like OIG and background checks.
- Navigate to Configurations > Settings > Integrations.
- Expand Bullhorn ATS > Expand Entity Mappings.
- Click on the green + button on the top right to add in the requirement mappings.
- When it is clicked it will open at the bottom of the list.
- From the Able Entity drop-down, select the Form Any document that needs to be completed and signed by a Candidate, Skills Checklist A Candidate’s self-assessment of their aptitude of a specific area of expertise. To complete a Checklist, an Applicant must answer all Skills prompts with a score (and sub-score, if required) and provide a digital signature, which certifies that the information provided is accurate. or Credential.
- From the Bullhorn ATS Entity drop-down, select the corresponding requirement.
- Remember, these mappings need to be one to one mappings. You cannot have the same requirement mapped twice.
- Click the blue checkmark to save the mapping.

Was this helpful?