Upload Expense Receipts
When creating a Web Time Entry Expense Report the first step you should take is uploading expense receipts/images for your report. When you later create the report, you enter expenses in the application and link the receipt image to the expense line item for approvals and audits.
The following functionality is for Expenses V1. There is now a new Expenses UI Version (V2) available. If your UI does not match the instructions below, see our Expenses V2 documentation.
Preparing an Image for Upload
All receipt files must adhere to the following guidelines:
- Acceptable file types: .jpg, .png, .gif, .tif, .pdf
- Maximum Image size: 4MB
Use one of the following methods to create a file or image:
- Take a photo from your smart phone and upload or email it to your computer.
- Scan documents and save as images on your computer.
- Convert an existing image from your screen. Right click and choose Edit or Open With to convert the image to one of the acceptable image formats.
- Capture a picture of your screen using {Fn+PrScr} or {Alt+PrtScrn}, paste to Paint, then save as one of the acceptable image formats.
- If you are using Paint, make sure the image is on one page, not a multi-page document.
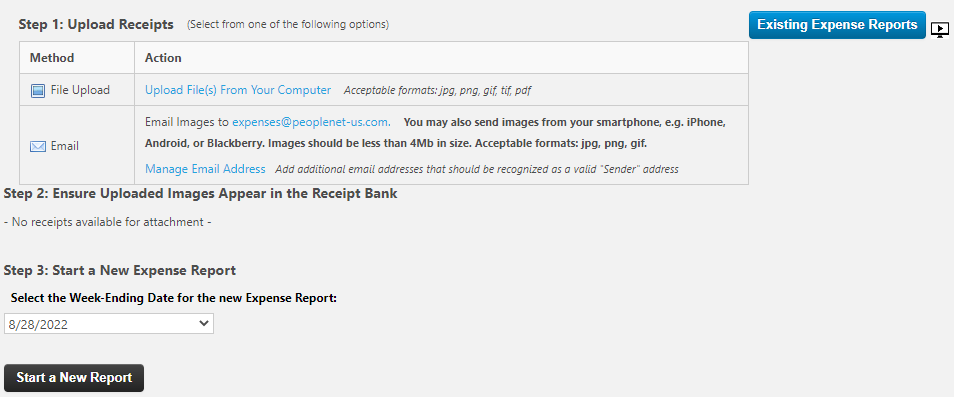
Select an Upload Option
- File Upload: Allows you to browse your local hard drive to upload scanned images.
- Email: Sends images to expenses@peoplenet-us.com.
Upload Receipt Files From Your Computer
- Click Upload File(s) From Your Computer.
- Click the Add files... button to find receipt images on your local hard drive.
- Double click on the file to add it to the Upload images window.
- Click Start upload to upload the receipts to the Expense Receipt Bank. Wait until all files are uploaded before closing the upload window.
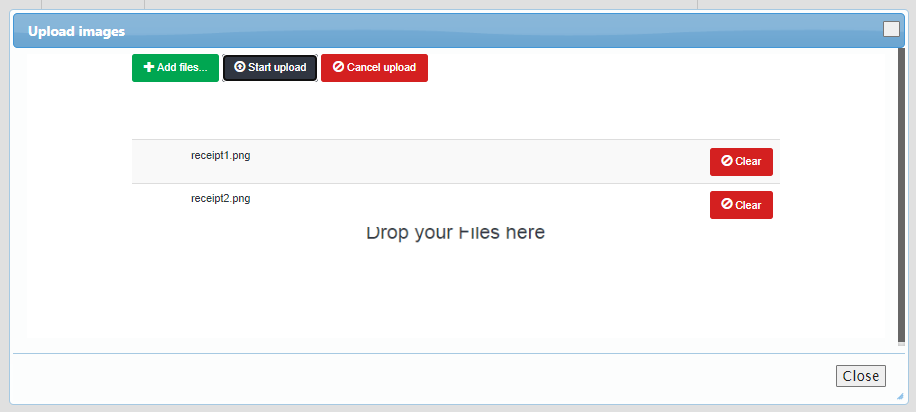
- Check the Receipt Bank on the main Expenses screen to confirm receipt images have been uploaded to .
Email Receipt Images
Email images or scanned receipts to: expenses@Peoplenet-us.com
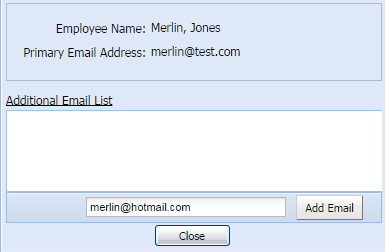
- The system determines which Receipt Bank to upload images to based on the email address you have on file (the email address you registered with for Web Time Entry).
- If you plan to email receipts from a different email address click the Manage Email Address to add additional email addresses.
After uploading your receipts, continue to Expense Entry to enter your expenses into your report
Review Receipt Bank
Once images are uploaded, they will appear in the Receipt Bank. The images are automatically available for New or Existing Expense Reports.
- Click the orange Refresh button to refresh the screen if your receipt is not showing.
- Click the blue Search button to manage previously loaded images.
You do not need to select the images here, simply verify that the images you uploaded are showing in this window.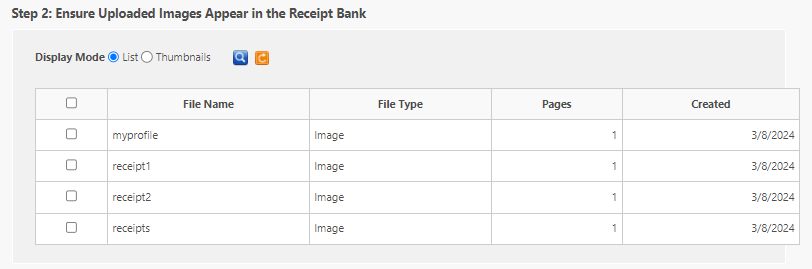
After submitting an expense report with an image from your Receipt Bank, you can delete the image from the bank to stay organized.