Expense Entry
Your agency may require you to submit on the job expenses through a Web Time Entry Expense Report. Follow the steps below to learn how to submit your own Expense Report.
If you have questions about your client or agency expense policies, contact your local office representative prior to submitting your expense report for approval.
The following functionality is for Expenses V1. There is now a new Expenses UI Version (V2) available. If your UI does not match the instructions below, see our Expenses V2 documentation.
Before You Begin
- Receipt Images must adhere to the following guidelines to upload or email to the receipt bank:
- Acceptable formats: .png, .jpg, .gif, .tif, .pdf
- Maximum size: 4 MB
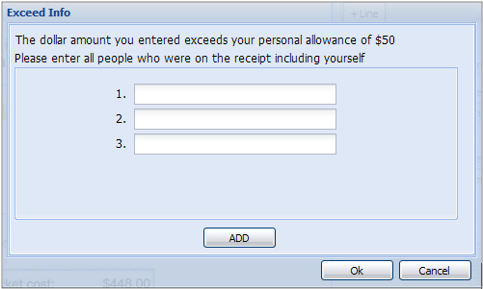
- In some cases, spending thresholds/limitations are set by your agency and may require you to enter additional information with the expense entry. If the allowance is exceeded, a separate pop-up window will appear to include additional information.
- The number of line items displayed in the pop-up is based on the amount of the expense and the spending limit.
Entering Expenses
- Click Expenses in the top menu.
- Upload the receipts you'll need for your report. See Upload Expense Receipts for detailed steps on uploading receipts.
- Under Step 3: Start a New Expense Report select the correct week ending date for your expense.
- Click Start a New Report.

- The following is a display of the expense application window that appears after starting a new expense report. The window is split into two panels:

- Left Panel (Expense Image): Shows 1 of x receipts uploaded.
- Right Panel (Expense Entry): Interface used to enter expense items to be linked to the receipt image displayed in the left panel.
- Enter the following expense details in the top right of your screen under Reimbursements. Do not use any special characters like @, $, &, #, etc.
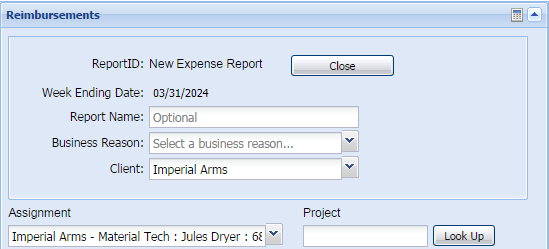
- Report Name: Enter a unique name for your report (optional).
- Business Reason: Add a business reason for the expense if applicable (optional).
- Client: Select a client from the drop down.
- Assignment: Select the appropriate assignment from the drop down menu.
- Project: Enter the project name or select a previously entered project name by clicking Look Up (optional).
- Ensure the correct receipt image that should be linked to the expense line item is displayed in the left panel. If not, use the navigation arrows at the top of the left panel to move to the correct receipt.
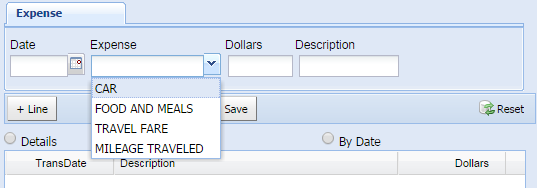
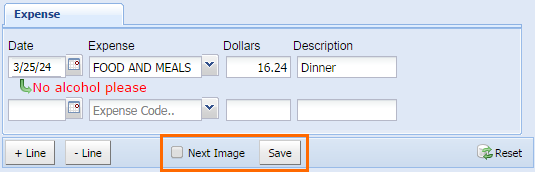
- Fill out the following information under Expense:
- Date: Date of the expense.
- Expense: Pick the applicable expense code from the drop down. The drop down options are specific to your agency.
- When selecting an expense code that involves calculations (e.g. mileage), the expense application automatically calculates the dollar amount after the data is entered.
- Dollars: Enter the amount of the expense.
- Description: Describe the expense.
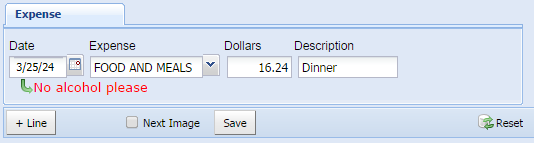
Additional messages or instructions may appear if special requests, restrictions, or limitations have been set by the client. Follow the instructions displayed when entering an expense.
- Click + Line to add a new expense line item. Add lines to represent what is displayed on the left image panel. For example, if you have multiple images displayed on the left, then enter an expense line for each image.
- Select - Line to remove an expense line item.
- Select Reset to clear the data entered.

- When you have finished entering expense items from the receipt image, select the check box Next Image. The next receipt image in the Receipt Bank will be displayed after the expense line item is saved
- Select Save to add the expense item(s) to the report.
- Click Attach the image to the expense report.
- A new window will pop up. Confirm whether you have finished entering details from the receipt image.
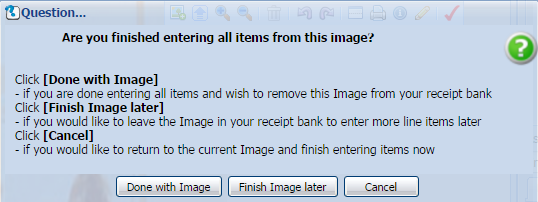
- After responding to the confirmation prompt, the data you entered will
be added with other expense entries that appear in the transaction window. The expense total is displayed at the bottom of the transaction window. This amount is automatically updated when an expense is added or deleted.
- To edit an expense that is listed in the transaction window right click on the line item and select one of the following options:
- Detail: View expense details.
- Edit: Modify expense entry.
- Delete: Remove expense entry.
- After all expense items have been entered into the expense report, select Submit for Approval to submit your expense report.
- Select Close to close the expense window and submit the expense report at a later time.
Once the expense report has been submitted, you are no longer able to make changes.