Virtual Time Clock (VTC) Setup
Overview
Follow these instructions to set up a Virtual Time Clock (VTC) for a group.
Any group can be set up to use a VTC for entering time. You must obtain this request in writing before enabling it for a group.
Steps
- Go to the group.
- Select Edit.

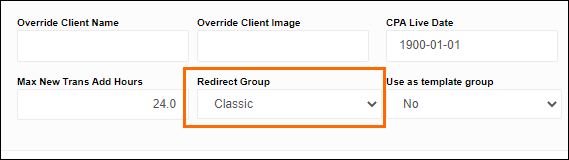
- Under the Group Info section, set the Redirect Group drop down to Classic.
- Navigate to the Web Time Entry section of the edit screen and update the following fields:
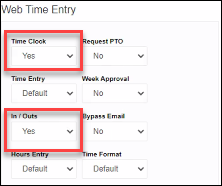
- Time Clock: Yes
- In/Outs: Yes
- Locate the Terminal ID for the VTC by selecting Maintenance > Admin > Clocks from the top menu.
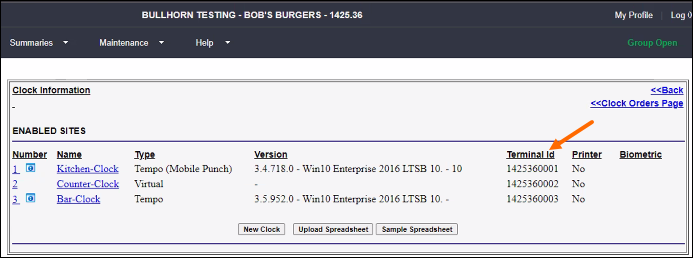
- Add the Terminal ID to the following URL replacing the "XXXXXXXXXX" with the ID number.
- SL1: www.mypeoplenet.com/logon.cfm?termid=XXXXXXXXXX
SL2: sl2-www.bte.bullhornstaffing.com/logon.cfm?termid=XXXXXXXXXX
- Test to verify the client is able to access the VTC.
- Open the new URL and use an employee's PIN to make a test punch.
Restricting Access
A client may ask to only allow VTC access on a specific IP address. If the client would like this enabled have them submit the IP address via email.
- Open the clock settings by selecting Maintenance > Admin > Clocks from the top menu and clicking on the clock name to open.
- Under Restrict IP at Virtual Site select Manage IP(s) for Site.
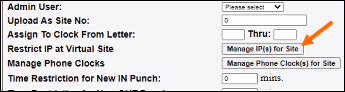
- Enter the IP address and select Add IP(s).
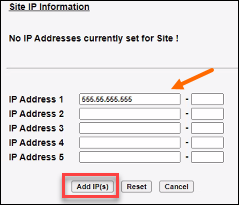
- Click Update Clock to save the changes.
For instructions on punching see VTC Punch Instructions.
Was this helpful?