| Package: JS jobboard (Communities) |
Communities User Guide for Contractors: Timesheet & Expenses
![]()
Community Site and User Login
You should receive a notification with directions on how to create your username and password for login.
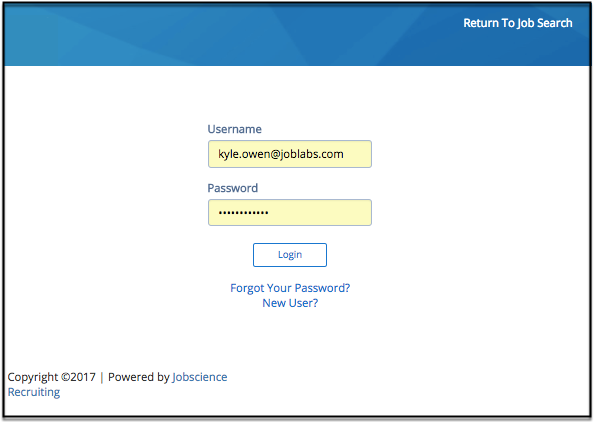
Enter the username and password that you created from the email notification. Click Forgot Your Password to reset your password at any time. You will receive email instructions on how to perform the reset.
Timesheets
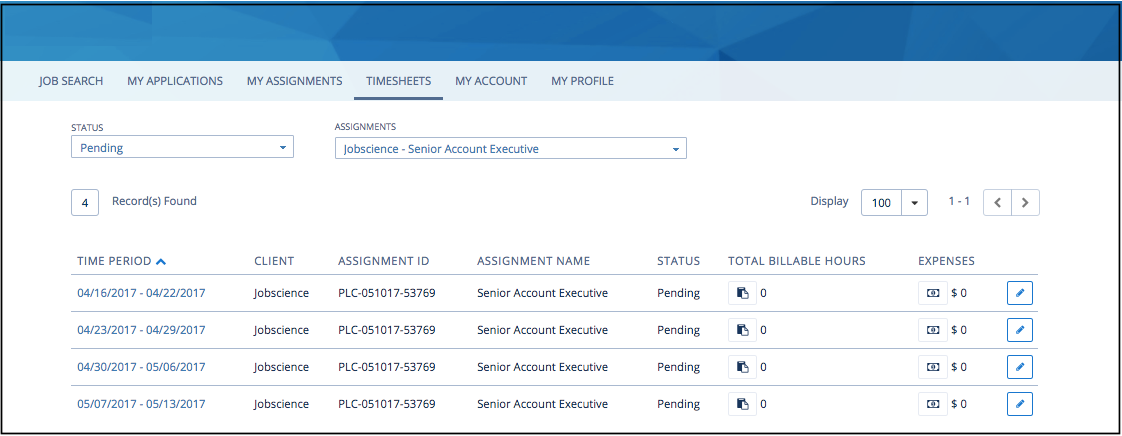
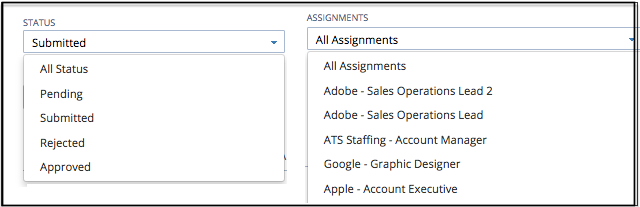
The default view on the Timesheets tab will be the list view. You can filter the list by selecting a Status or you can also filter by Assignment if you have multiple assignments for which you are submitting hours. Clicking the column header will also perform a list sort. Note that Pending status will display your timesheet for the current week or previous weeks' timesheets that have not yet been completed and submitted for approval.
-
Use the Display pull down to select the number of timesheets to display. You can also use the page scroll as needed.
-
Select the pencil icon to get to the timesheet detail page.
-
Submitted Status: Displays all timesheets submitted for approval.
-
Pending: Displays all timesheets that have yet to be submitted by the employee(s).
-
Rejected: Displays timesheets that have been rejected and require re-submission.
-
Approved: All timesheets that have been approved.
Detail Page
From the timecard list page, select the pencil icon to get to the timesheet detail page for the desired week. This is the page where weekly hours will be submitted along with any expenses that have incurred.
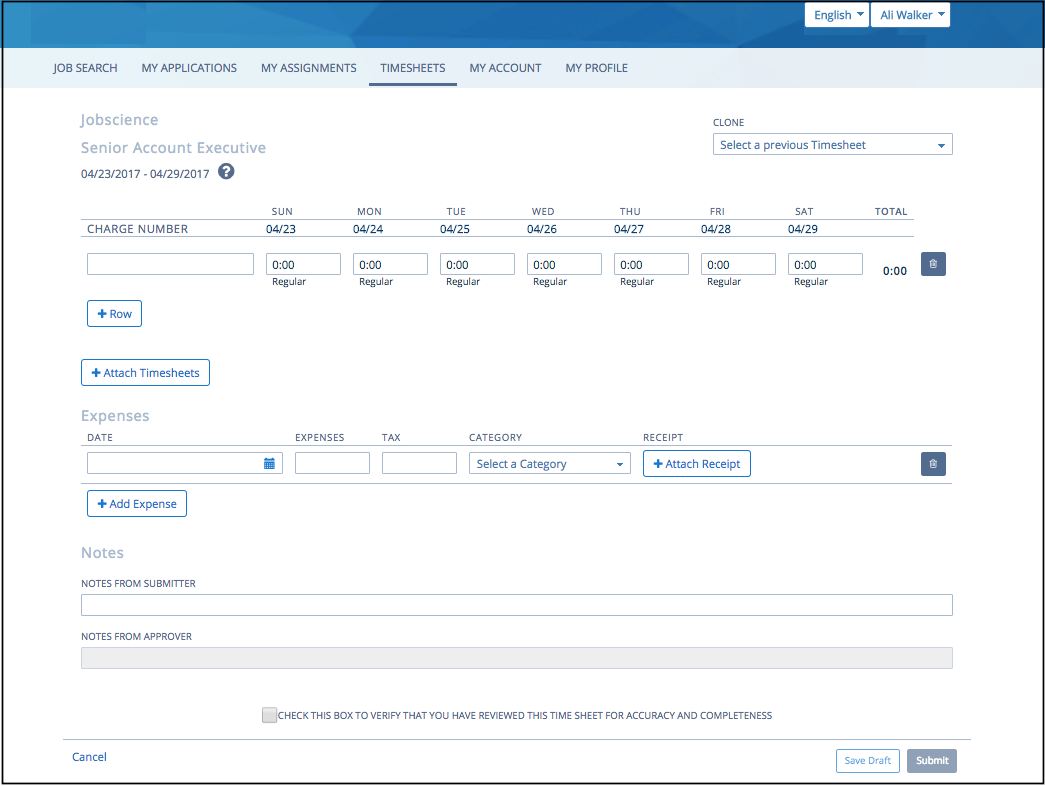
Hours Entry
There are two methods for entering hours. Hours Only entry and Start Time and End Time entry. The method applied to your timesheet will be determined by your agency or approval manager.
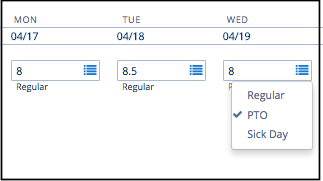
Hours Only Timesheet
Click or select the hours field for a particular day of the week.
-
In the hours field you can enter hours or partial hours. For example, you can enter 8 or 8.50 if you worked an additional one half hour.
-
By default, your hours will be submitted as regular hours. Click the blue square icon to view and select other hour type options to which you can allocate your time.
| Note: Available hour types are determined by your agency or administrator. Complete hours entry for each day worked. |
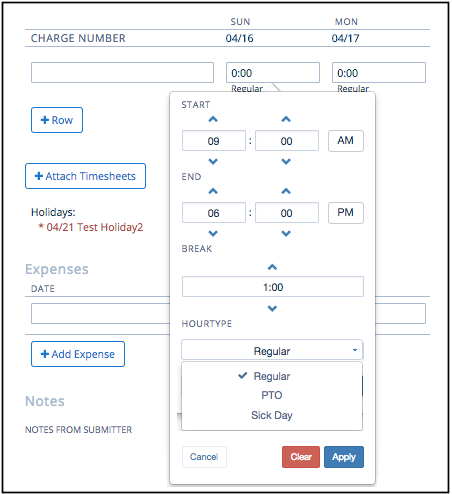
Start and End Time Entry
Click or select the hours field for a particular day of the week.
-
The start and end time entry screen will display. Use the up arrow to scroll to later time and the down arrow to scroll to an earlier time. You can enter hours and minutes for both your start and end time.
-
In the Break section, enter the total time taken for breaks. If you've taken two fifteen minute breaks and an hour lunch, the total should show 1:30. Time increments are 15 minute units. Use the up arrow to increase the time and down arrow to decrease.
-
By default, your hours will be submitted as regular hours. Click the blue square icon to view and select other hour type options to which you can allocate your time.
| Note: Available hour types are determined by your agency or administrator. Complete hours entry for each day worked. |
Cloning Previous Timesheet Hours
The Clone dropdown displays a list of all approved timesheets. Select any of the displayed timesheet periods. The hours you submitted for the period will populate the current timesheet you are completing. You can use the clone option to save time manually entering hours. However, since you are copying previously submitted hours, you must review and confirm the hours are accurate for the current week.

| Note: The Clone function is available only for Weekly Timesheets. It is not available for Monthly, Semi-Monthly, or Bi-Weekly timesheets. |
Attaching a Timesheet Document
If required, you can attach a timesheet document to support the hours that you are submitting. Click the +Attach Timesheet button to upload your document. You may upload any common Word document, PDF, Spreadsheet, or Picture files.
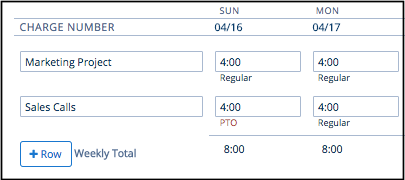
Charge Codes
If enabled (configured on) for your site, you will see the Charge Code field on your timesheet. You will receive instruction from your agency or from your approval manager if specific data is required for you to enter in this field. Otherwise you can enter the task or project for which you are submitting hours or you can leave the field blank.

Adding Additional Rows to the TimesheetSubmitting or Saving a Timesheet
Click the +Row button to add an additional row for hours entry. This will be required if you need to charge time to one or more hour types in a single day. For example, if you worked four regular hours and then took the other four hours as PTO time all in a single day. Adding an additional row may also be required if you want or need to track hours against two different charge codes for example.
Submitting or Saving a Timesheet
When hours and expenses have been entered, scroll to the bottom of the page to submit or save the timesheet.
-
As needed, you can enter a message for your approver in the Notes from Submitter box. Your approving manager will see the message when approving your timesheet.
-
Select the checkbox to acknowledge that you have reviewed the accuracy of your submission.
-
If not yet complete with your timesheet, you can select Save Draft and complete later. Otherwise, select Submit to send for approval. A message will display confirming your submittal.
-
After submitting successfully, your timesheet will move to Submitted status

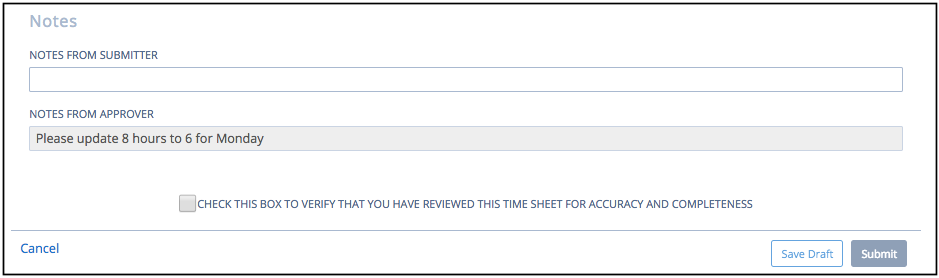
Rejected Timesheets
A timesheet may be rejected if any of the submitted hours or expense is determined to be incorrect. If your timesheet is rejected, you will be notified and the timesheet will be in Rejected status. Open the rejected timesheet by clicking on the pencil icon.

-
In the Notes section, you should see a message in the Notes From Approver box. Review the message for correction instructions. if you are still unclear on what corrections are required. Contact your agency representative or your Approval Manager directly.
-
Perform the required hours or expense corrections and re-submit your timesheet for approval. Your timesheet will again to Submitted status until an approval action is performed.
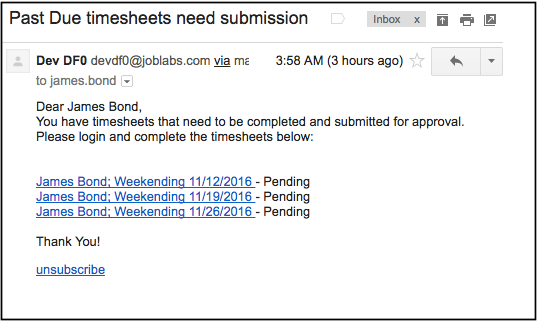
Timesheet Reminder Notifications
If there are outstanding timesheets that you have not yet submitted for approval, you will receive a system generated email that will list the employee names and weekending date of the timesheets that require your approval. Clicking the hyperlink will redirect you to the login page. After login you will be able to access the timesheet detail or list pages to complete the timesheets and submit for approval.
| Note: You will receive an email reminder for timesheets that are due for the week if you have not yet submitted for approval. |
Sample Notification
Submitting Timesheets from a Mobile Device
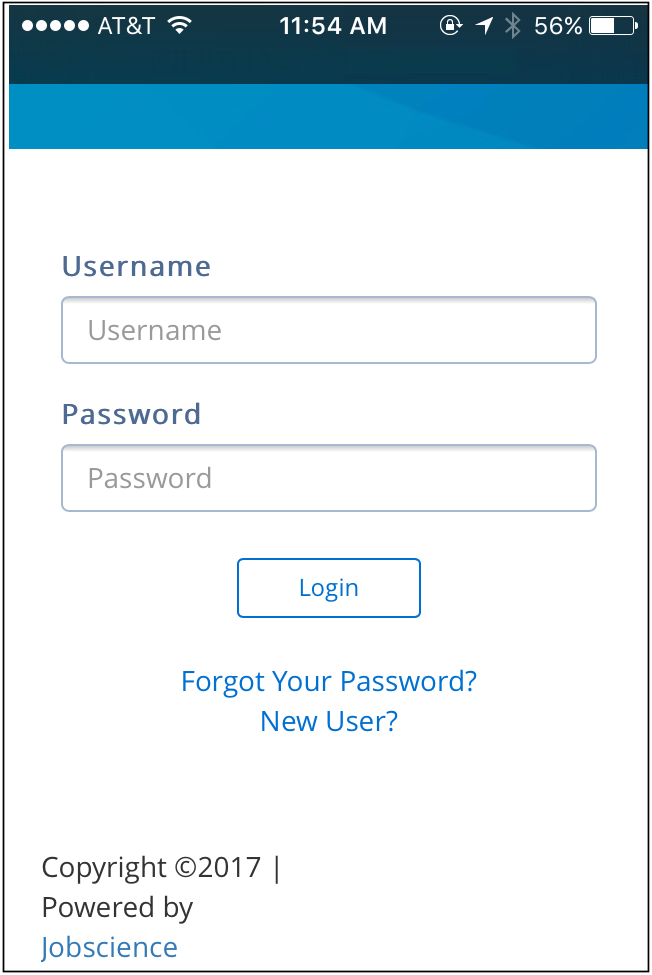
You may access the community site, from your mobile device, to submit or view your timesheets. Open your mobile browser and navigate to the login URL.
From your device, enter the same username and password used to log into the community site from your desktop or laptop. Once logged in, you will have access to the same pages and features that are available from your computer browser. The community pages will adjust according to the size of your mobile device.
-
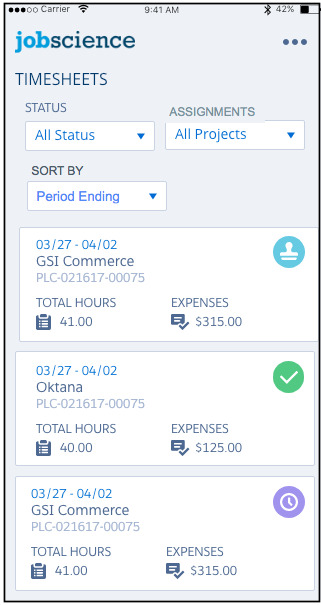
Access to Timesheet list pages
-
Perform mass or individual timesheet approvals
-
View submitted expenses
Note: Receipts attached as picture files (e.g. jpeg, png, etc.) are viewable from a mobile device. Document and PDF attachments will not be viewable from the mobile site. -
View Timesheet details and expenses
-
Reject Timesheets
Mobile Login
Mobile List View and Filters
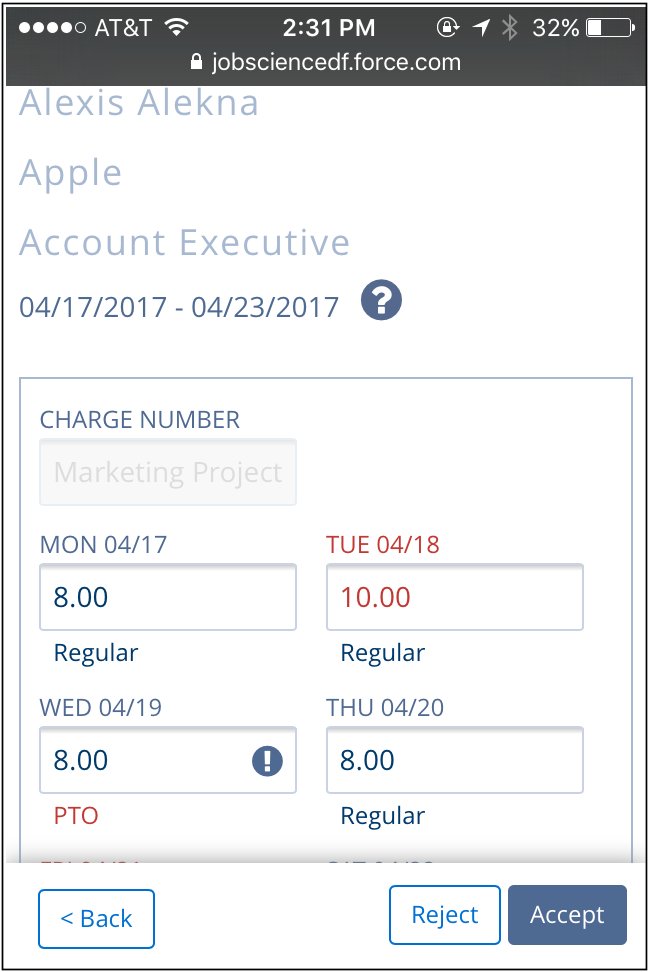
Mobile Timesheet Detail
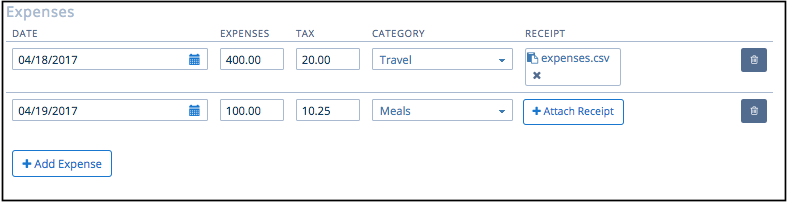
Entering Expenses
If enabled for your assignment, you are able to enter expenses for reimbursement. In the expense section below the hours entry section:
-
Enter the date of your expense
-
Enter the amount and tax of your expense item
-
Select one of the available categories in the drop down. *Note, items qualified for expense reimbursement will be determined by your agency.
-
Select the +Add Receipt icon to upload a copy of your expense receipt as required by your agency or manager.
-
If you have multiple expense items, select the +Add Expense button to add additional rows for entry.