Understanding the Onboarding Integration
Bullhorn's integrated ATS/Onboarding solution simplifies and streamlines the distribution of documents to candidates, both pre and post-placement. Instead of managing information in two completely separate applications, you now have the ability as a recruiter to initiate and monitor the onboarding process from within the Bullhorn ATS. Once enabled, you’ll have visibility from the following areas:
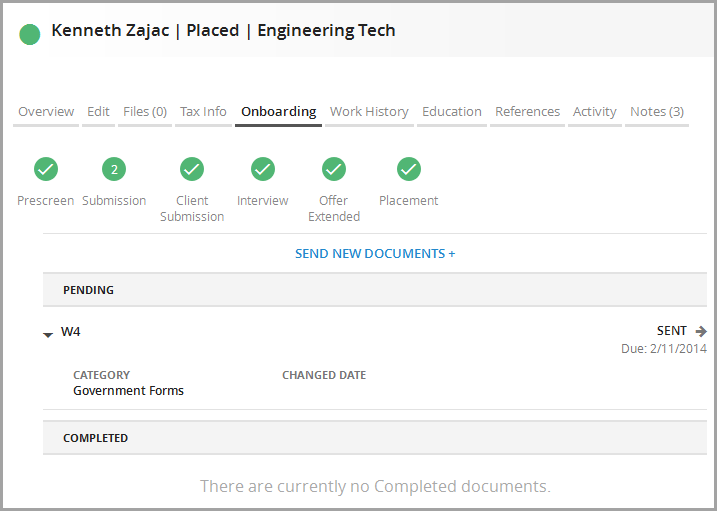
- The Onboarding tab on the candidate record.
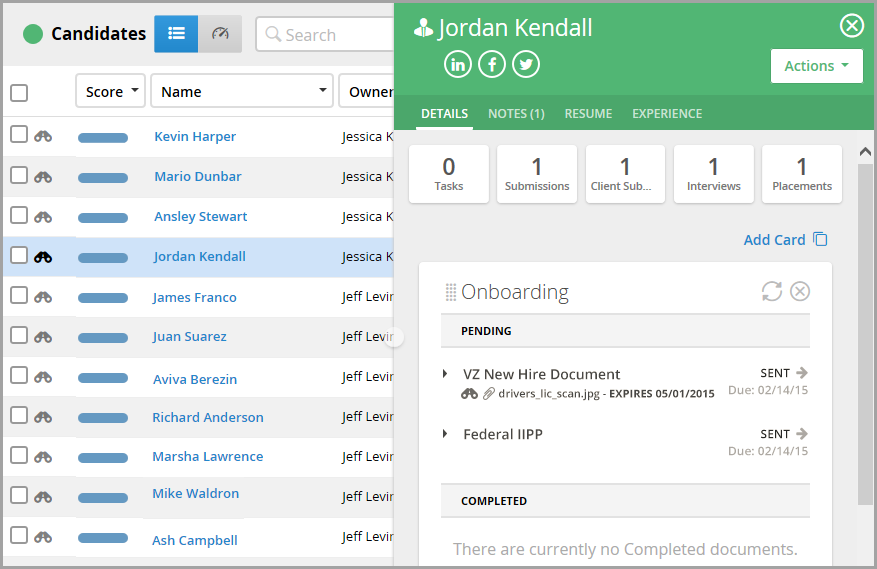
- The Onboarding card on the candidate list preview slideout (if you don’t see it, you must add it via the Add Card drop-down).
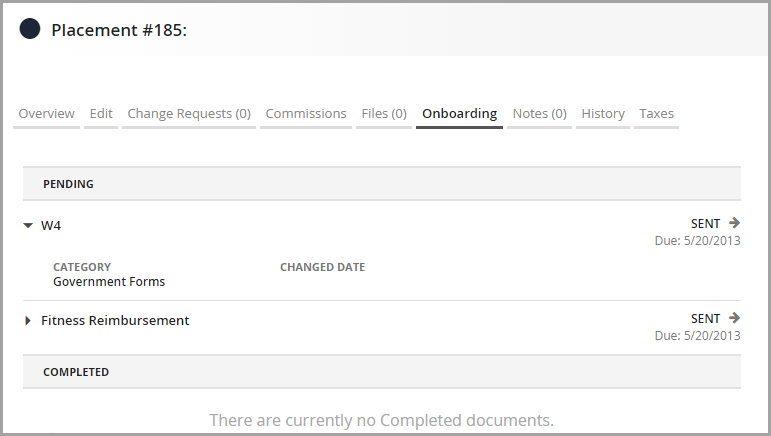
- The Onboarding tab on the placement record.
- The Web Response and Internal Submissions sections on the job record Activity tab (use these sections to send documents to multiple candidates at once).
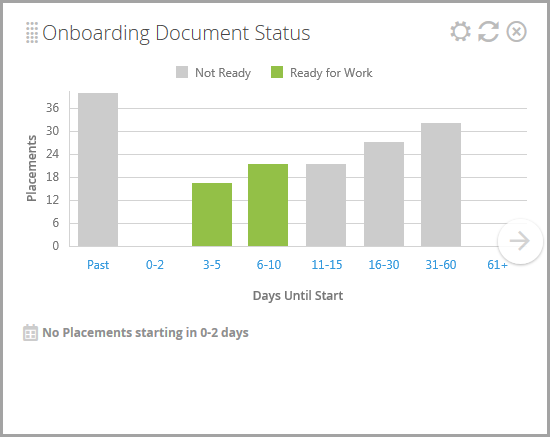
- The Onboarding Document Status card on the Placement Dashboard. For more information, view the Understanding the Placement Dashboard article.
From these areas, you can:
- Send existing documents and packets to candidates for completion.
- View general information (name of the document, due date, category, changed date, and packet – if applicable) and status of each document that has been sent to candidates:
- Sent – Documents that have been sent to the candidate/employee that they have not viewed yet.
- In Progress – Documents that have been either:
- Accessed by the candidate/employee (i.e., they clicked the link to the document sent by the Onboarding Administrator, logged in, and, at the very least, viewed its contents.
- Completed and submitted by the candidate/employee and subsequently rejected by the Onboarding Administrator.
- Completed and submitted by the candidate/employee and subsequently un-submitted by the Onboarding Administrator.
- Submitted – Documents that have been completed by the candidate/employee but not yet approved by an Onboarding Administrator.
- Completed – Documents that have been completed by the candidate/employee and approved by an Onboarding administrator.
It’s important to note that, currently, from Bullhorn, while you can view all of this information about a document, you do not have access to view the documents themselves. This is meant mainly as a security measure, especially when dealing with sensitive information such as passport numbers, social security numbers, etc. At this time, from the ATS, you also cannot see what documents are within a packet. Should you have any questions about these contents, you must log into the Onboarding application directly to view them.
To request this integration, contact Bullhorn Support.
To Send a Document to a Single Candidate
On the candidate (pre-hire) or placement (post-hire) record, click the Onboarding tab.
Click Send New Documents.
| Note: If the candidate doesn't yet have a record in the Onboarding application, this action will create one. |
In the new window, if necessary, search for the document(s) to send to the candidate in the search box at the top and select the check boxes to the left of the documents.
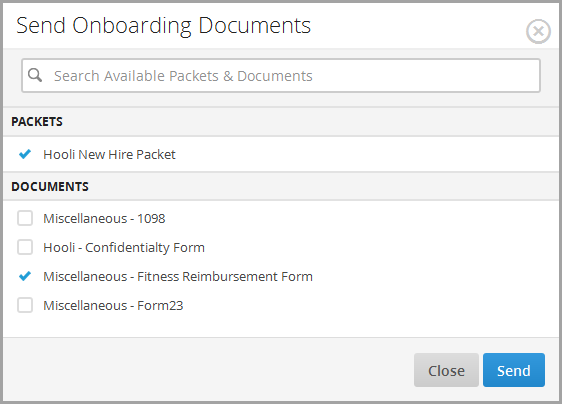
Click Send.
- The candidate receives both an email and in-app notification prompting them to fill out their new paperwork.
If desired, click Add Note.
In the new window, verify the following:
- The About field is pre-populated with the candidate’s name.
- The Note field contains default text describing the documents (you can edit this as needed).
- The Action drop-down is set to the value Documents Assigned.
Enter any remaining information as necessary.
Click Save.
To Send a Document to a Group of Candidates
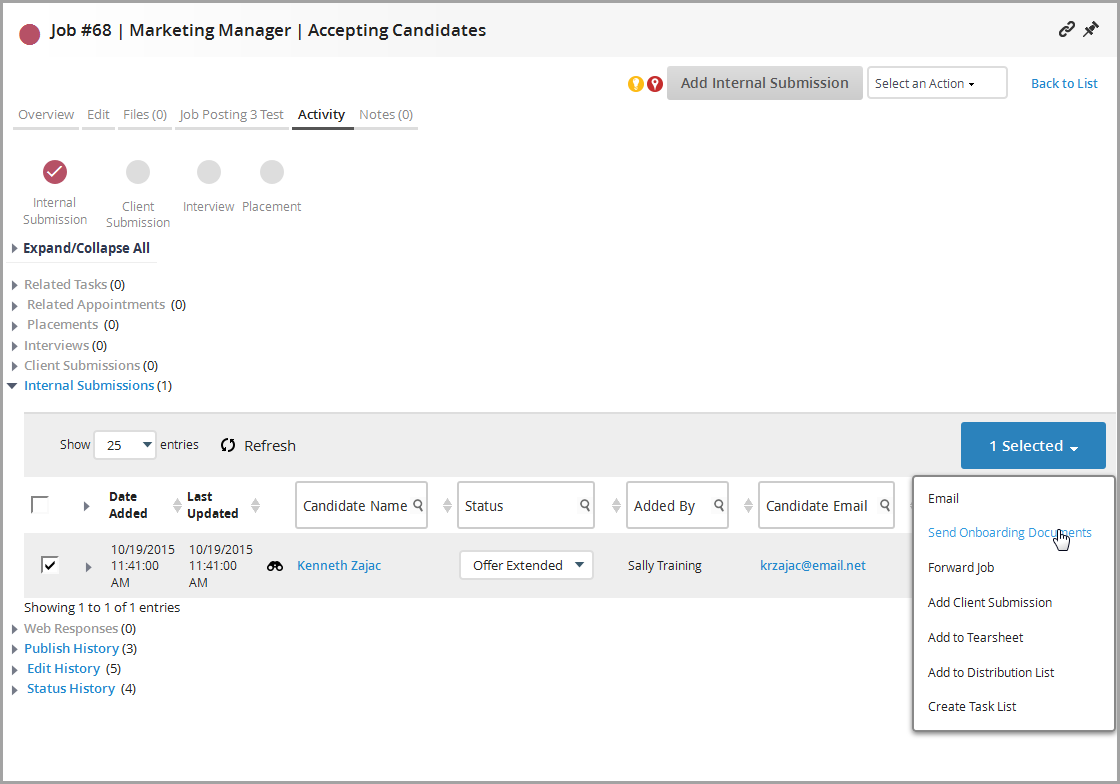
- On the job record, click the Activity tab.
- Expand either Web Responses or Internal Submissions.
- Select the check boxes to the left of the desired candidates.
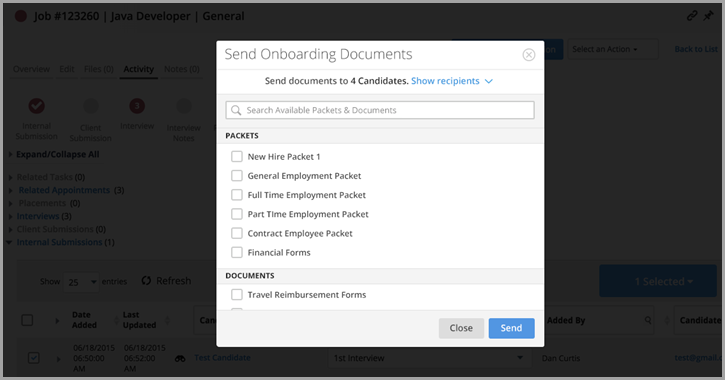
- From the Selected drop-down, select Send Onboarding Documents.
- In the new window, if necessary, search for the document(s) to send to the candidates in the search box at the top and select the check boxes to the left of the documents.
- Click Send.
- The candidates receive both an email and in-app notification prompting them to fill out their new paperwork.
- If desired, click Add Note.
- In the new window, note the following:
- The About and Additional References fields are pre-populated with the candidates’ names.
- The Note field contains default text describing the documents (you can edit this as needed).
- The Action drop-down is set to the value Documents Assigned.
- Enter any remaining information as necessary.
- Click Save.