Creating a New Placement
Overview
This article contains information on how to manually create a new placement record in Bullhorn Back Office / Onboarding.
Note: If you are connected with Bullhorn ATS, it is recommended that you create all new placement records in the ATS and have the records in Back Office / Onboarding setup via integration.
Steps
- Navigate to the Placements tab.

- Select Add.
- In the Add Placement popup, add the following information:
- Search for and select the Branch associated with the employee.
- Search for and select the Employee name.
- Enter in an End Date, if necessary.
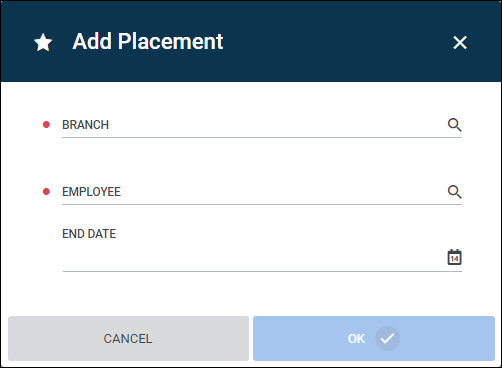
- Select
 to continue to the placement record.
 - At a minimum, the following required fields need to be completed to finish setting up a placement record:
- Company - Search for and select the company where the employee will be working.
- Department - This is the billing contact or client contact associated with the company.
- Department Start Date - For billing contacts, this determines when invoices are sent to that contact.
- Title - This is the name of the placement.
- Select
 to create the placement record.
Recommended Fields
The steps provided above are the minimum requirements for creating a placement record. Depending on your needs, you may need to have additional information included on the record as well. The following sections call out important fields to consider when creating a placement.
The General Information section has many fields for reporting purposes, but the below fields impact the the placement directly.
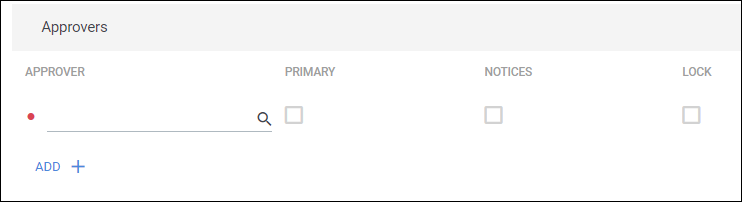
- Approvers - If your employee is submitting time for the placement, you can designate the timecard approver here.
- Type of Placement - Choose the type of placement - either Temp, Perm, or Temp-Perm.
- Receive Notices - Determines whether or not the employee receives notices specific to this placement.

If your employee is allowed to submit expenses, you can determine what service group they belong to.

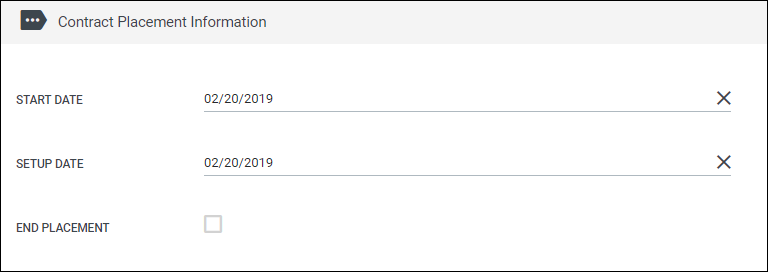
This section includes the placement Start and End Dates.
This is also where you can manually mark the placement as having ended.
|
Note: If you are connected to an ATS, ending a placement should be done in the ATS. |
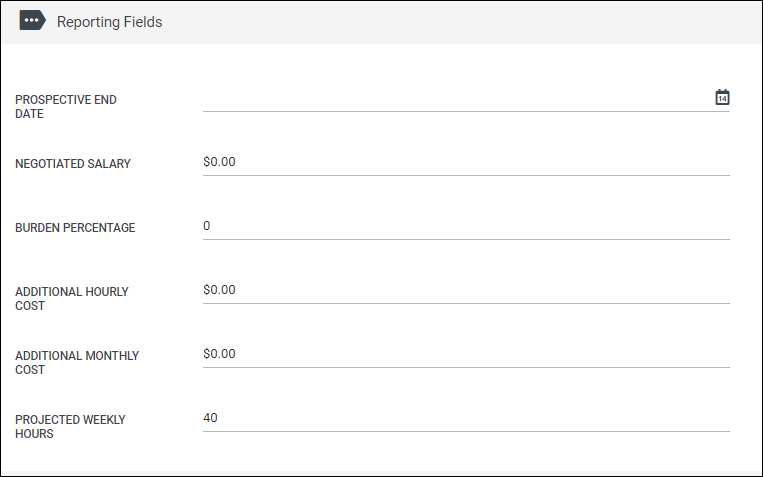
Reporting fields include fields for the placement burden and additional costs, which can be figured into various reports.
You can set the placement Pay Rate and Pay Overtime profile here.

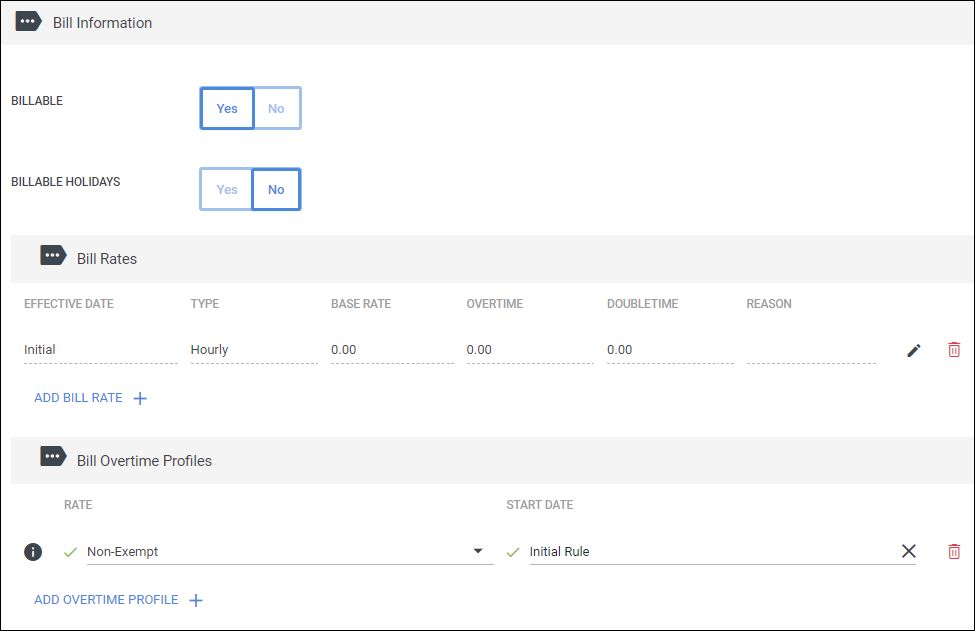
You can set whether or not the placement is billable, if holidays are billable, the placement Bill Rate, and Bill Overtime profile here.
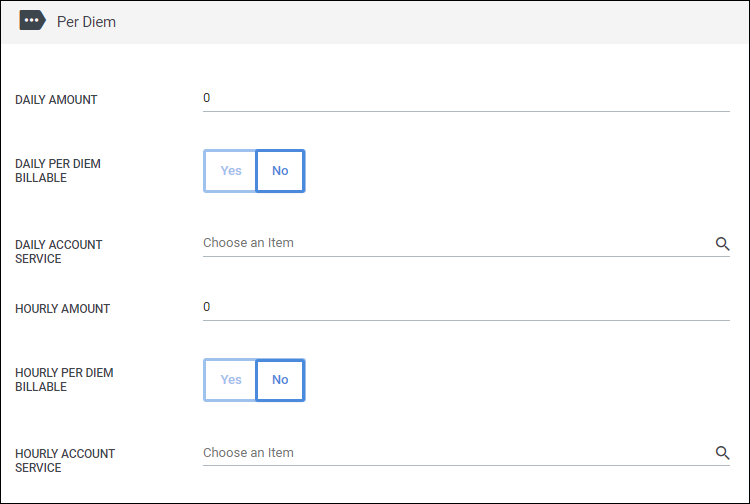
If the employee receives and hours or daily per diem, you can set that up in this section.
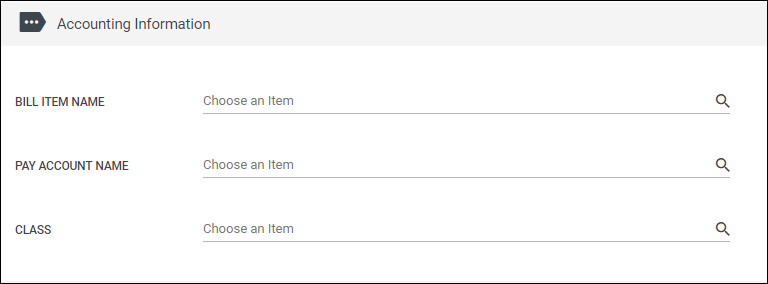
If your Bullhorn Back Office is connected to a QuickBooks account, you can enter the relevant account and item information in this section.
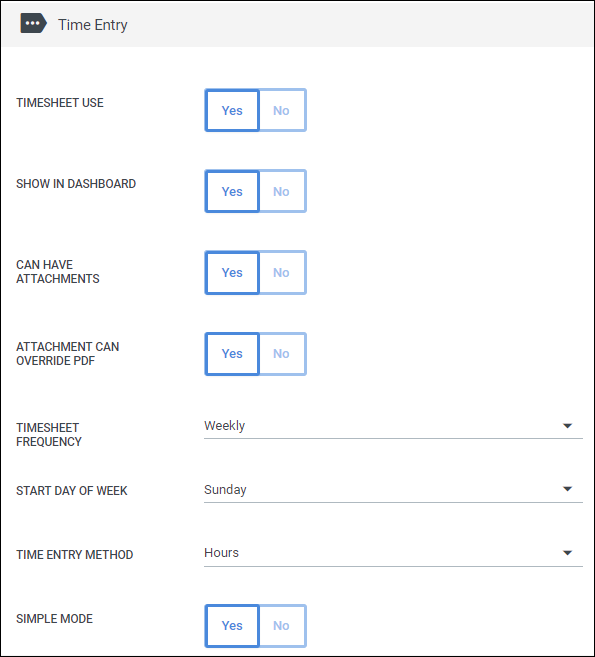
These settings control the type of timesheet and time entry settings for the placement.
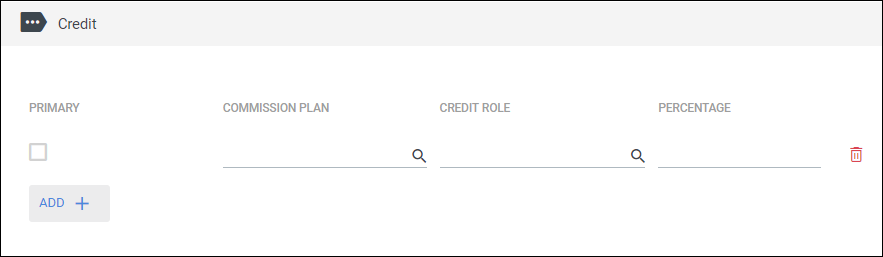
If you have reps receiving commissions, you can assign them to the placement here.
- This section requires the Commission module. Please contact your Account Manager if you do not have this section.