Power Notes
Overview
Power Notes use the standard Salesforce Task object and create records with a Power Note record type as a more flexible way to log notes and memos than what is available through Salesforce Activities and Notes. Power Notes provides the ability to add notes to multiple objects using templates and includes a viewer that consolidates the notes better than the standard Salesforce Activity Timeline screen.
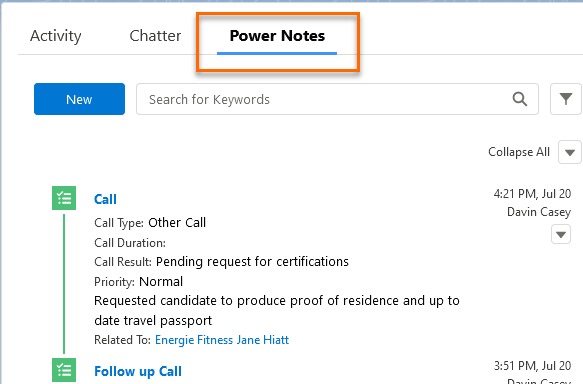
Power Notes tasks are visible in the Power Notes viewer rather than the Activity Timeline. Logged in users will see Power Notes they’ve created on their Tasks page. For more details on the Power Notes viewer, see Power Notes Viewer
Prerequisites
- The Org must use Bullhorn Recruitment Cloud release 2021.07 or newer
- Salesforce Lightning
- ATSv2 data model is enabled
- Generic Lookup Component is enabled
Out of the box, Power Notes supports the following objects:
- Account
- Applicationv2
- Candidate/Client
- Job
- SendOut Schedule v2
The Power Notes component can be added to any page layout on these objects as well as the Action menu, with minimal configuration. It’s possible to add support for other objects with additional configuration. SeeAdmin: Power Notes Configuration for configuration and customization details.
Features
Power Notes adds these features to Salesforce Activities and Notes:
- Supports relationships with multiple objects in the Related To field.
- Display only tasks created by users (recruiters) related to interactions with clients and candidates so it’s easier to browse the list of tasks for specific information.
- Pick a predefined Subject with a related fieldset to create structured notes.
- Use a template or add free-text to populate the Description field.
- Send the note as email to selected recipients.
- Save the note as a task on any of the related objects.
Saved Power Notes are displayed in the Power Notes viewer which includes the following capabilities:
- Search existing Power Notes using keywords or filters
- Expand or collapse the list of Power Notes or the individual Power Note
- Delete and Edit individual Power Notes
If the Power Note uses Salesforce's standard WhoId/WhatId Task lookup fields it will be visible in both the Power Notes viewer and the standard Salesforce Activity Timeline. Administrators can view WhoId and WhatId Task Lookup Support for configuration details.
Relate Power Notes to a Candidate
It is also possible to display Power Notes related to a candidate in ATS. Once you activate this option, you can view the Power Note summary for each candidate by clicking on the ATS i icon. The summary will appear on the first tab while the second tab will continue to display the Application v2 record details
Using Power Notes
Create a Power Note
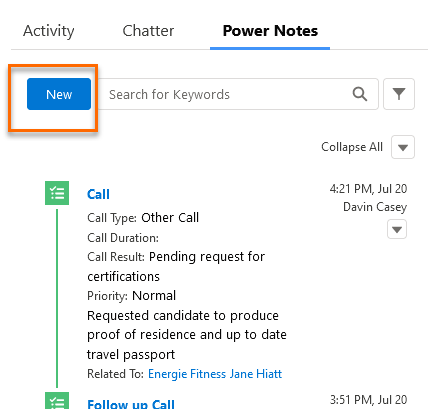
- In the Power Notes viewer click on the New button.
- Admins are able to hide the New button from the Power Notes viewer.
- Admins are able to hide the New button from the Power Notes viewer.
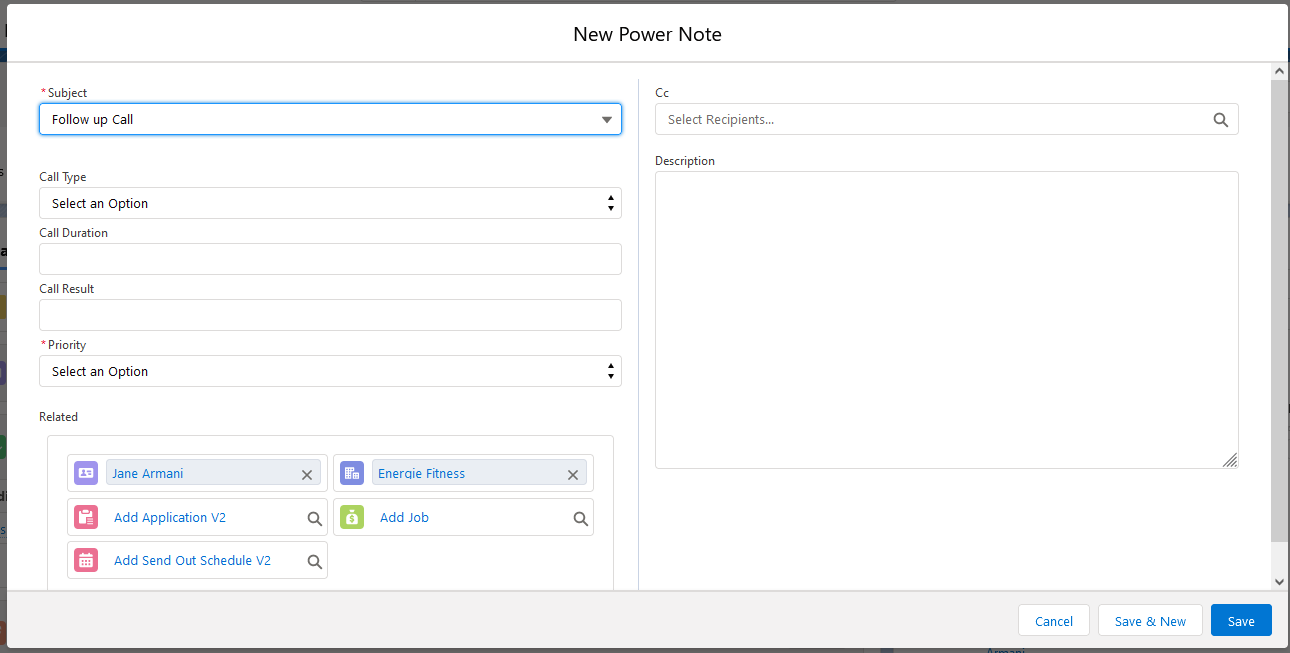
- The New Power Note screen pops up.
- Fill in the necessary fields and click on the Save button. Click Save & New instead to create another Power Note.
Due to task object limitations, you are not able to add an attachment to Power Notes.
Relate a Power Note to a Record
When creating a new Power Note the Related section controls where the new note is saved and which records it is associated with.
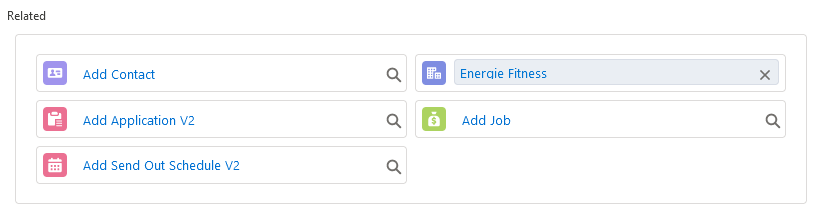
A lookup field for each configured object is displayed. If the lookup field is populated when the Power Note is saved a task is created on the record selected in the lookup field.
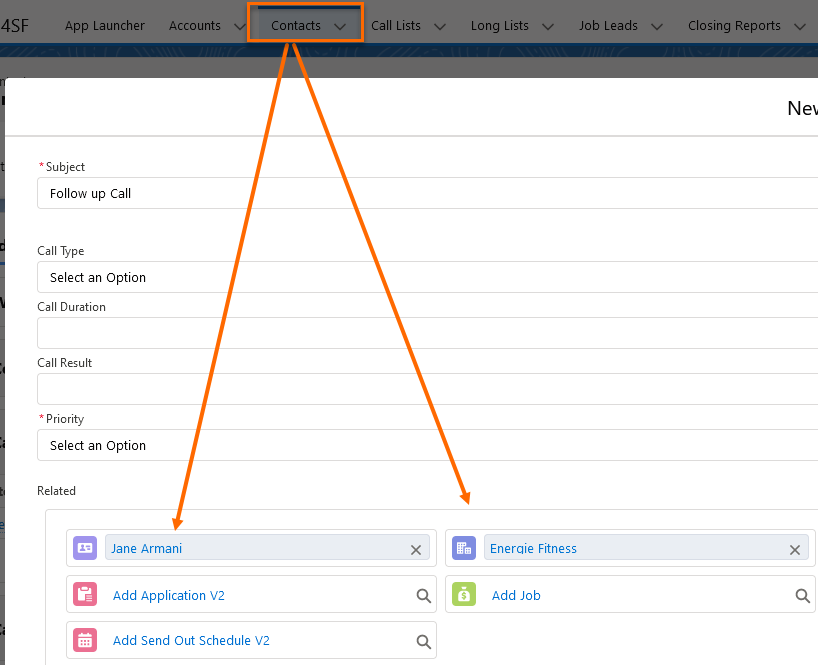
Client Contacts and Candidate Contacts both use the Add Contact Lookup Field since they are both part of the Contact object.
If a relation already exists with another object, then the relevant Related lookup will be pre-populated with the related record. For example, when creating a Power Note from a Contact record, the Contact and Account related fields will be pre-populated using the info from that Contact record.
Subjects and Fieldsets
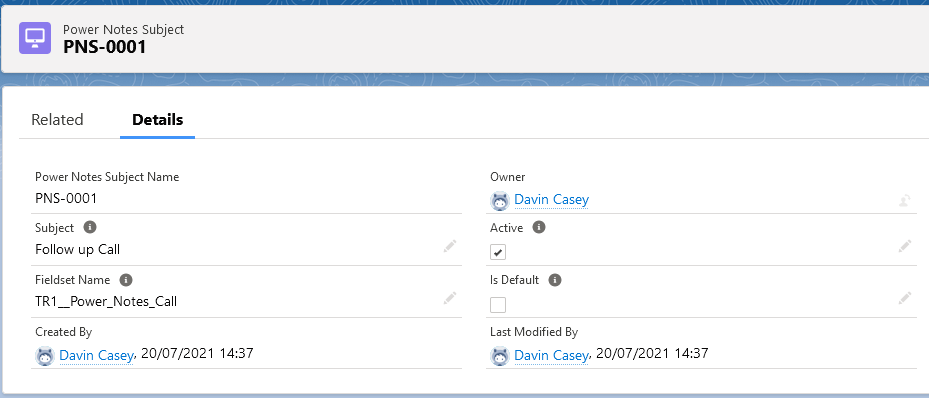
Pre-defined Power Note Subjects are created and customized in the Power Notes Subject Object. Associating a Subject with a Fieldset helps keep notes structured. When a Fieldset is associated, users will be presented with a specific set of fields to fill out after selecting their Subject.

Add a Subject
- Go to the Power Notes Subject Object and click the New button.
- Fill out the Subject field.
- Enable the Active checkbox.
- To make a Subject the default, mark the is Default checkbox.
Associate a Fieldset
-
s create a fieldset on the Task object with relevant fields. To add a custom field, create that field against the Activity object then add it to the Task layout. Both standard and custom Activity object fields can be used.
There are no restrictions on the number or type of fields that can be added to the fieldset.
-
Enter the API name of the fieldset on the relevant Power Notes Subject record, in the Fieldset Name field.
If no fieldset is present on the Power Notes Subject record, the free-text Description field is available to enter any note.

Additional configuration options are available for Power Notes Subject. For more details, see, Power Notes Subject Configurability.
Templates
Records from the Power Notes Template Object can be associated with Power Notes Subjects to pre-populate the Description field when a Power Note is created. The template text is entered in the Template Content field of a Power Notes Template record.
Multiple templates can be associated with a single subject. After selecting a Subject, users will be able to select which template to use. A default template can also be designated for each Subject.
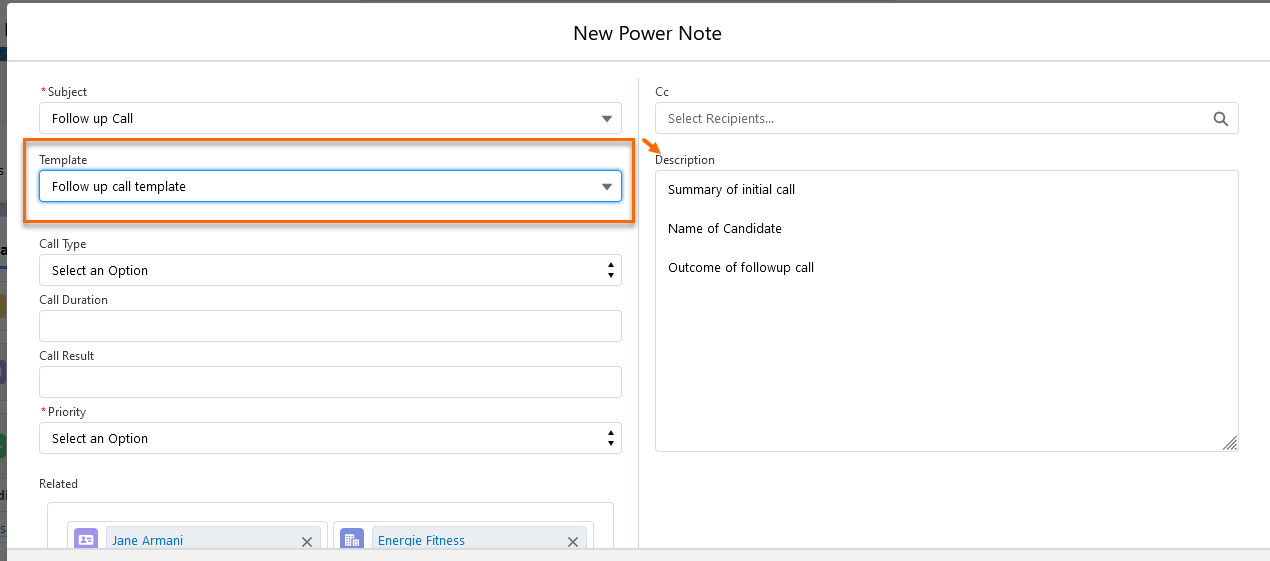
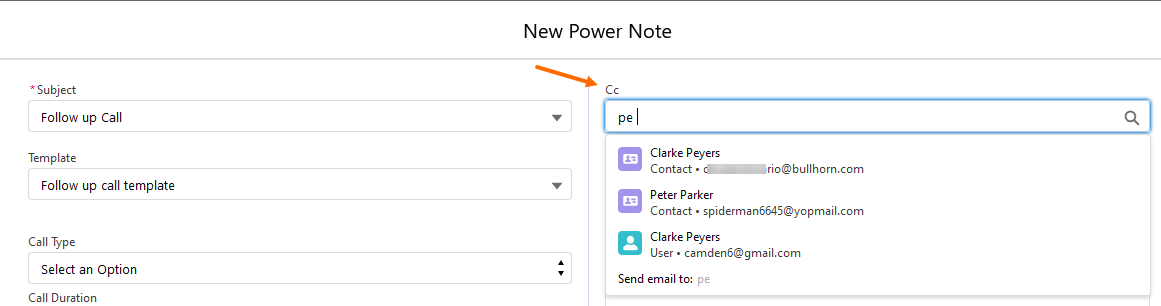
Use the Cc field on the New Power Note screen to email the Power Note being created. This field is a lookup to Contacts/Users and uses the functionality.
The email message body is the text entered in the Description field.
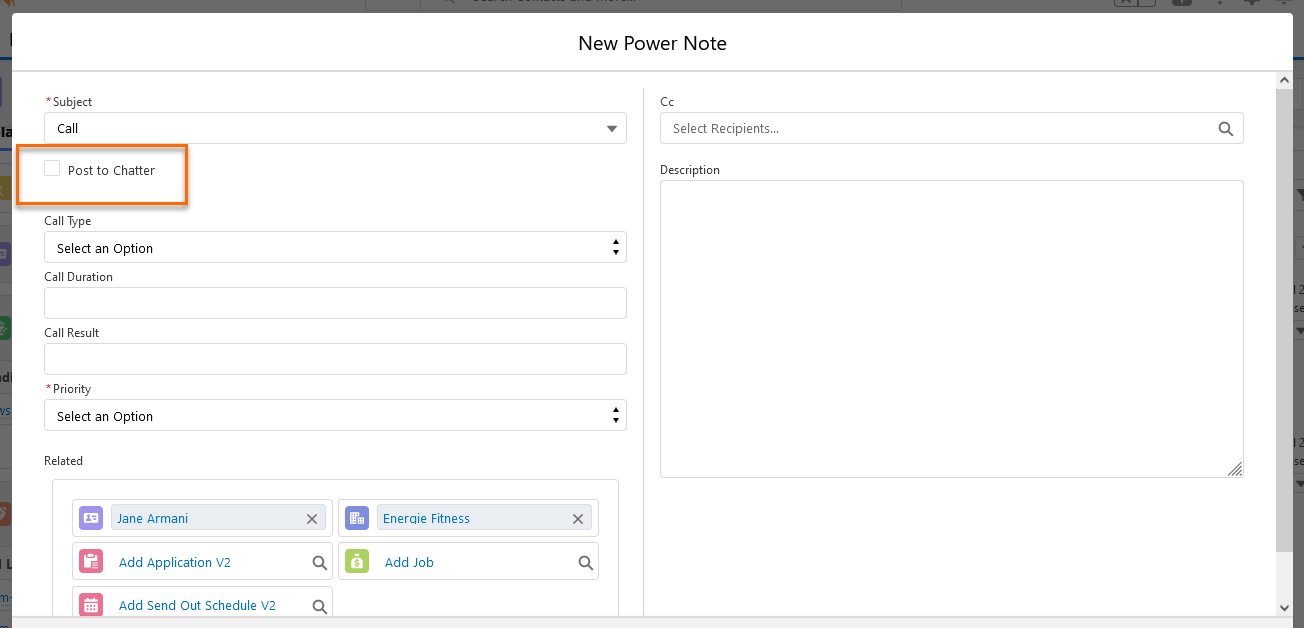
Post on Chatter
Post any text in the Description field of a Power Note to the Chatter feed on related records by selecting the Post to Chatter checkbox on the New Power Note screen. System Administrators can decide whether this function is enabled.