May 2026 Release: Omnitable Features & Enhancements
Intelligent Column Resizing for Omnitable
-
Feature:Omnitable
-
Level of Configuration: None
The Omnitable now includes intelligent column resizing, an enhanced user experience based on user feedback.
Manual resizing is now possible with the new Reset Column Width button that is available under the Cog settings icon menu and also under the individual column headers.
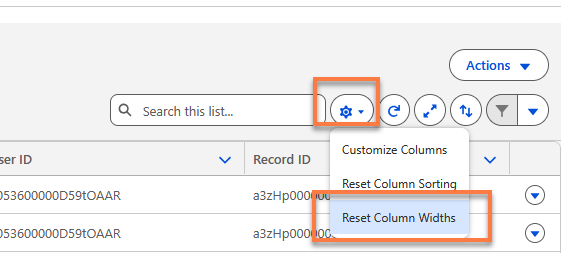
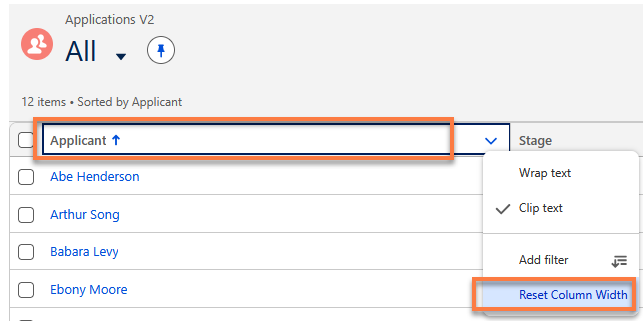
The enhancements cover five key scenarios:
-
Auto-Fit on First Load - When a user first arrives on an Omnitable page (or resets to default), column widths are automatically calculated based on the content loaded in the current chunk, eliminating narrow or oversized columns on initial view.
-
Manual Resize Preserved - When a user manually drags a column to resize it, that column holds its new width while all other columns remain unaffected.
-
Smart Column Add/Remove - If the user hasn't manually resized any columns, adding or removing a column triggers an automatic recalculation of all widths to fit the updated set. If columns have been manually resized, existing widths are preserved, and new columns are auto-fitted to fill remaining space (or appended if the table is already full-width).
-
State Persistence Across Navigation - Manually resized column widths are remembered when navigating away and returning. If no manual resizing has been done, the page behaves as if it were a first load. This applies to the same Named View; the changes are not carried across different Views.
-
Viewport Responsiveness - Resizing the browser window or zooming applies the same rules — manual widths persist; untouched columns recalculate to fit.
Accurate Omnitable Record Count for Large Datasets (2000+)
-
Feature:Omnitable
-
Level of Configuration: None
The Omnitable now displays the true total record count when a dataset exceeds 2,000 records, replacing the previous behaviour where the count was capped or misleading for large result sets.
Previously, users had no way to know whether they were looking at 2,001 or 20,000 records. The system now performs a background count query when the total exceeds 2,000 and surfaces the real figure in the record count display. The counter behaves correctly in all states:
No selection: "Showing 100 of 5,432 records"
Rows selected: "10 of 5,432 records selected"
Filter applied: "Showing 100 of 2,001 records" (reflects the filtered total, not the overall total)
Rows selected after filtering: "10 of 2,001 records selected"
Call List Members Omnitable: Option to Add Contextual Data Viewer for Candidate Call List Members List
-
Feature:Omnitable
-
Level of Configuration: None
Recruiters working in Call List Member Omnitables can now access a Contextual Data Viewer (CDV) directly within the table, allowing them to review key candidate information without leaving the Omnitable.
Out of the box, the following tabs are displayed:
-
Documents / Default Resume Preview
-
Contact Details
-
Combined Activity Timeline
-
Employment & Education History
-
Applications
Configuration
This CDV instance is part of the Managed Package and is not added to the page layout by default — administrators must manually configure it for an existing Call List Members Omnitable. The component is designed to work independently of any specific Omnitable instance, so admins should verify that the CDV configuration is appropriate for the composition of their Call List Members.
Add the Flow to the Call List Lightning Record Page
-
Navigate to a Call List record in your Org.
-
Click the to open the Lightning App Builder.
-
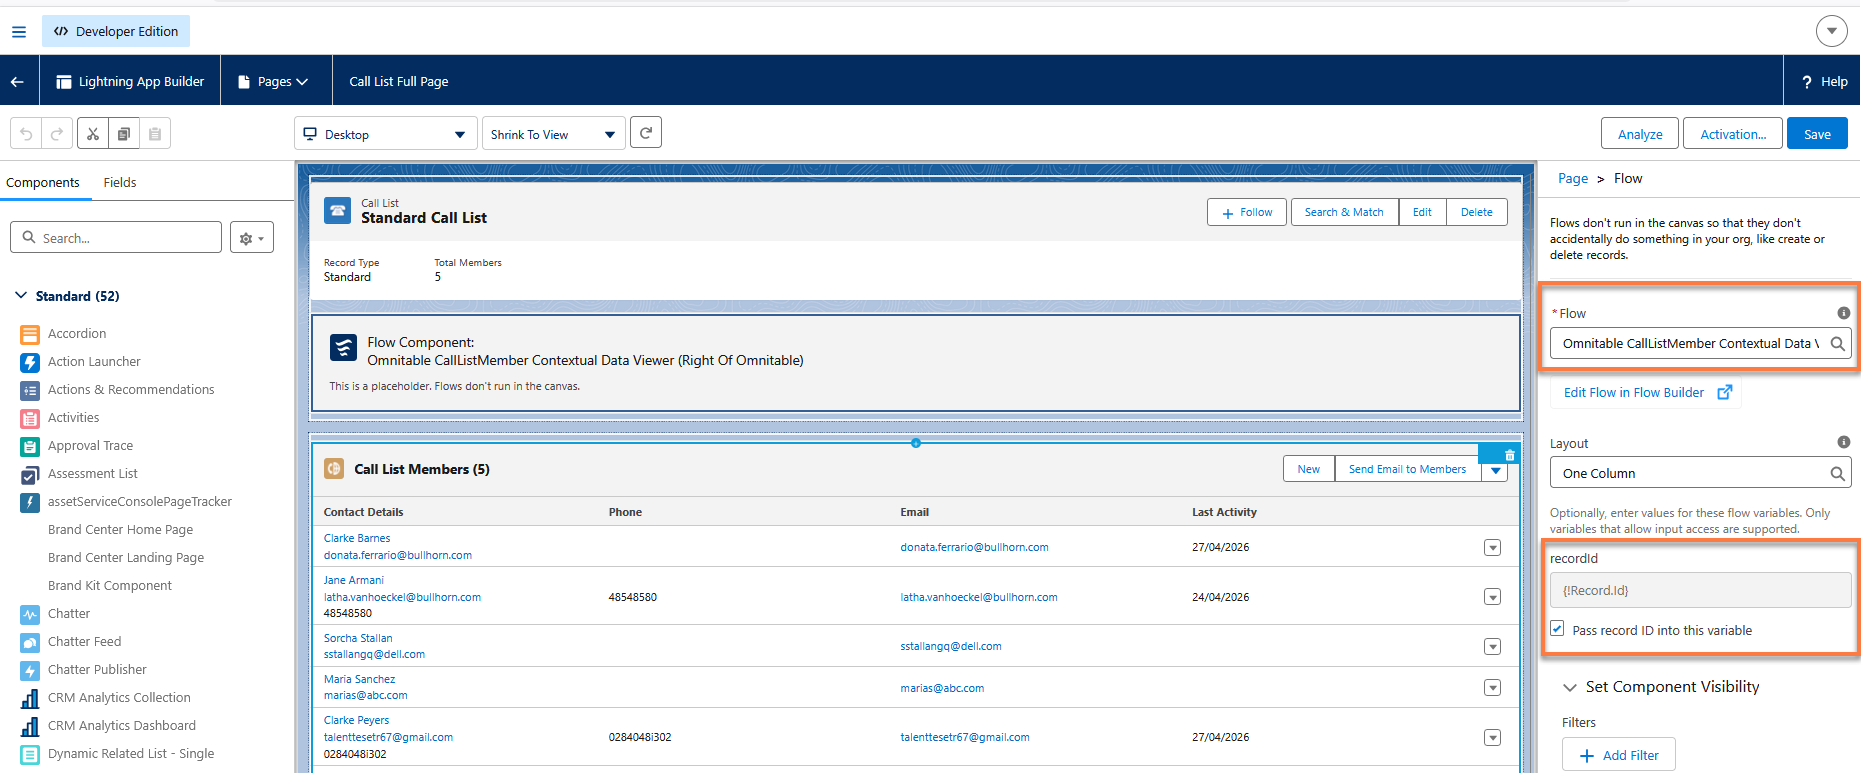
In the component palette on the left, search for "Flow" and drag a Flow component onto the page in your desired region.
-
In the component properties panel on the right, configure:
-
Flow: enter the API Flow name TR1__Omnitable_CallListMember_Contextual_Data_Viewer_Right_Of_Omnitable, OR
TR1__Omnitable_CallListMember_Contextual_Data_Viewer_Below_Omnitable
-
Select the ‘Pass record ID into this variable’ checkbox.
-
Optional: Use the ‘Set Component Visibility’ filter to set where this Flow is displayed. For example, ‘recordTypeName=Standard’.
-
-
Select Save.