Configuring Systematic Accounting Period
Systematic Accounting Period enhances your ability to tie pay and bill data together based on when costs are incurred and revenue is recognized. This feature allows you to create working lists to filter and action upon charges based on a specified accounting period. The Accounting Period is available for reporting in and Data Replication. Bullhorn automatically assigns an Accounting Period to every Payable and Billable transaction that is added to the system based on your configuration. Additional UI components also assist in filtering and sorting your data based on the Accounting Period.
Use the steps below to configure Systematic Accounting Period for your corporation. Any changes to this setting are not retroactive.
Configuring the Accounting Period Settings
- From the Bullhorn Menu in ATS, click Pay & Bill Settings.
- Click the Accounting Period tab.
- Fill out the following fields:
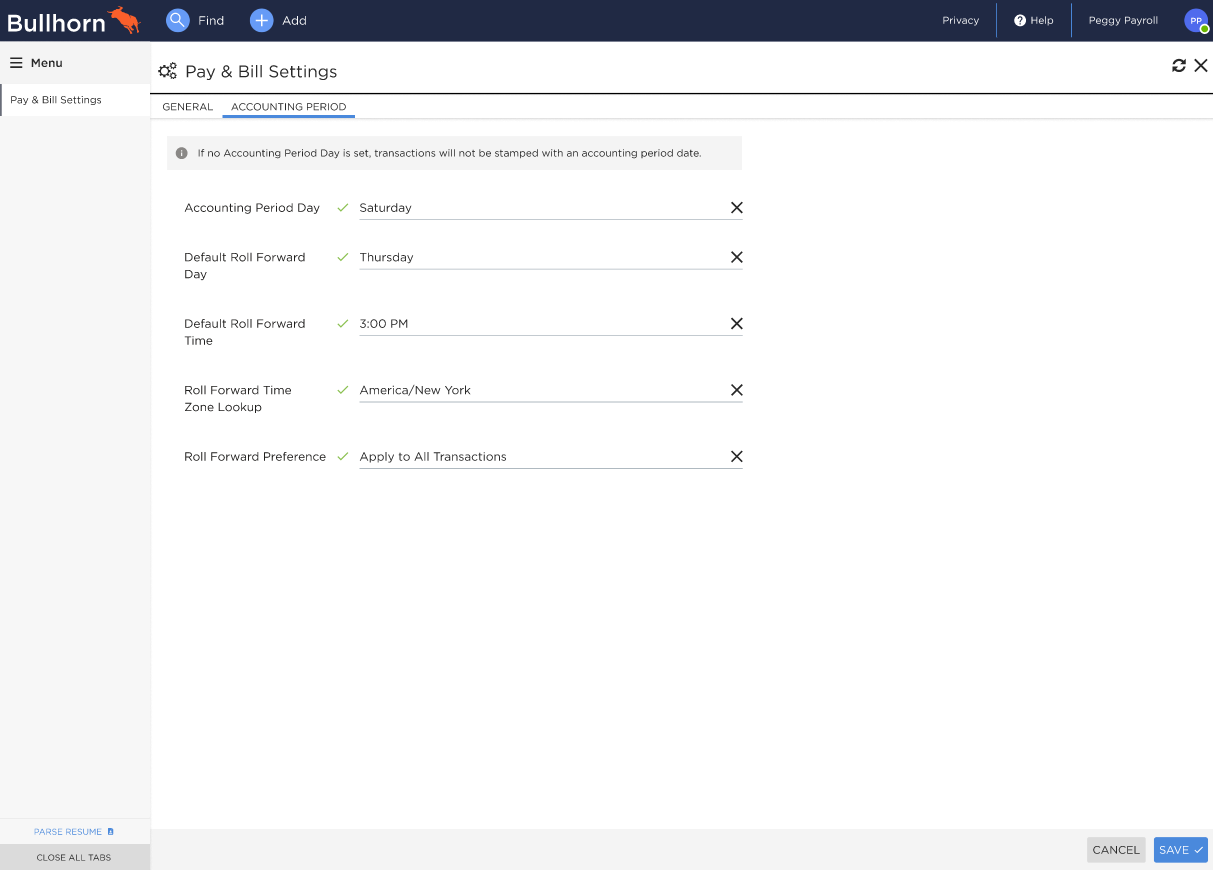
- Accounting Period Day: The single day of the week that will be automatically stamped on every transaction and charge coming into the system, despite the week end date. This setting is applicable to your entire corporation.
- Roll Forward Day: This setting determines if the
transactions should be assigned an Accounting Period Date of the
week worked or if it should roll forward to the following week's
Accounting Period Date. Set for when you aim to finish payroll.
- Roll Forward Time: This setting determines if the transactions should be assigned an Accounting Period Date of the week worked or if it should roll forward to the following week's Accounting Period Date. Set for when you aim to finish payroll.
- Roll Forward Timezone Lookup: The timezone that the Roll Forward Day and Time will be based on when assigning an Accounting Period Date to transactions.
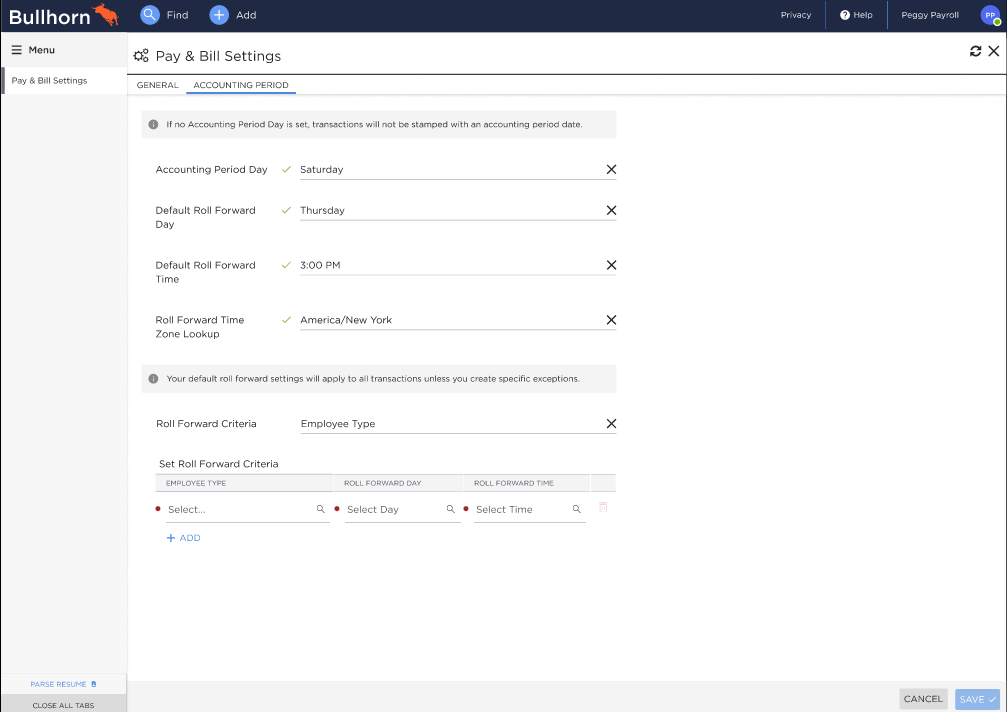
- Roll Forward Preference: Choose between Apply to All Transactions or Apply Based on Selected Criteria. The option you choose dictates the additional fields you'll need to fill out.
- Apply to All Transactions: The Accounting Period will apply to all Transactions.

- Apply Based on Selected Criteria: Allows you to configure multiple accounting periods to ensure each entity under a corp can control its invoicing process.

- Roll Forward Criteria: Choose a criteria to base the Roll Forward Day and Time on.
Employee Type.
- Set Roll Forward Criteria: Use the table to set the Roll Forward Day and Time for each Criteria Type.
- Roll Forward Criteria: Choose a criteria to base the Roll Forward Day and Time on.
- Apply to All Transactions: The Accounting Period will apply to all Transactions.
- Click Save.
All fields must be filled out in order to Save.
Configuring Field Maps
- From the Bullhorn Menu in ATS, click Field Maps.
- Open Bill Transaction.
- Search for the accountingPeriodID field.
- Deselect the Hidden checkbox.
- Next, open Pay Transaction.
- Search for the accountingPeriodID field.
- Deselect the Hidden checkbox.
- Click Save.
Configuring View Layout
- From the Bullhorn Menu in ATS, click View Layout.
- From the Field Map Entity drop down, select Billable Charge.
- Click the Profile Record tab.
- Under Profile - Header ensure Min Accounting Period (minAccountingPeriodID) and Max Accounting Period (maxAccountingPeriodID) are moved to Include in View.
- Click Save.
- In View Layout, select Payable Charge from the Field Map Entity drop down.
- Click the Profile Record tab.
- Under Profile - Header ensure Min Accounting Period (minAccountingPeriodID) and Max Accounting Period (maxAccountingPeriodID) are moved to Include in View.
- Click Save.
If you do not have the ability to configure Systematic Accounting Period, contact Bullhorn Support to ensure you have the correct entitlements.
