Add a New Employee
This article contains instructions on how to add a new employee to a group in .
Depending on your configuration, these options may not be available.
If your agency is connected to an ATS to track employee assignment information, adding new employees is likely automated by the ATS and should be added there.
If using an ATS, creating records manually in Bullhorn Time & Expense may cause a duplicate record or be overwritten by the ATS.
Add New Employee
- After selecting a group, choose Maintenance > Employee Setup.
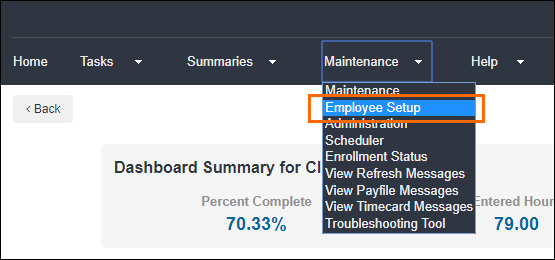
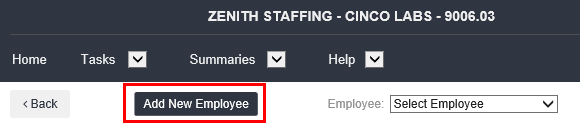
- Select Add New Employee.
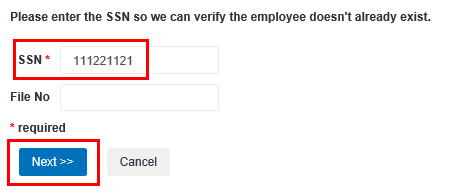
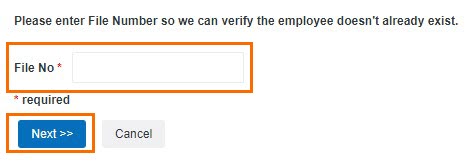
- You will be prompted to enter a unique SSN (SIN) or File Number for the new employee. The prompt you see is dependent on how your company is set up in .
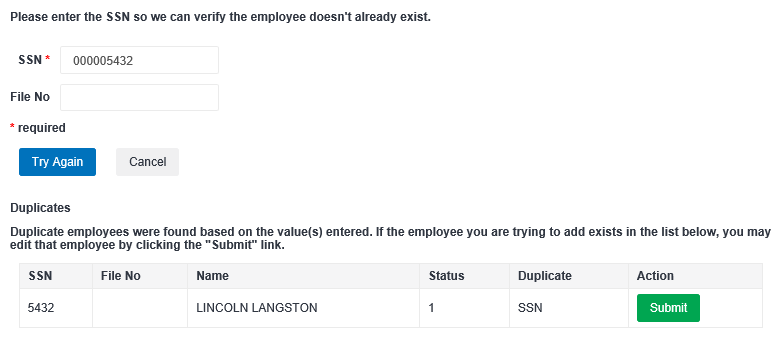
- If you are prompted to enter a SSN: Enter a unique nine digit SSN in the SSN field.
- The employee PIN is created automatically based on the SSN entered in this step. In most cases, the PIN is the last four of the string entered in the SSN field.
- The employee PIN is created automatically based on the SSN entered in this step. In most cases, the PIN is the last four of the string entered in the SSN field.
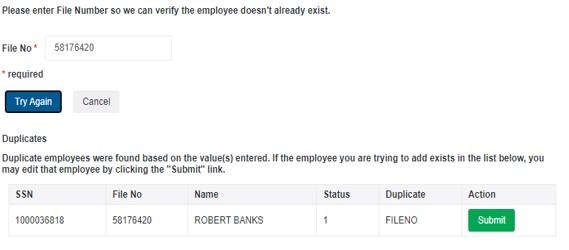
- If you are prompted to enter a File Number: Enter a unique ID for this employee. This ID can contain letters and numbers, but no special characters.
- The PIN is not automatically created from the File Number. You will need manually enter a PIN in step five.
- The PIN is not automatically created from the File Number. You will need manually enter a PIN in step five.
- If you are prompted to enter a SSN: Enter a unique nine digit SSN in the SSN field.
- Select Next to continue.
-
If you see that the employee record already exists, you can modify that employee's record by selecting Submit.
-
Otherwise, re-enter the ID so that the value is unique and does not match an existing employee and select Try Again.
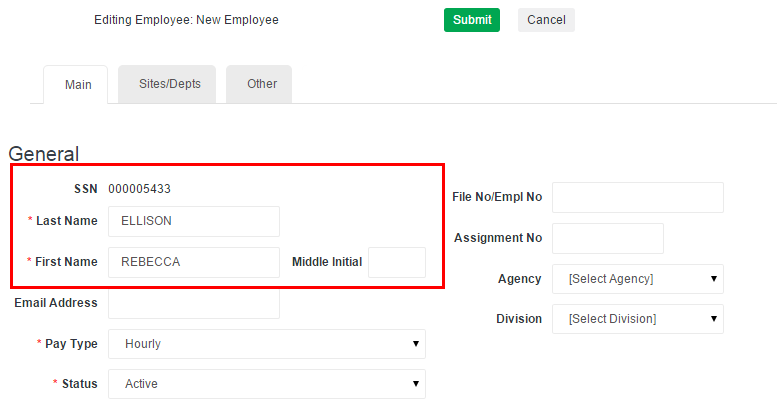
- On the Main tab, enter the employee's Last Name and First Name. If the PIN does not automatically populate, enter a unique PIN for the employee.
- Other fields may be required depending on your agency and configuration.
- Other fields may be required depending on your agency and configuration.
Each employee must have a unique SSN or File Number. If you entered a SSN or file number that matches an existing employee, you must take action before proceeding.
Enter Site & Department Information
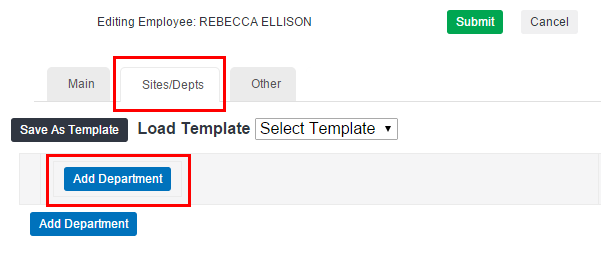
All employees must be assigned details for sites and departments.
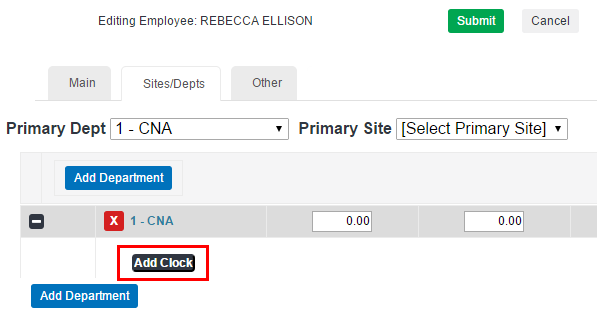
- Navigate to the Sites/Depts tab.
- Select Add Department.
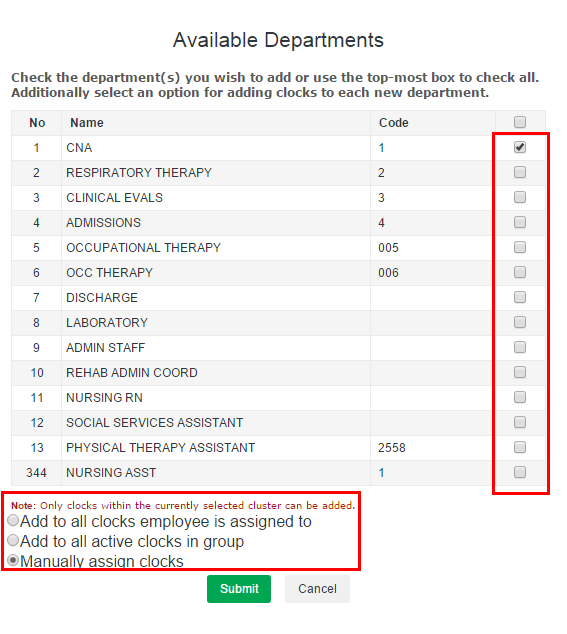
- In the Available Departments window, select the departments you want to assign the employee.
- After you select departments, you may be required to make a selection regarding clock assignment:
- Add to all clocks employee is assigned to: This will add the employee to any clock where the assigned departments are active.
- If you select this option, you will proceed directly to entering assignment details and bypass clock assignment.
- Add to all active clocks in the group: This adds the employee to all available clocks in the group.
- If you select this option, you will proceed directly to entering assignment details and bypass clock assignment.
- Manually assign clocks: This option allows you to manually select the clock sites to be assigned to the employee.
If your view does not include any clock assignment options, the employee will be able to record time on all clocks in the group
- When you have added all departments and made a clock assignment option, select Submit.
Assign a Clock Site
- Select Add Clock to begin assigning clock sites.
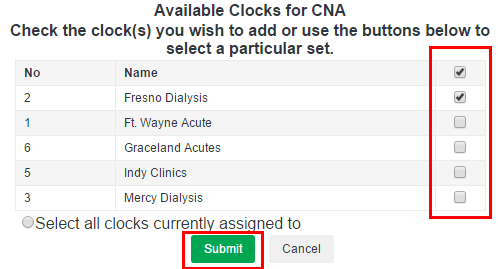
- In the window that opens, select the clocks you want to assign to the employee using the checkboxes on the right of the screen.
- When you are finished making selections clickSubmit to close the pop-up.
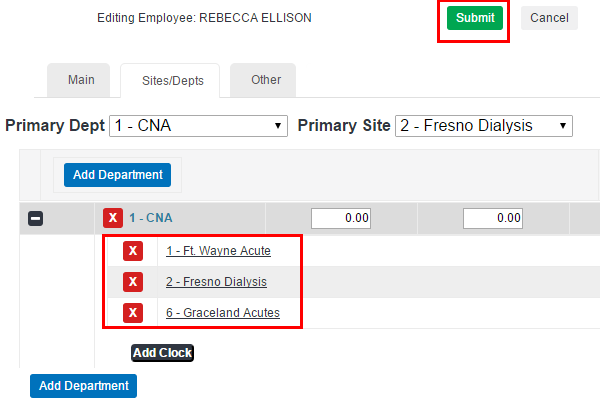
- Ensure the needed sites appear under the department and select Submit to save.
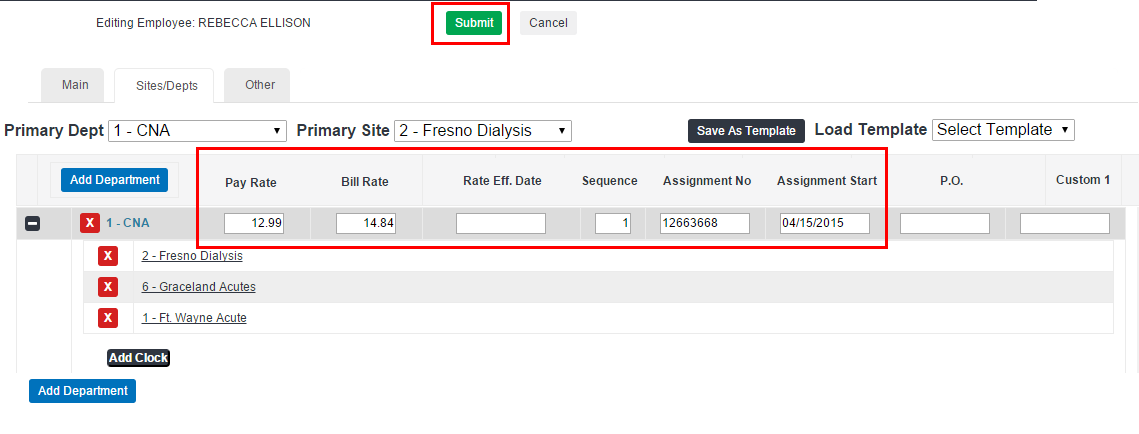
Enter Assignment Details
After assigning departments and clock sites, you can enter assignment details.
- The following details are recommended for each department:
- Pay Rate: The hourly rate at which the employee is paid for work.
- Bill Rate: The hourly rate at which the client is billed for the work performed by the employee.
- Assignment No: The assignment number associated with the department. We recommend entering a unique assignment number for each employee and assignment. Avoid reusing assignment numbers.
- Assignment Start: Indicates the date at which the employee started working the assignment.
- Carefully review the information you entered. When you are ready to save the employee details, select Submit.
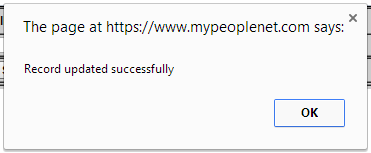
- After entering all required fields, you will see a confirmation message appear.
- You may have to perform a Long Update or Force Initialize on your time clock before the employee is recognized after entering a PIN.