Department Shift Setup
This function is used primarily by clock groups. It will assign a shift number to a work period and may also affect break deductions, soft scheduling rules, and more. This article contains the steps for how to setup Department Shifts.
Adding a Shift
- Select Maintenance > Administration from the top menu.
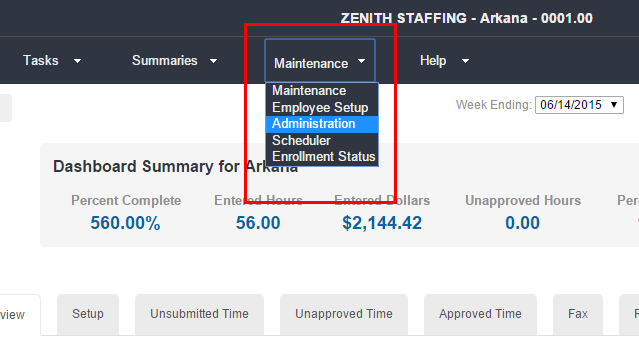
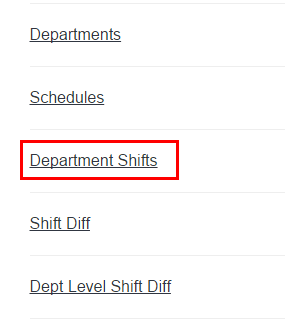
- Click on Department Shifts.
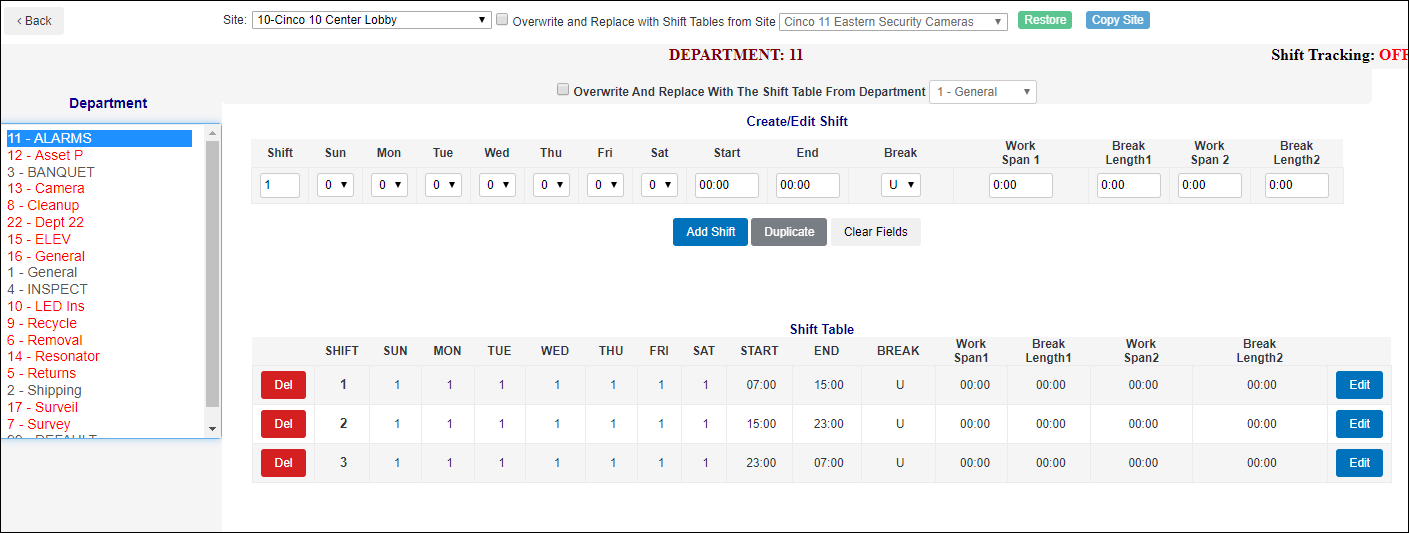
- Ensure that the correct clock (site) is selected in the drop down menu on the top left. Department Shifts may be configured differently based on clock site.

- Ensure that the correct clock (site) is selected in the drop down menu on the top left. Department Shifts may be configured differently based on clock site.
- Select the Department on the left of the screen.
- Departments listed in black have at least one shift defined.
- Departments listed in reddo not have any shifts defined.
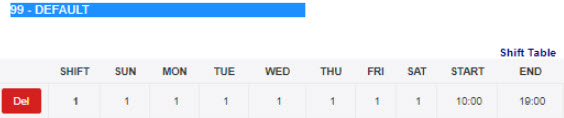
- Department 99 (Default) will apply to departments without a specified shift.
- Duplicating a shift in the same Department can cause payroll issues and tracking errors.
Every active department should at least have a general table shift setup to prevent payroll and timesheet error,

- Use the Create/Edit Shift table in the top center of the page to define a shift.
- For best results, try to limit the number of daily shifts to 3.
- For each day to which the shift applies, change the "0" to a "1" in the daily drop down menu.
- If you change the value to "2", this means that the shift will trim or break if a work span crosses from one shift into another. For example, if Shift 1 is defined as 7:00-15:00 and Shift 2 is defined as 15:00-23:00, and an employee works 7:00-15:15, the 7:00-15:00 portion of the work span will be assigned to Shift 1. The remainder of the shift (from 15:00-15:15) will be assigned to Shift 2.
- Shift 0: There is no current shift setup for this day. This means if they clock in they will not be set to a shift resulting in a 0 shift for that day which could result in payroll issues.
- Shift 1 - A shift is set up for this department for this day. This option is used for a general workday with no specific parameters. For example, you have a shift from 9:00 - 17:00. If employees clock in at 8:30 and out at 1750 it will show full-time. Hours that fall outside of the shift table will not be trimmed.
- *Shift 2* - Trims actual shift from all of the excess time. For example, you have a shift from 09:00 - 17:00. You clock in at 08:30 and out at 17:50. Shift will clock you in at 08:30 and out at 9:00. Then you clock in at 09:00 out at 17:00. It will then clock you back in at 17:00 and back out at 17:30.
- Enter the Start and End time for the shift (in military time).
- Select a break type (if applicable).
- U: Unpaid break. Typically used with auto breaks (employees will not clock in/out for an unpaid. Will automatically deduct the break length specified in the Break Length field after the length of time specified in the Work Span field.
- M: Minimum break. Typically used if employees will be using the clock to record break punches, but the lunch punches should all meet a specified minimum time regardless of the actual minimum. For example, if the minimum lunch length should be 25 minutes, enter :25 in the Break Length field to ensure that all lunch punches are at least 25 minutes. If the actual break time is greater than the length specified in the Break Length field, the actual time will be recorded. For best results, leave the Work Span field empty.
- Enter a Work Span if you will be creating an automatic break deduction.
- The work span will indicate the minimum number of hours that must be worked before the break is deducted. If you have two auto break deductions, always enter the shorter work span first and the longer work span second.
- Break Length specifies how many minutes will be deducted for an automatic break.
- If you have two auto break deductions, always enter the shorter break length first and the longer break length second.
- Click the Add Shift button to save your shift.
Your new shift will then appear in the shift table.
Deleting a Shift
- Select the department.
- Click the Del button to the left of a specific shift.
Editing a Shift
- Select the department.
- Click on Edit to the right of the specific shift.
- Update the values for that shift.
- Click Add Shift to save your edits.
Copying a Shift from Another Department.
You may also use the Overwrite and Replace tool to quickly copy Department Shifts from one site to another.
- Select the site you are Copying TO in the menu on the left.
- Click in the box to Overwrite and Replace with Shift Tables from Site.
- Select the site you are Copying FROM in the Menu on the right. You are going to copy FROM the clock on the right TO the clock on the left.
- When you're ready to copy the Department Shifts, click Copy Site.
- Click Restore to discard the changes.
Troubleshooting Steps
If an employee's hours are being incorrectly assigned to shift 0.
- Confirm that the values on the shift table is set to 1 or 2. (not 0)
- If the site the employee is assigned to does not have a shift setup, this will result in a 0 shift for their site on the TMC.
- To change or adjust the site shift on the employee's timesheet, please refer to the Change Site, Department, or Shift article on how to change shifts.
You cannot have shift-in & rounding on a clock simultaneously. This will cause clock-in issues. Whenever you are working with shift-in/shift-out windows, make sure you have department shifts set up to 1 or 2.


If Shifts are not loading correctly, please contact Bullhorn Support.