Data Privacy: Example Workflow
BH Automations is available to our customers as an optional premium product.Please reach out to your Invenias account manager if you would like to learn more about how Automations can transform your processes as well as your Client and Candidate engagement.
Overview
This automation will add People with a Data Privacy status of your choice (i.e., Declined, Withdrawn, Expired, etc) to a named Invenias Programme Record and set them as off-limits. An Invenias user can then review the list regularly and decide whether to request consent again or to process the deletion/data minimisation of the records. This action occurs according to your data privacy preference.
This example will be based on the Candidate entity. To demonstrate the efficiency of the feature, we will focus on Clients only by starting the automation using a Sales Contact list rather than a Candidate List.
To highlight the Candidate has entered a re-consent/deletion process, you could expand this workflow by adding Email notification steps to the Candidate Owner.
Steps to Create Date Privacy Sample Workflow
For this example, you will need to have a Programme Record already created in Invenias.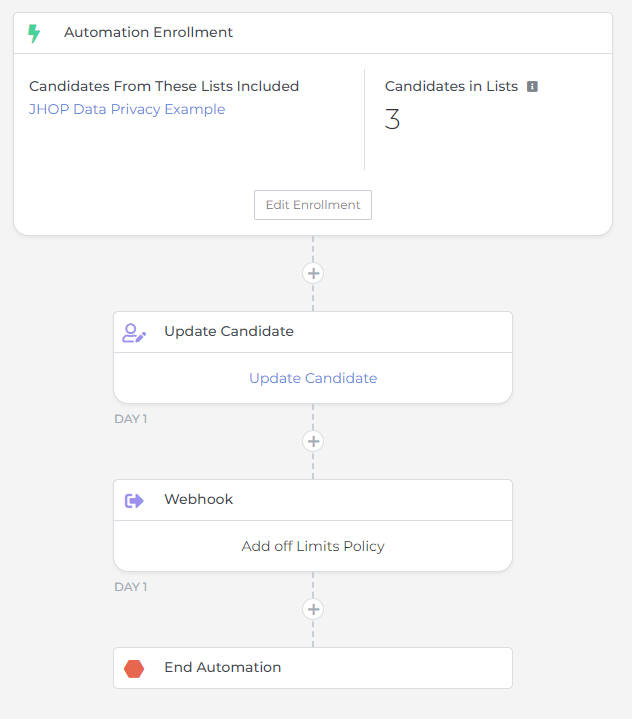
Create the Automation
- Create a New Candidate-based Automation (Candidate = Invenias People Records with Candidate ticked).
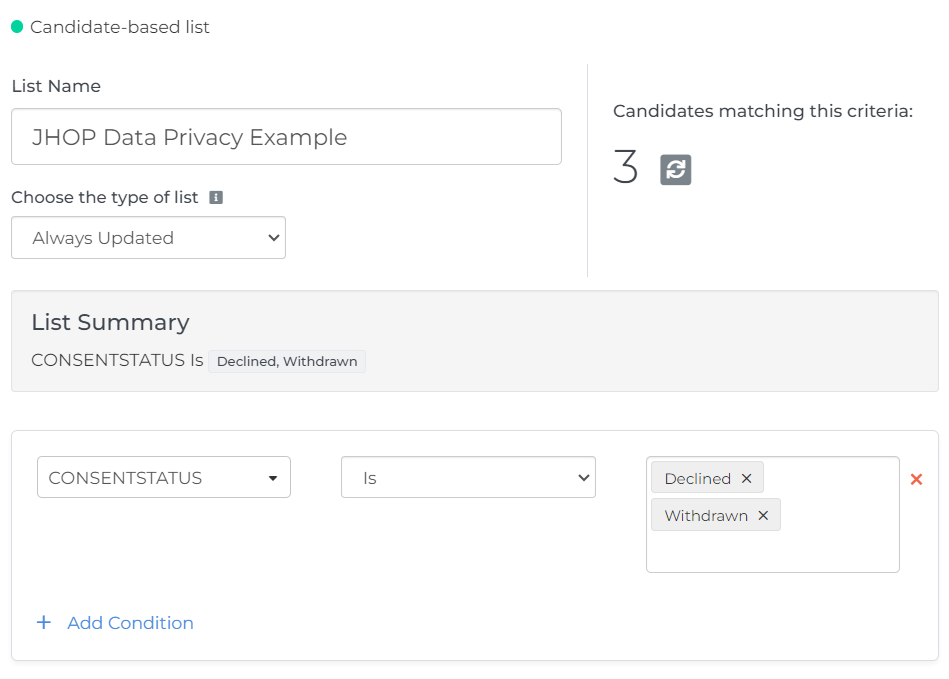
- Create a New List, like the example below:
- List Name: Enter your desired list name.
- For example, “Data Privacy Status Declined & Withdrawn”.
- List Criteria: Select the options for your desired condition:
- In the first drop-down, select Consent Status.
- In the second drop-down, select Is.
- In the third field, add Declined and Withdrawn.
- All three of these options can be customised to meet any desired conditions.
- You can add more conditions if you want to restrict which Candidates enter this automation.
- To add this restriction use fields such as Categories, Programmes, and Groups (Record Management groups).
- List Name: Enter your desired list name.
- In the List Criteria box, click Save.
- This action brings you back to the workflow screen.
- Click Save to close this window.
- This action saves the List to the workflow.
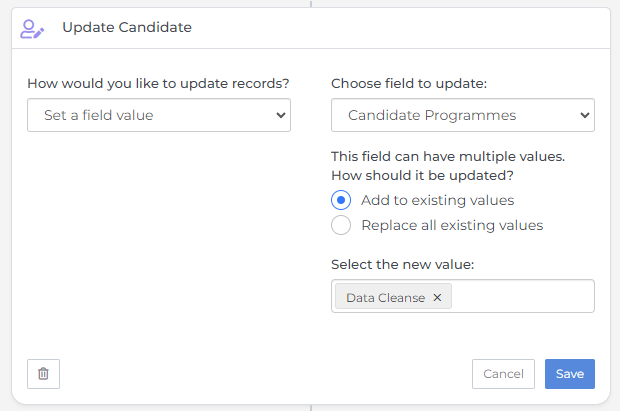
Update the Candidate
- Click the + icon and add an Update Candidate step.
- In How would you like to update records?, click the drop-down and select Set a field value.
- In Choose field to update, click the drop-down and select Candidate Programmes.
- Click Add to existing values.
- Enter the name of your selected Programme Record.
- Click Save.
Create the Webhook
- Click the + Icon and click Webhook then fill out the options as follows:
- Name: Enter the desired name for your webhook.
- For example, “Add Off Limits Policy”.
- Method: POST
- URL: api/herefish-webhook/off-limits
- Data:
- Enter the tags for the desired behavior, for example:
- Create a Policy with Block behavior: {“Behavior”:”Block”}
- Create a Policy with Warn behavior: {“Behavior”:”Warn”}
- Remove a policy: {“Behavior”:””}
- Enter the tags for the desired behavior, for example:
- On Failed Request: Select your preferred option from the drop-down.
- Name: Enter the desired name for your webhook.
Test
This step will test the settings in your automation.
- Click Test Webhook.
- You can choose to test with any Candidate that has been exported to .
- This will create an Off Limits policy for the selected Candidate or Contact.
- If necessary, be prepared to open the Invenias record and remove the policy.
- With a successful test, click Save.
Switch on the Automation
-
Click Automation Settings.
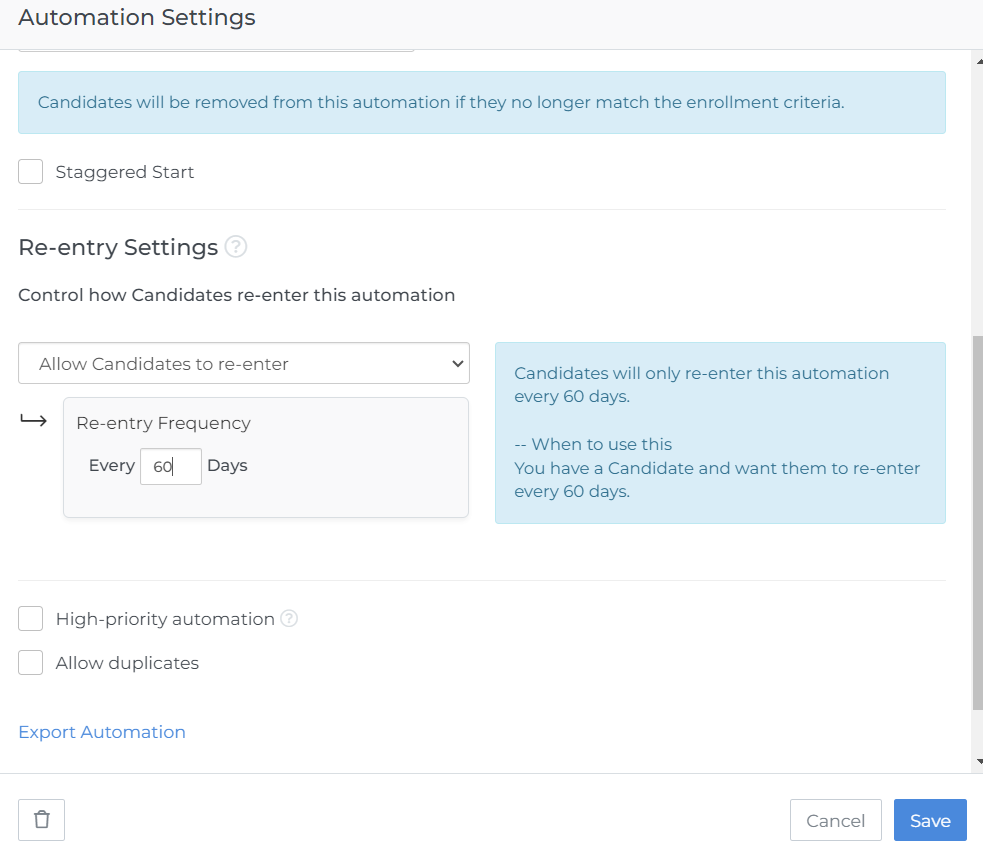

Best Practice: The Allow Candidates to re-enter option should be selected. This option accounts for when you need to send a person multiple consent requests periodically for different Assignments. Select the Re-entry Frequency for the number of days you would typically assign for Consent expiry periods.
- Click Save.
- Click the Green tick to switch on your automation!