Rule Example: If X, Set to Y
's Rules engine allows administrators to apply client-specific business logic to positions during the sync process. Rules are structured as If/Then statements and run after company, skill, and flex mappings have been applied. Rules can be assigned either account wide or at the credential level, and each rule is assigned a priority number that determines the order in which rules are applied.
Administrators with elevated permissions can create, edit, and delete rules directly in VMS Sync Admin Tools without contacting VMS Sync Support.
This article outlines how to use exactMatchTest.setTo to create a rule that changes values coming from the VMS into other values when they enter .
Use Case
In instances where you require extreme specificity, exactMatchTest ensures that only a value that exactly matches the one you enter in your rule will show in a certain way. If the value doesn't match exactly, the rule will fail and not be set. This is important in instances where information needs to be perfectly accurate to prevent mistakes.
For example, you may have multiple names in your VMS for different branches of the same hospital. Using exactMatchTest additionalDetails.branchNodeName ensures that only an exact branch name will successfully enter VMS Sync. You can then investigate any records that aren't entered correctly.
Rule Creation Steps
Do the following to create a rule that changes values coming from the VMS into other values when they enter :
-
Open the Rules Dashboard.
-
Click Create +.
-
From the top navigation bar, if appropriate:
-
Select the Credential (Optional) dropdown, and choose a Credential.
-
Select the Priority dropdown, and increase or decrease the Priority.
-
See Rules Best Practices for more information on Priority.
-
-
-
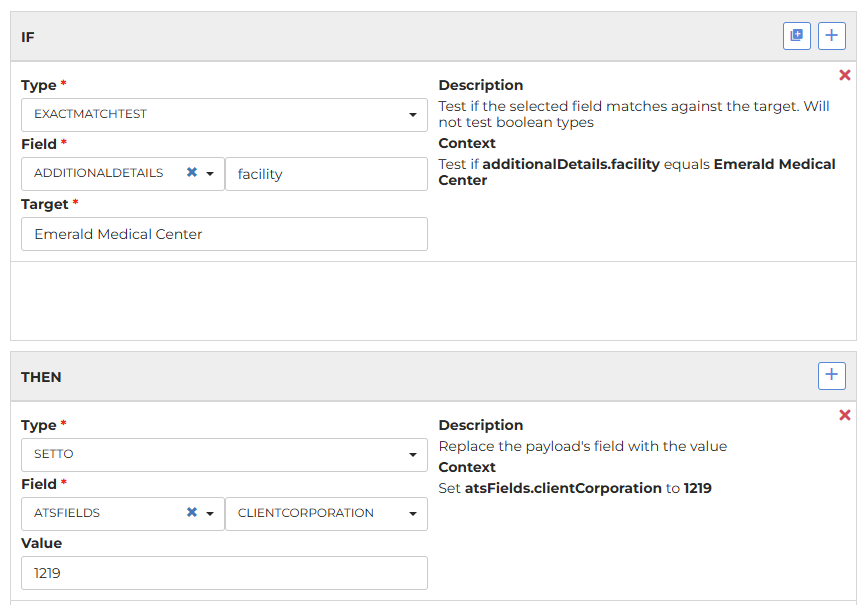
In the IF section, select exactMatchTest from the Type dropdown.
-
Select a parent field and a child field, if necessary, from the Field dropdowns.
-
Enter the exact value you're searching for in the Target field.
-
In the THEN section, select setTo from the Type dropdown.
-
Select a parent field and a child field, if necessary, from the Field dropdowns.
-
Enter the value you want the target from the If section to be converted to in the Value field.
-
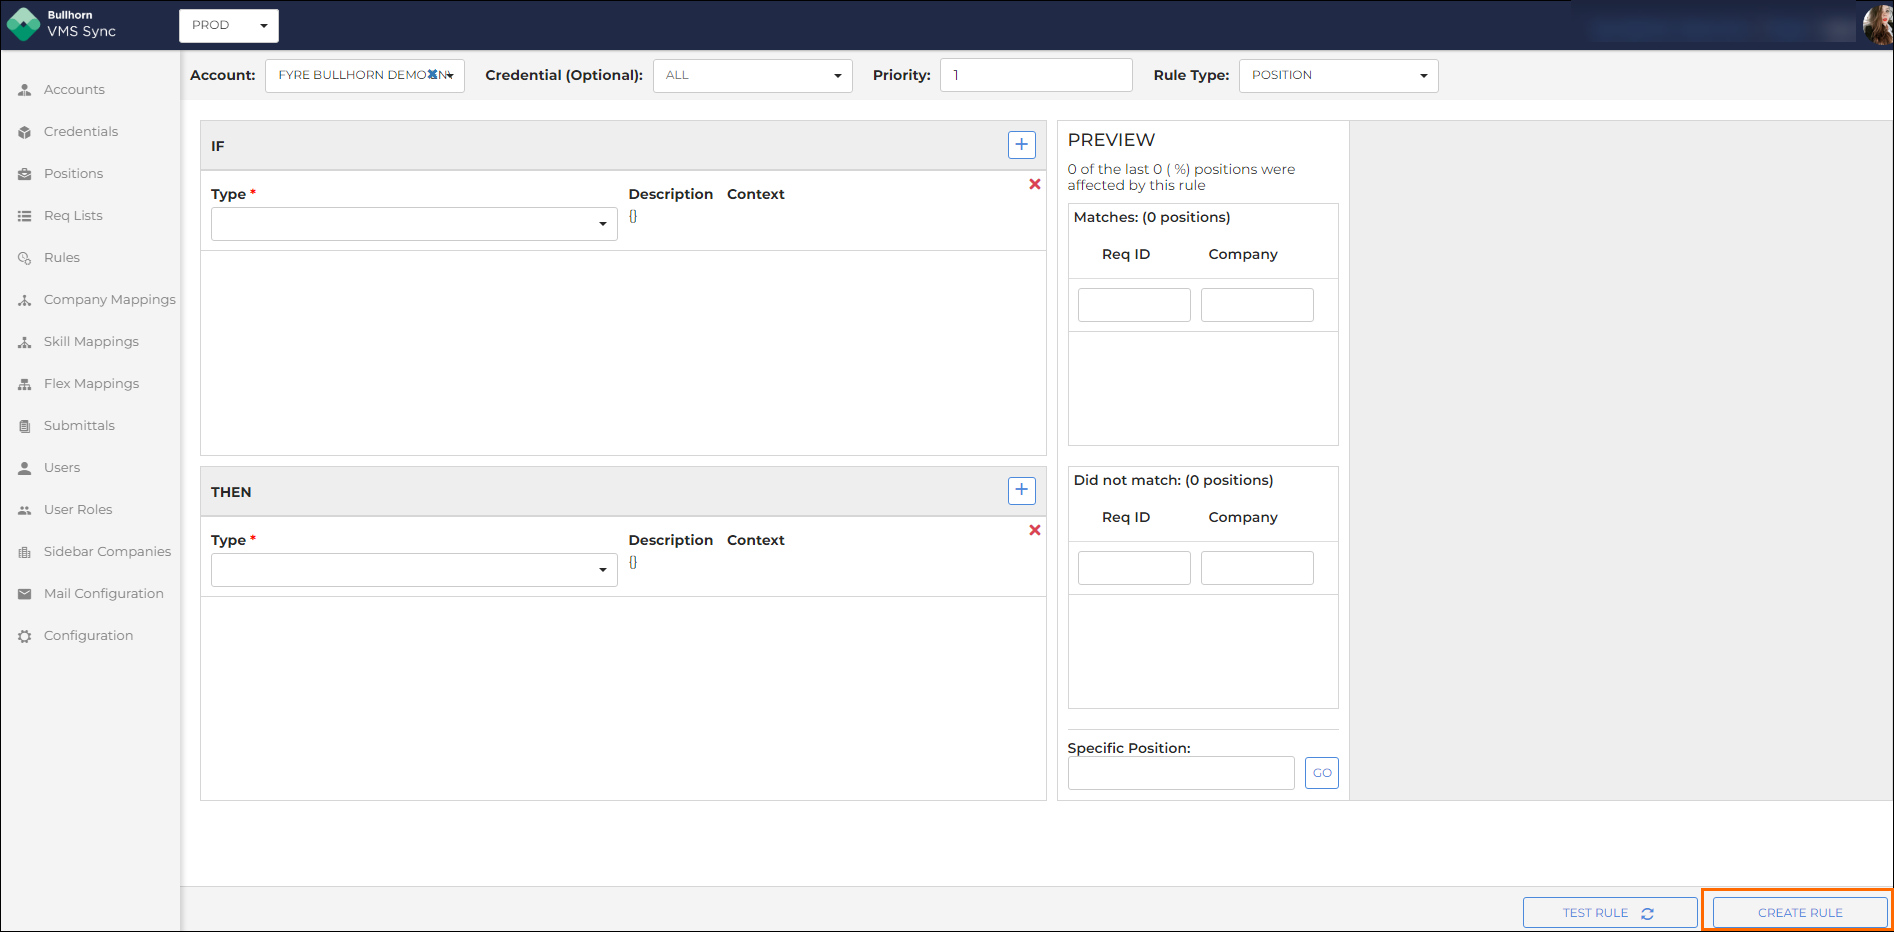
Click Test Rule.
-
The preview will show the recent positions the rule was applied to.
-
Click a result to view the JSON with highlighted values (IF = Blue, THEN = yellow).
-
You can use the Specific Position field to test a specific req ID.
The rule would look like this if you want to search for a facility called "Emerald Medical Center" and set the ATS Company ID to "1219" in .
-
-
Click Create Rule.
-
In the Purpose section of the pop-up, enter text to describe the rule and click Add Purpose.
-
Example: Priority = High

-
Values coming in from a VMS that match the "If" value you set, will change to the "Then" value you set up when populated in ATS.