Workflow for Authorized Representatives
Overview
As an Authorized Representative you will be responsible for verifying an employee's identity and completing Section 2 of their I-9 forms.
Use the below links to jump to a section:
Accessing the I-9
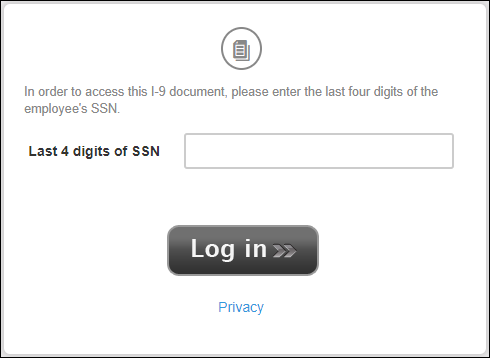
When an employee submits an I-9, you will receive an email with a link that is unique to that employee and their I-9.
| Note: This link is only active for 48 hours. A new link can be requested from an Onboarding Administrator. |
- To access the I-9, you must enter the last four digits of the employee's SSN as it appears on the I-9.
- You may need to obtain the last four digits of the SSN from the employee when they are present for the authorization process.
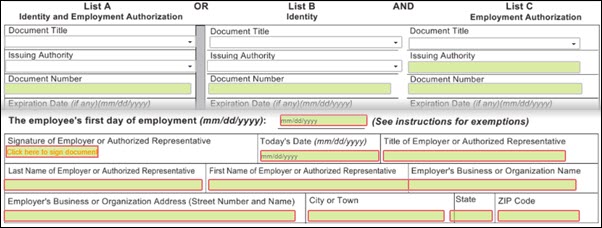
- Review the employee's identification materials from the List of Acceptable Documents and complete Section 2 of the I-9.
- The employee must be physically present.
- The physical documents need to be examined - no photocopies or pictures.
- The documents must be current.
Managing Documents
If you retain electronic copies of the employee's documents, they can be attached to the I-9.
If you do not retain copies, you can move on to the next section, Approving the I-9.
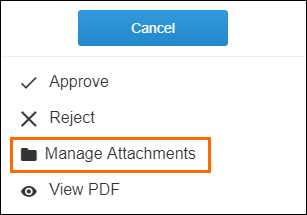
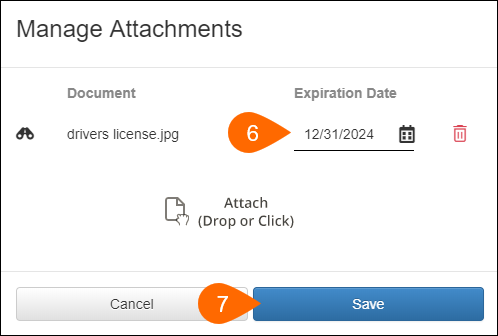
- Once the documents have been scanned or saved to your computer, select the Actions button at the top of the page.

- Choose Manage Attachments.
- Drag and drop the document file to the Manage Attachments dialog box.
- You can also select Attach to browse for the file instead.
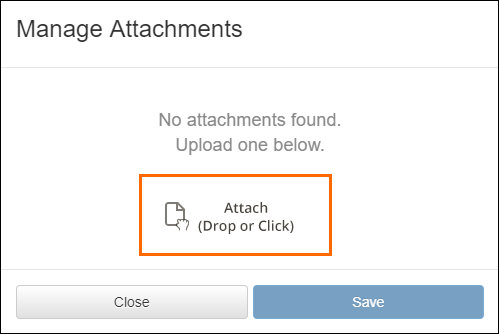
- Enter an expiration date for documents such as driver's licenses or passports.
- Once the file has been attached, select Save to confirm the upload.
Approving the I-9
Once section 2 is complete and the documents have been reviewed and saved, you can then approve the I-9.
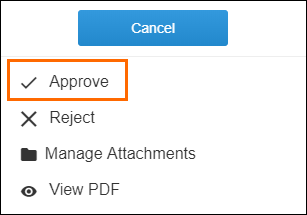
- Select the Actions button at the top of the page.
- Choose Approve from the menu.
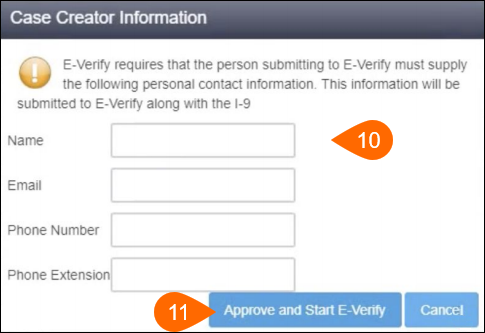
- In the Case Creator Information popup, enter in your name, email address, and phone number for confirmation purposes as required by E-Verify.
- Select Approve and Start E-Verify to continue.
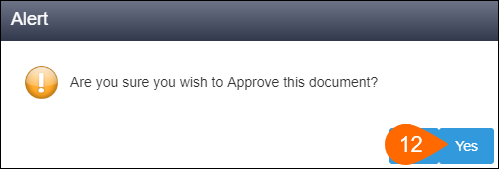
- Select Yes to confirm the approval.
- You have successfully approved the I-9! The Onboarding administrator will send the approved I-9 to E-Verify for authorization.
You can safely close the close the browser.
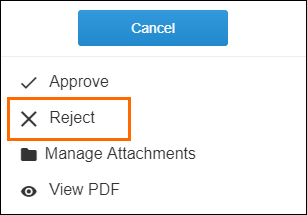
Rejecting the I-9
If you find any issues with the I-9 or the associated documents presented by the employee, you can reject the I-9.
Rejected I-9s will be sent back to the employee so they can make any necessary changes.
- Select the Actions button.
- Select Reject from the menu.
- Enter in a reason for rejecting the I-9.
- The reason for the rejection will be included in the email the employee receives.
- Select Yes to confirm the rejection.

- You will receive a new email requesting you to log in again once the employee has corrected and resubmitted the I-9.
Additional Resources
Additional documentation for completing the I-9 can be found at the following links: