Sending an Employee's I-9 to E-Verify for Work Authorization
Once the employee has submitted the I9 form, you'll need to complete the remaining fields, sign, approve, and send it through E-Verify for processing.
Steps
- Navigate to the Employees tab.

- Locate the employee that submitted documents and select
 next to their name to open their record.
- In the employee record, select Documents.

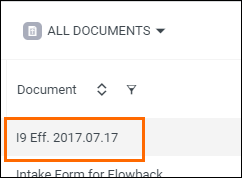
- In the employee's document list, locate the I-9.
There several options for narrowing your search:- The Showing filter lets you choose between showing all employee and placement documents, documents assigned to the Employee record, and documents assigned to specific placements.
- Each of the column headers can be sorted and/or filtered to locate specific documents more easily.
- Confirm the I-9 is in the "Submitted" status.
- If the status is either "Sent" or "In Progress," the employee has not yet submitted a completed I9.
- Choose
 next to the document to open it.
- Review the content of page 1 to make sure everything is in order.
- Select
 next to Next Page to jump to page 2.
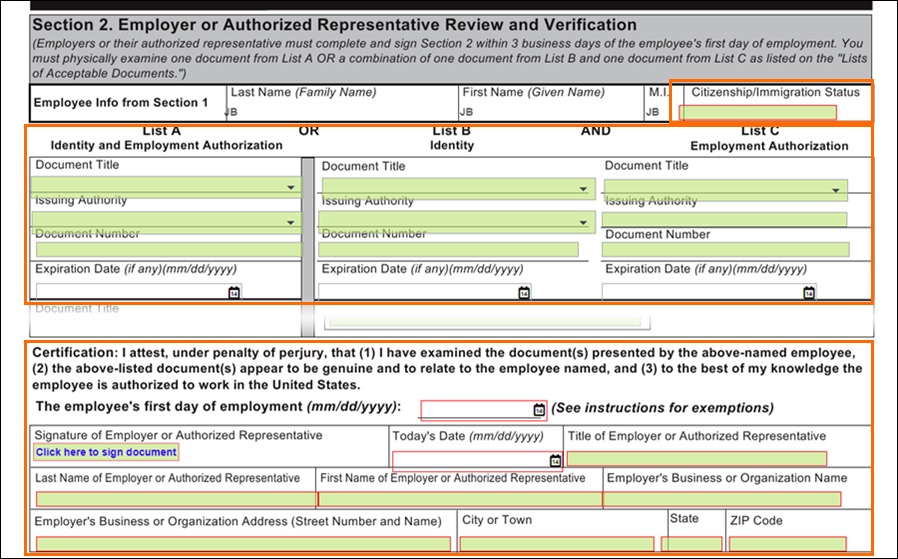
- In Section 2: Employer or Authorized Representative Review and Verification, complete the following:
- Citizenship/Immigration Status
- List A or List B AND List C identification information.
- Required certification information and signature.
- Press
 to confirm you changes.
- If you have AutoVerify enabled, select
 to automatically start the E-Verify process.
- If you have AutoVerify enabled, select
- Go to the E-Verify tab located below the I-9 document header.

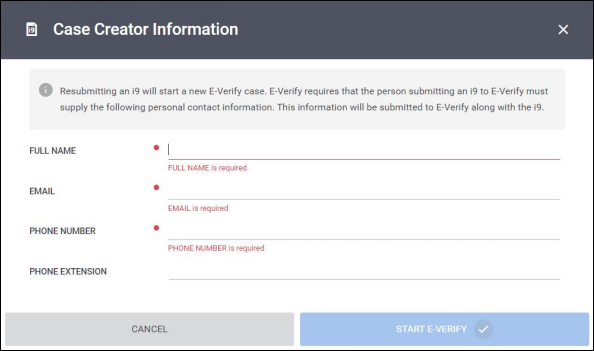
- On the Case Creator Information screen, enter or verify your contact information.
- Onboarding will automatically populate this information from your Admin record. Instructions for updating your Admin record can be found here.
- If you are ready to begin E-Verify processing, select
 .
.- If the employee has been verified before, the button will say Reverify Employee instead.
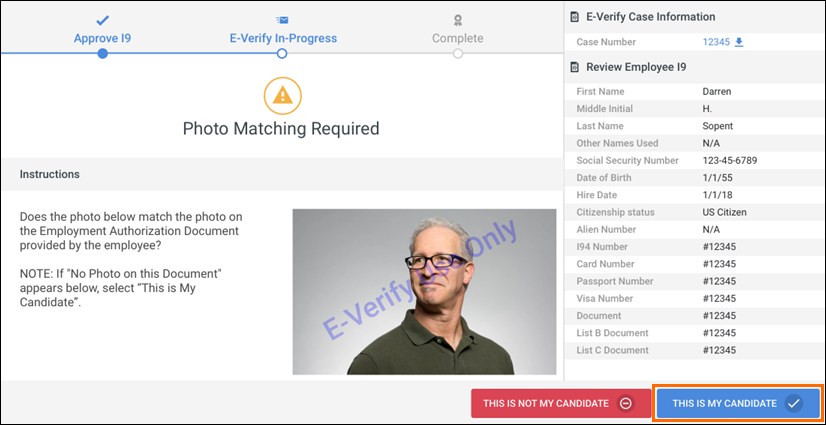
- If a photo match is required, select This is My Candidate, assuming the photo is correct.
- If an image comes back stating "Not Found," continue with the process by selecting This is My Candidate.
- If the photo does not match, select This is Not My Candidate.
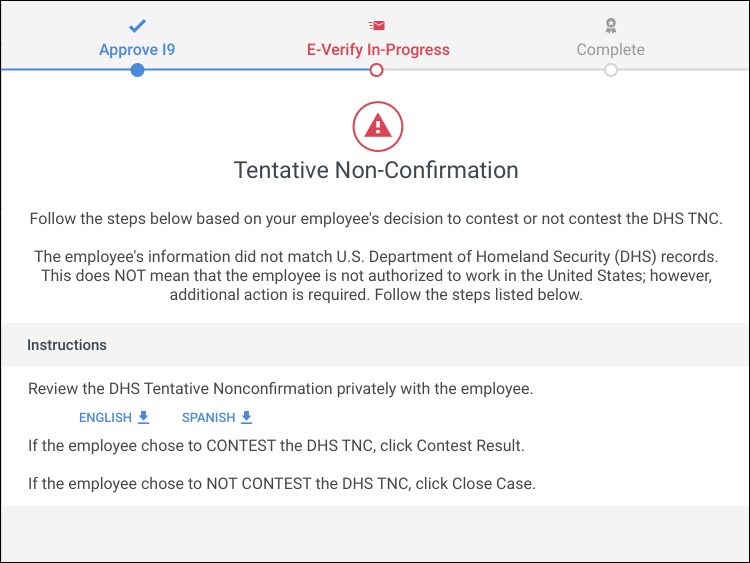
- See the Tentative Non-Confirmation section below for more information.
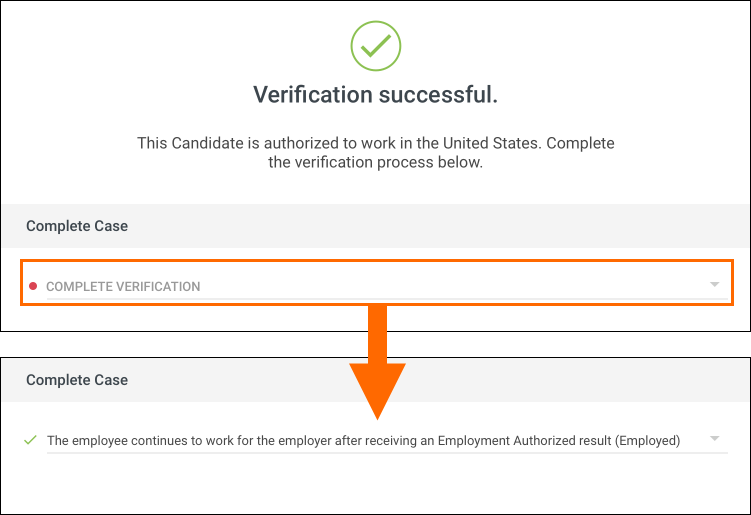
- On the Verification Successful screen, complete the verification process by selecting a reason for closing the case from the Complete Verification dropdown.
- Select
 to confirm your selection.
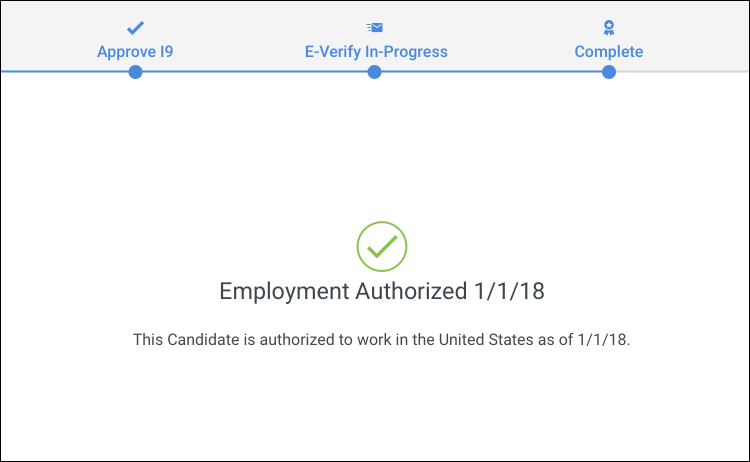
 - You will be presented with the Employment Authorized screen. You have successfully processed a case through E-Verify!
E-Verify Statuses
| Statuses | Notes |
|---|---|
| Draft | |
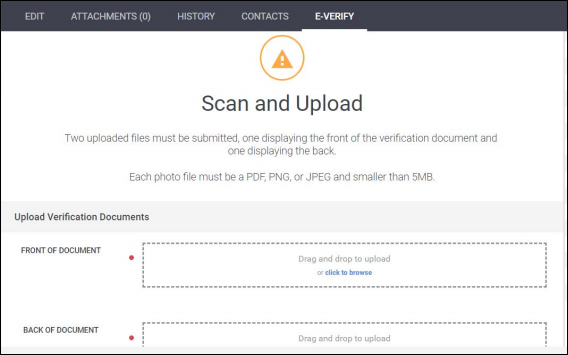
| Scan and Upload | See below for more information. |
| I9 Sent | |
| I9 In Progress | |
| I9 Submitted | |
| Review and Update Data | |
| Photo Matching Required | |
| Pending E-Verify Action | |
| Authorized | |
| Resubmit Case | |
| Final Non-Confirmation |
Additional Information
Was this helpful?
