Create a Template for Resume Manager
Overview
This article describes how to create a basic formatted resume template to use in . Once a Candidate resume is formatted it will show your company's logo along with the Candidate's name and resume body but all personal details (phone number, address, etc) are removed.
Create a Basic Template
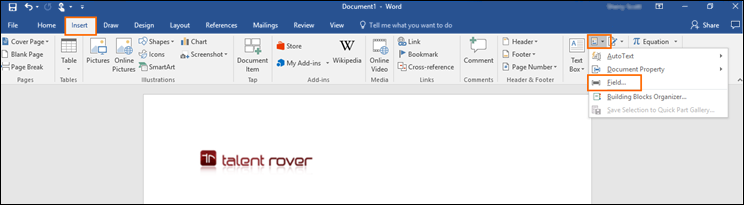
To start, launch Microsoft Word and create a new Word doc. This will be your template. It can have a header and footer in it along with a logo. Next, add two merge fields for the Candidate's name and resume body:
- Click Insert.
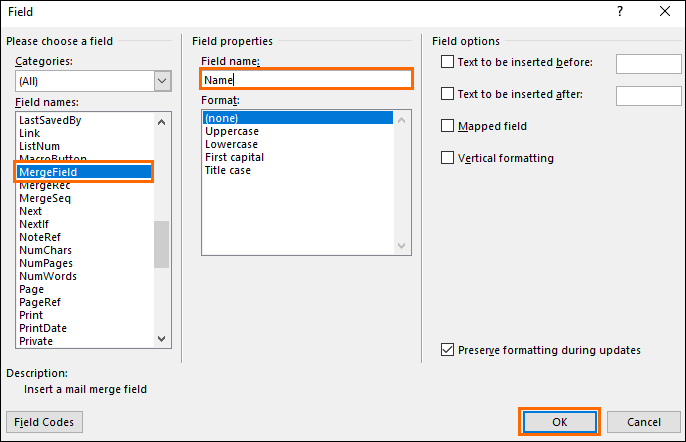
- Add a Merge Field for the name. Click the Quick Parts drop down.
- Select Field.
- The Field pop up window displays.

- The Field pop up window displays.
- Scroll down in Field Names and select Merge Field.
- Type "Name" (capitalized) in the Field name.
- Click OK.
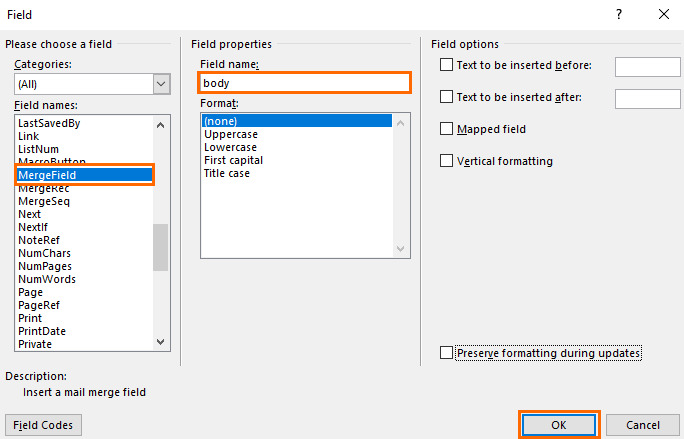
- Add a Merge Field for the body. Click the Quick Parts drop down.
- Scroll down and select Merge Field.
- Type "body" (lower case) in the Field name.
- Click OK.
- Save the template to your computer.
Once the template is saved, you can change the font size and position of the Name or body sections by selecting them and using the standard text size and align commands.
Upload into the
- From Classic, click All Tabs.
- Scroll down and click Templates.
- Click New.
- Type the name of the template in the Template Name field. This is the name that will display in .
- Click Save.
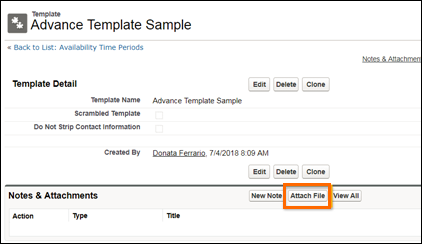
The Basic Template screen displays.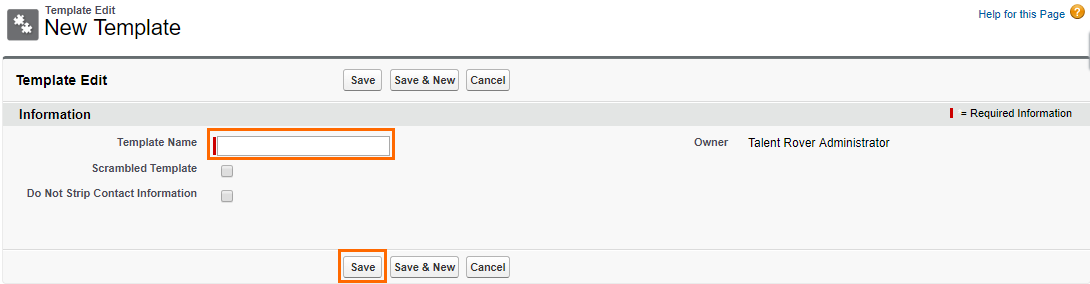
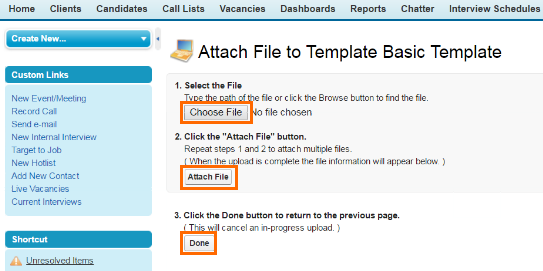
- Click Attach File.
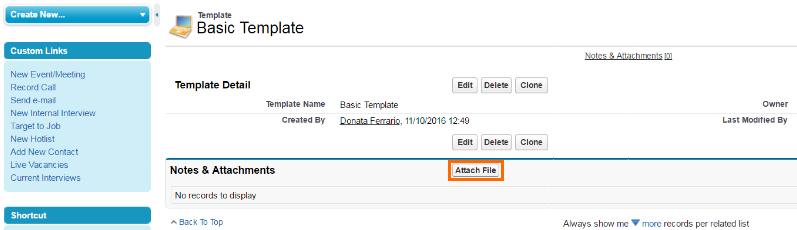
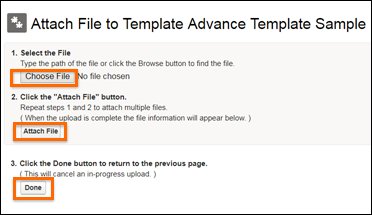
- Click Choose File and select the template you created.
- Click Attach File.
- Click Done.
Use the Template
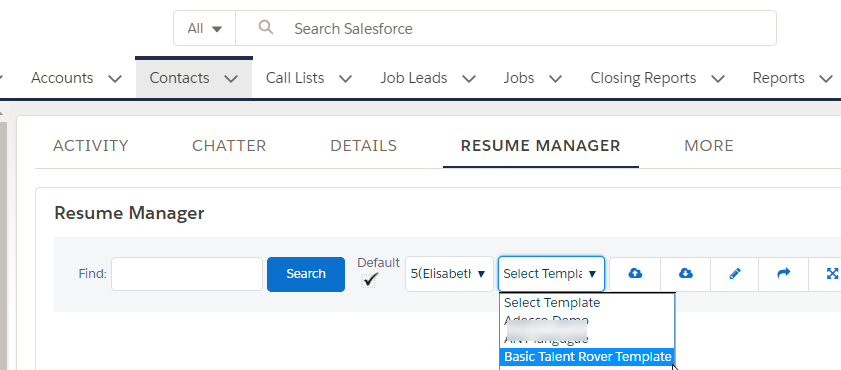
Navigate to any existing Candidate record and select the tab.
- Click the Select Template drop down.
- Select the template.
- Click the Create Formatted Resume button.
- The Formatted Resume now displays.
Create an Advanced Template
To create an advanced template, follow the same process as for the basic template, and then add merge fields to the template that reference fields in the candidate's Contact record. This allows the template to include more information about the candidate aside from just their resume.
Example
This example template shows Distance Willing to Travel and Skills in addition and the Name and body (resume) fields from the basic template. To do this, include merge fields linked to the corresponding Contact record fields.
Add the Merge Fields
- Select Insert.
- Add a Merge Field for the Contact field you want to add. Select the Quick Parts drop down.
- Choose Field.
The Field pop up window displays. - Scroll down in Field Names and select Merge Field.
- Type the API name of the Contact field under Field name. For example, if you want Distance Willing to Travel to be shown in the formatted template, enter TR1__Distance_willing_to_travel__c.
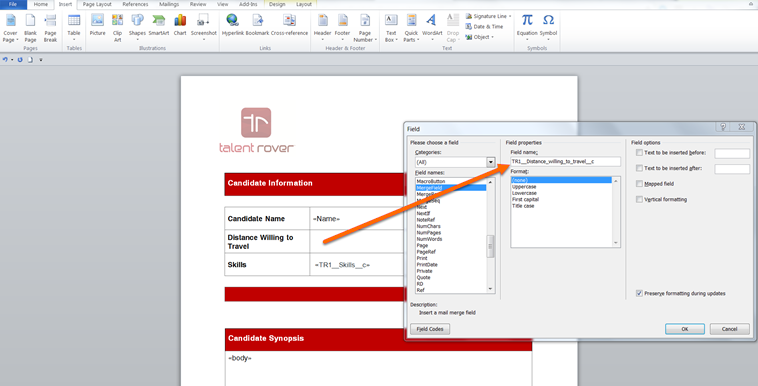
- Click OK.
- Repeat the same steps for each Contact field you want to add to your template.
Upload into the
- Navigate to Classic, select All Tabs.
- Scroll down and select Templates.
- Select New.
- Type the name of the template in the Template Name field. This is the name that will display in .
- Click Save.
The Template screen displays.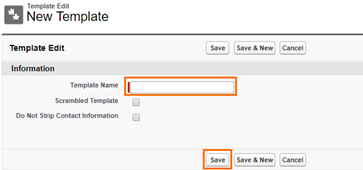
- Select Attach File.
- Select Choose File and choose the template you created.
- Select Attach File.
- Click Done.
Additional Template Information and Options
- Any Contact field (including Custom fields) can be used in the template except for the standard Address fields, due to the way they're formatted.
- Only fields from the Contact object can be referenced. No other object is supported.
-
Upload of the template files must be done while the Org is in Classic mode.

This functionality uses Attachments, which is not supported in Lightning.
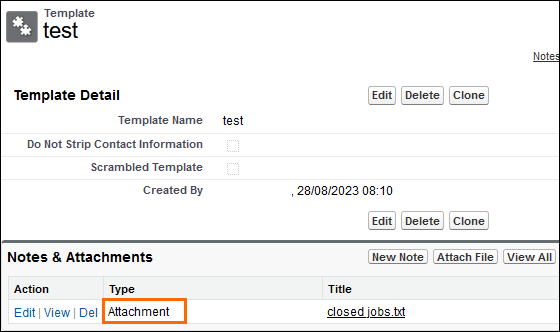
- After the upload, ensure the file displayed in Notes & Attachments lists the Type as Attachment.
- If the file is not uploaded as an attachment, see Files are uploaded as Salesforce Files and not as Attachments.
- If the file is not uploaded as an attachment, see Files are uploaded as Salesforce Files and not as Attachments.
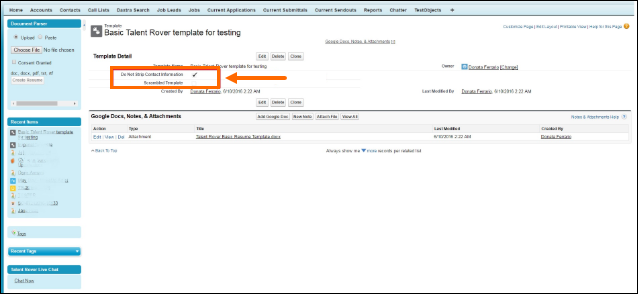
- To have a template that does not remove personal details, mark the Do Not Strip Contact Information checkbox on Template page layout.
- To have a template that encrypts the name of the candidate when emailed to a client via the Share button or email in , mark the Scrambled Template checkbox on Template page layout. The name will also be scrambled in the attachment name.

This will not work if the name is in the document's header.
Admin Note:
To enable these functionalities:
- Go to All Tabs > Templates > Click the name of your template.
- You will see the two checkboxes (pull them on the page layout if they are not already there).
- Do Not Strip Contact Information.
- Scrambled Template.