Manage Consent via Contact (Salesforce Classic)
Overview
A button called Send Consent is available on the Contact page to allow users to send Consent requests to one or more Candidates from a . This articles walks you through how to manage consent via the Contact
Using the Send Consent Button
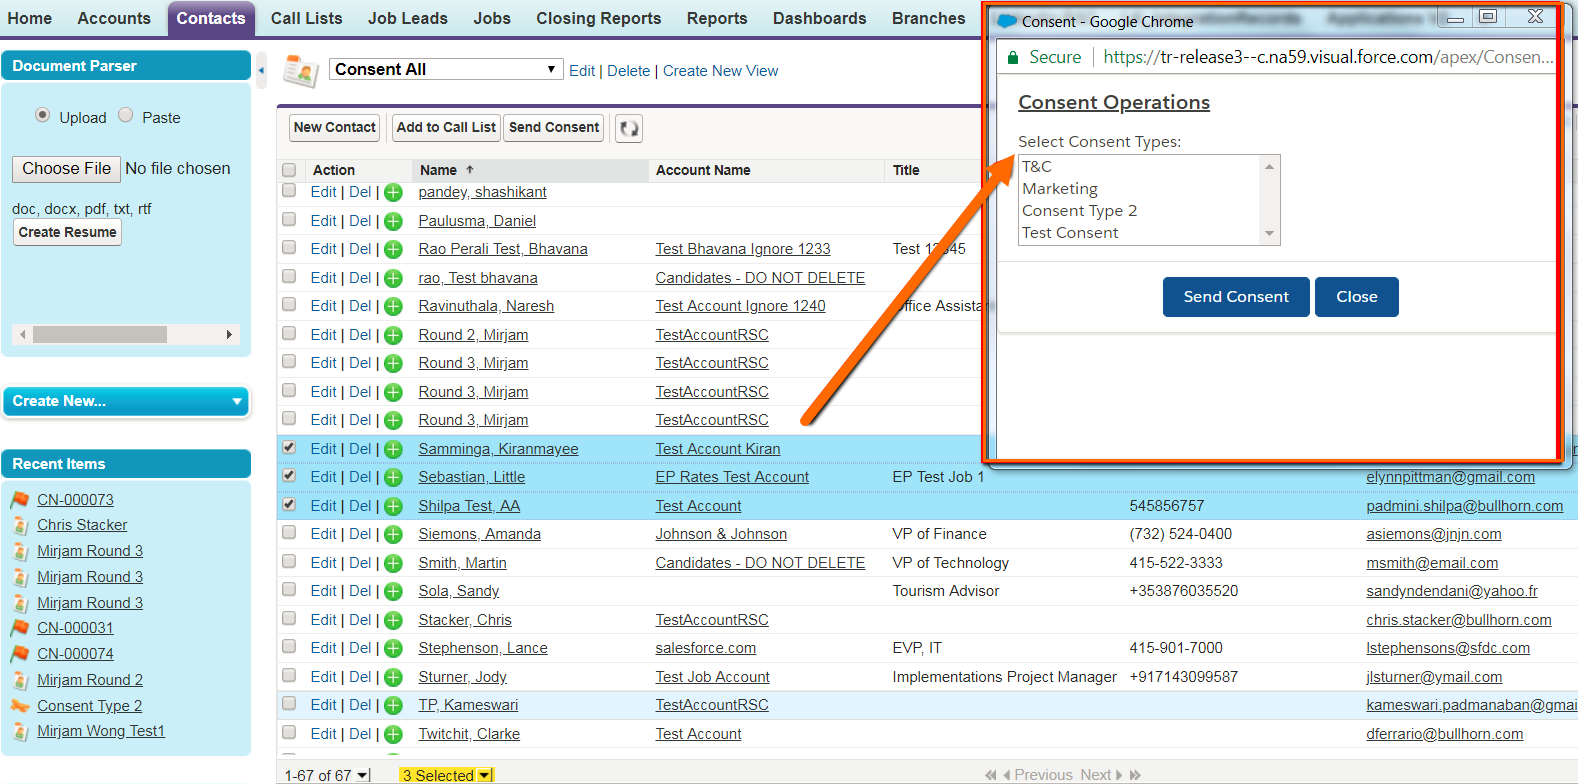
- Select the desired candidates from a Contact .
- Click on the Send Consent button.
- Select the required s from the pop up that appears and click on Send Consent. The Candidates will receive an email with a request to accept or reject consent.
Admin Note:
These are the steps for adding the new button:
- Go to Set up > Build > Customize > Contacts > Search Layouts
- Click on the Edit link next to Contact.
- Add the Send Consent button to the selected list and Save.
Using Consent s
Create a new
- On the Contact page click Create New View.
- Enter a Name and desired filters.
Search for Candidates who have been sent a specific
- Click Edit next to a or create a new view
- Add a Filter for the Consent Type field
- Example: includes "ConsentType1"
View Candidate responses status for a specific
- Click Edit next to or create a new view
- Add a Filter for the Response Status field
- Example: Response Status includes "ConsentType1 – I Consent"
Was this helpful?