Admin: Power Notes Viewer Configuration
These steps will configure the Power Notes Viewer for the Table View.
Add PowerNotes/Power Share Table View to a Page
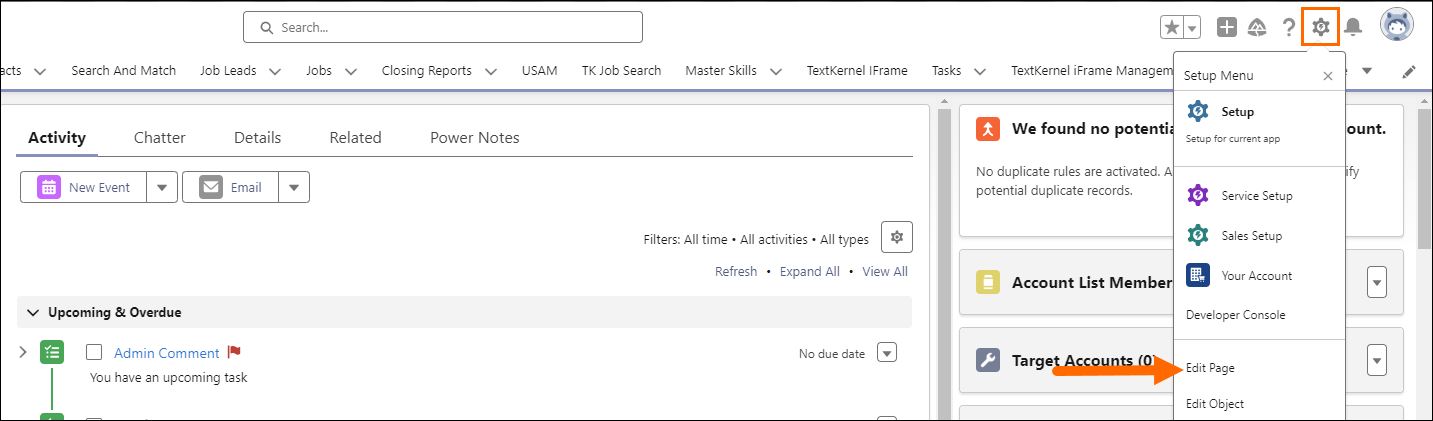
- Navigate to the page where you want PowerNote/PowerShare Table View to be displayed.
- Click the Setup icon and select Edit Page from the dropdown.
- In the Lightning App Builder, decide where you would like your Power Notes Viewer to appear on the page. over over the section until a blue box appears, then hover over the minus sign to show a plus sign. Click the plus sign to select the location of the Power Notes Viewer.
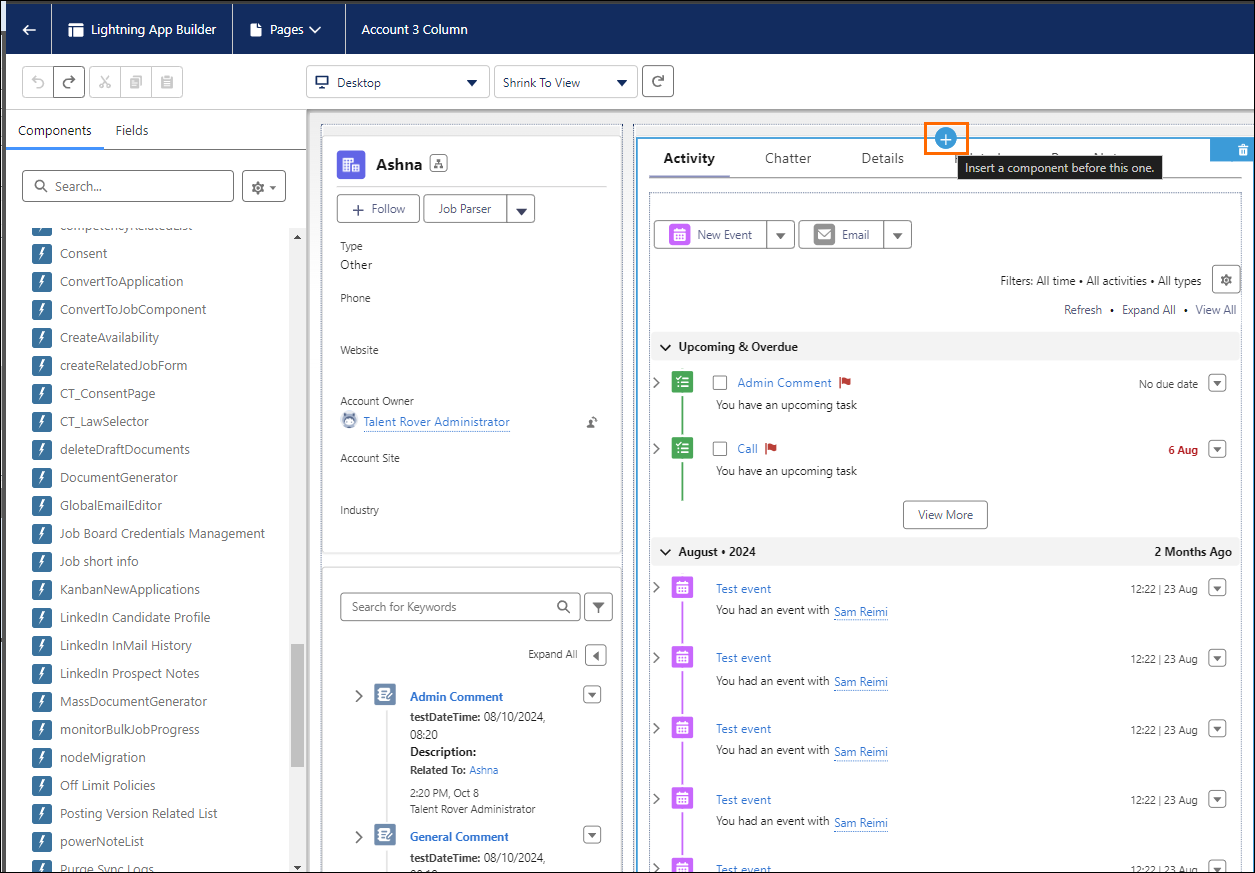
- Under Components > Custom Managed, click the PowerNotes component (powerNoteList).
- In the right-side pane, there are new fields available for completion.
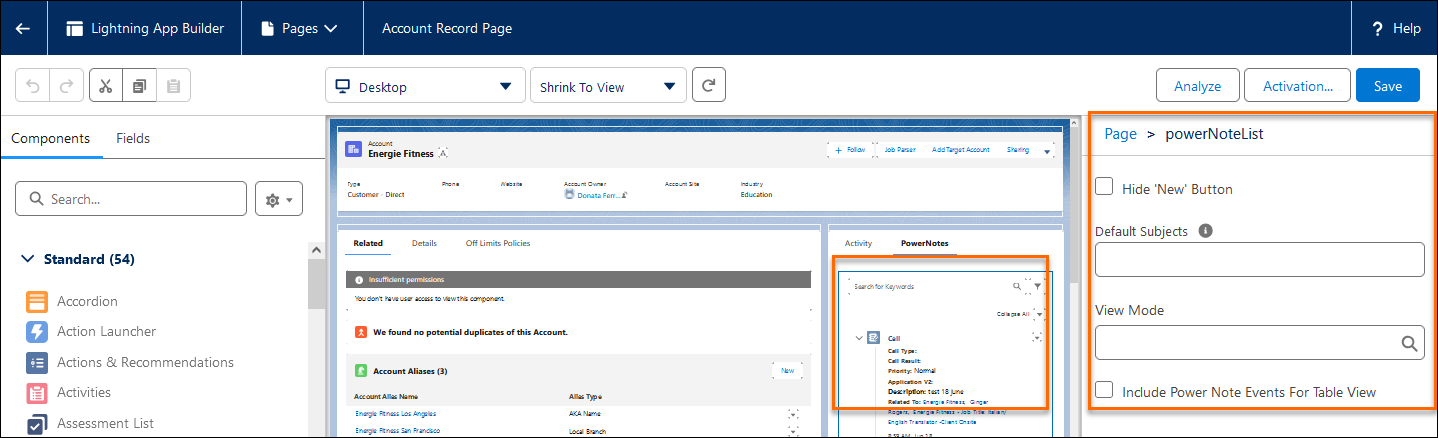
- Click the View Mode dropdown and select Table View.
- If your Org uses Event-based PowerNotes (as opposed to Task-based), you might want to select the Include Power Note Events For Table View checkbox.
- Click Save and Activate.
It is not recommended to configure Admin Filters (Default Subjects) for the powerNoteList component when Table View is enabled. When displaying large data volumes (as is the case for Table View) this will negatively affect the page performance.
Configure Table View Columns
-
Table View uses two fieldsets, both called TR1__Power_Notes_Tableview
-
One is on the Task Object, the other on the Event object.
-
-
Task and Event PowerNotes are shown in different Tables on the Table view.
-
PowerShares can only be tasks and are shown in the Task Table View.
The following three fields are available to be selected from the field sets but when added to Table View they display slightly differently from the same field on the Task/Events objects:
- Related_Records__c: This field exists on both the Event and the Task object and shows on the Table view as a list of all related records
- Power_Share_Source_Name__c: This field exists only on Task and is only supported for PowerShares. On Table View it shows the name of the ‘source’ as a clickable link
- Original_Power_Note__c: This field exists only on Task and is only supported for PowerShares. On the Table view it shows as a link to the Powernote the Powershare originated from
It is also possible to enable the end user to configure the columns showed in Power Notes Table View:
- Go to
- Next to Power Notes Supported Object, click Manage Records.
- Next to the desired custom metadata type record (EX: Job), click Edit.
- In the Table View Available Task Fields, enter the name of the task field set that contains the fields/columns available to the end user.
- Click Save.
Repeat the above steps for each supported object custom metadata type record.