Managing Existing Users
This article contains information on how to manage user options such as access groups, email addresses, user details, deactivating or reactivating access, and more.
Selecting a User
- Select Maintenance > Administration.
- In the Administration menu, select User Setup.
- Use the Search For User section to search and locate the admin that you need to manage. If your search returns results, the matches will be displayed in a small window that appears.
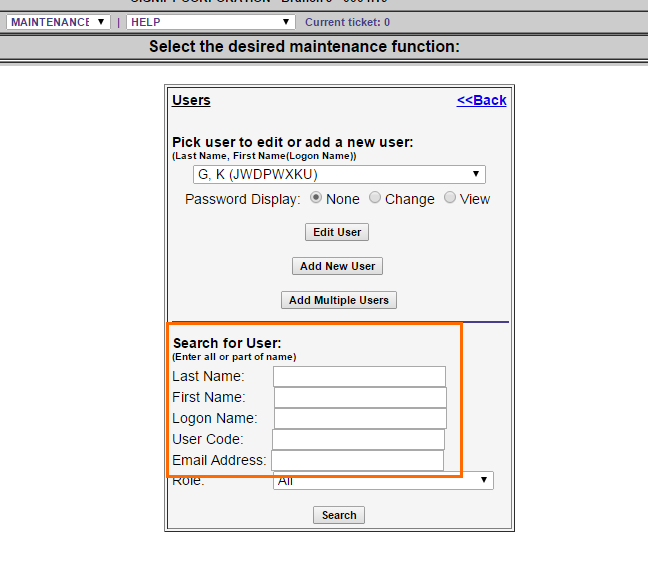
- In the results window, select a Password Display option:
- None: The User's password cannot be changed when making updates.
- Change: The User's password can be changed when making updates. The following colors outline the status of the user account:
- Amber: Active but not assigned to any access groups. These users cannot login until at least one access group is assigned.
- Black: Active and assigned to access groups. These users can login.
- Red: Inactive. These users cannot login. Users become inactive by default after 90 days without log ins.
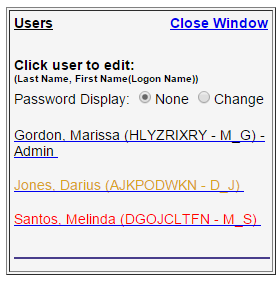
- Select a User to edit.
Updating a User
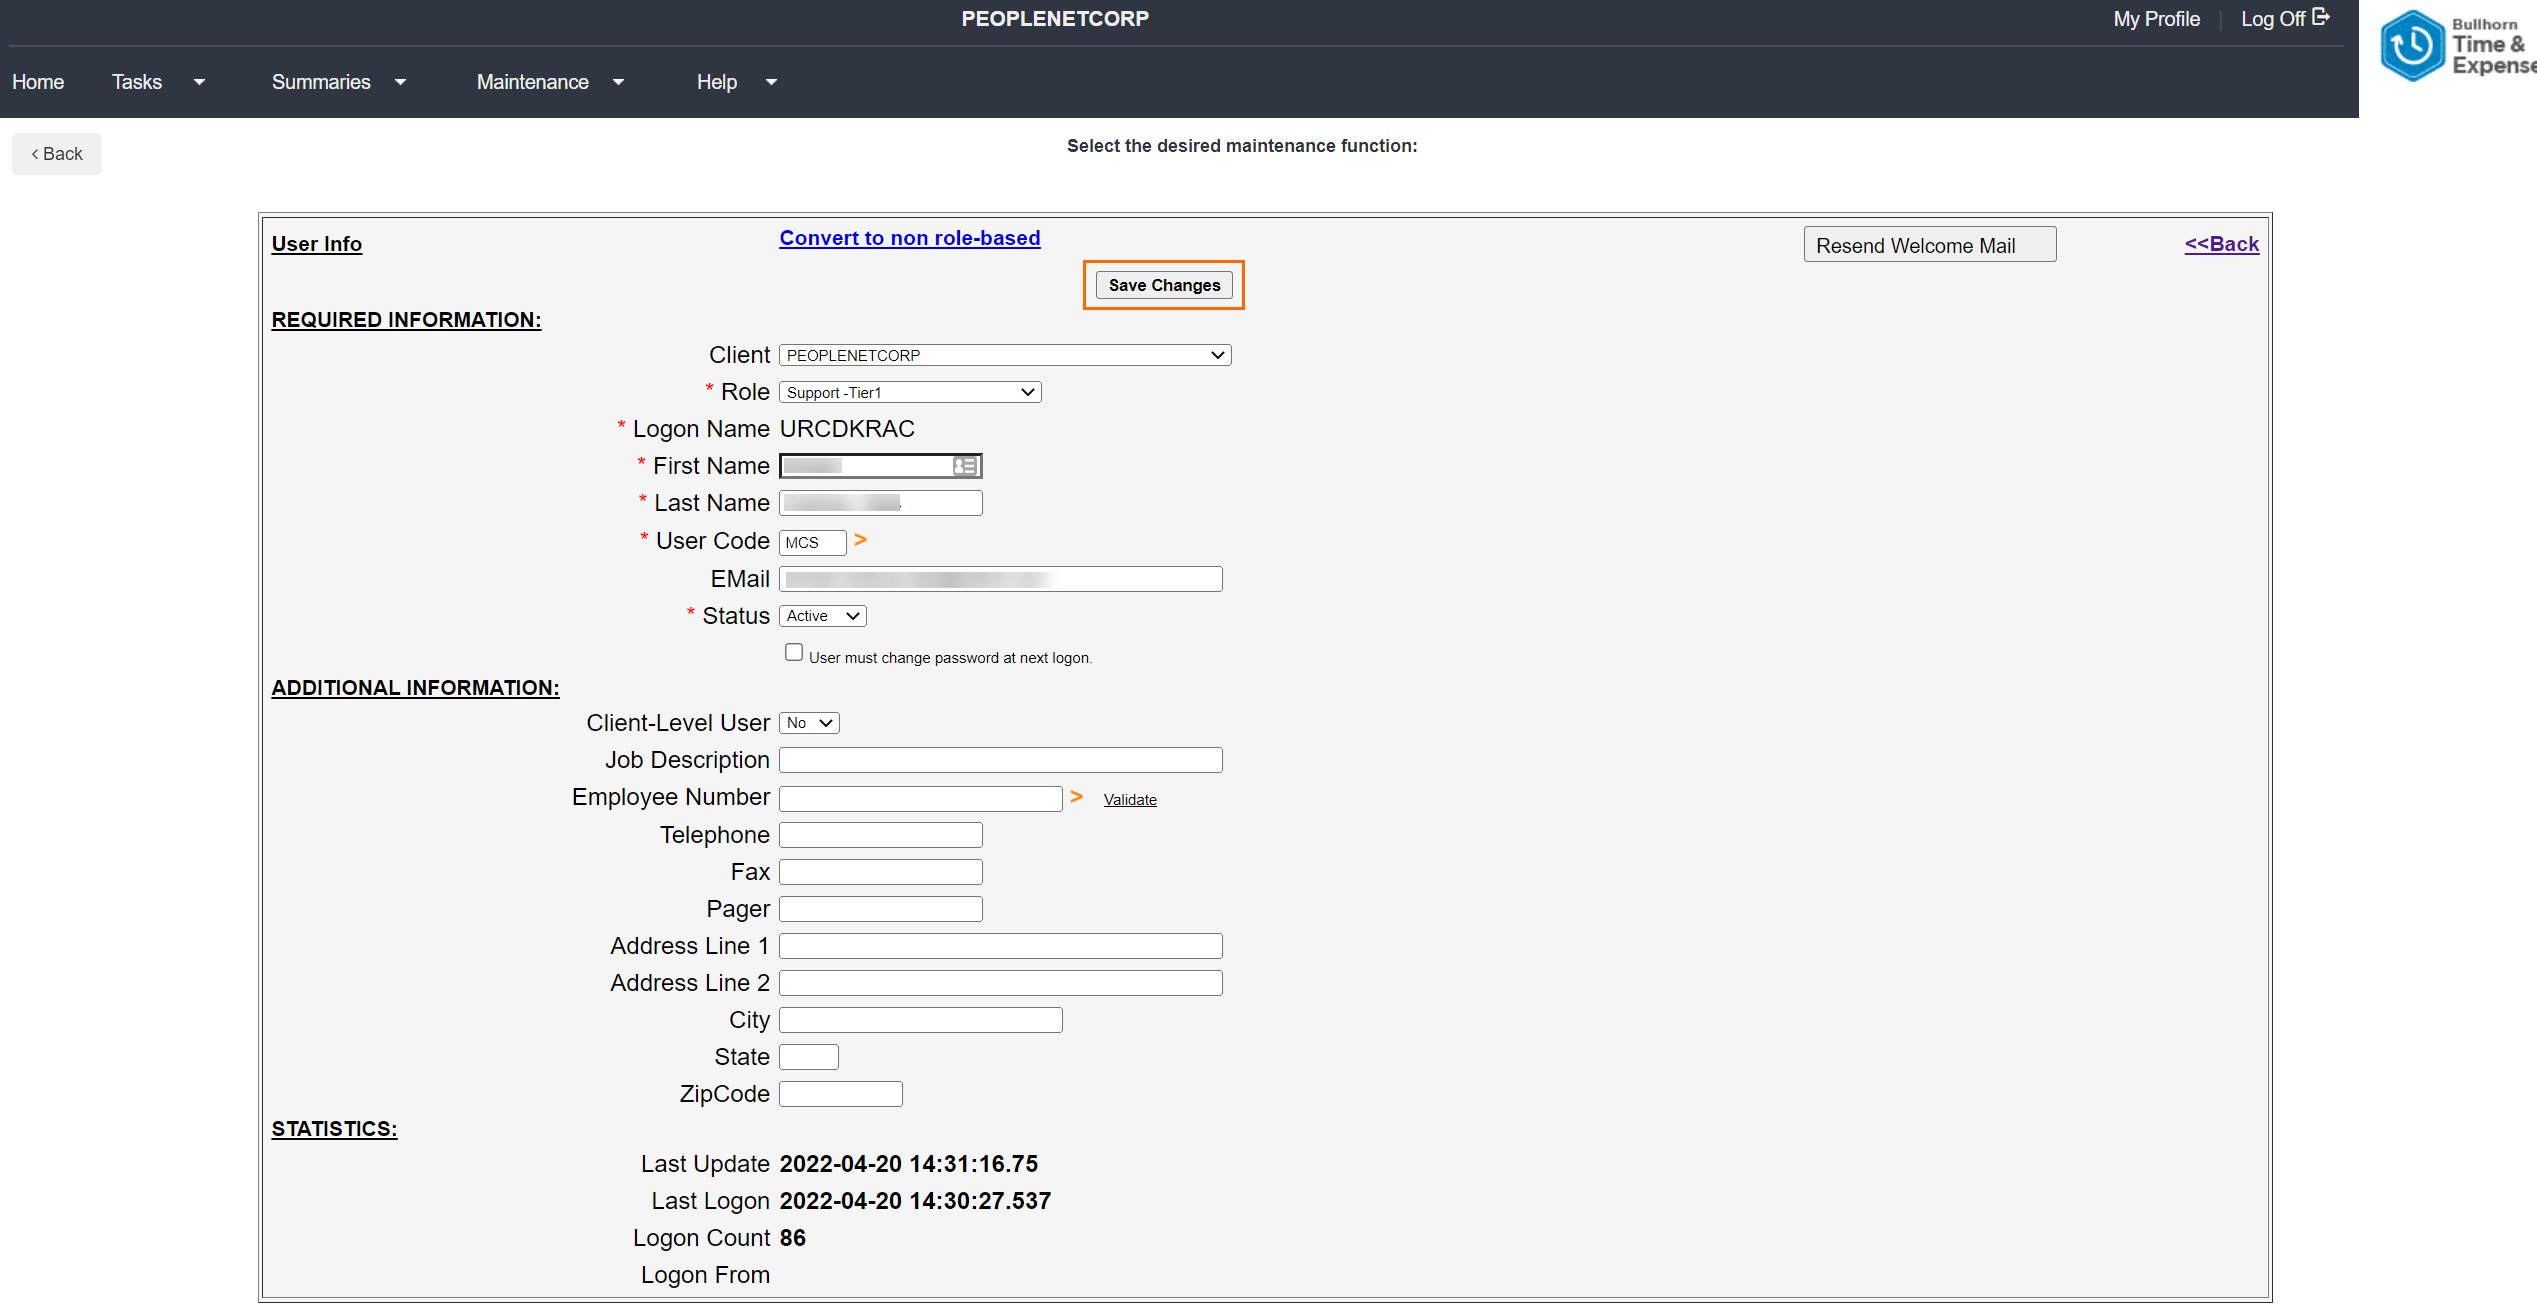
- After selecting a User, make any necessary updates to the fields displayed in the Required Fields section. You may update:
- Role: Determines how much privilege an admin user is allowed when navigating .Open the drop down menu to make a selection. See Common User Roles for more information on roles in Bullhorn Time & Expense.
- First & Last Name: Enter the first and last name of the User. It is important to enter correct details to allow proper look-up of details and even future password resets.
- User Code: Enter the initials of the User. This code acts as a visible audit trail and ties the User to time card edits, fix punches, and more.
- Email: Enter the email address of the User. This email address is used as a username when logging in to .
- Status:
- Inactive: Prevents the User from logging in.
- Active: Allows future logins.
- Job Description: Enter Web or Clock in this field to help distinguish it during login for Users with access to multiple admin profiles.
- Select Save Changes to proceed.
Assign User Access Groups
Access groups determine which details an admin user will be able to manage after signing in to . Depending on your organization, access groups may be based on group name, customer name, branch number, client number or more.
Active User's must always be assigned to at least one access group.
- Select Maintenance > Administration.
- In the Administration menu, select User Setup.
- Use the Search For User section to search and locate the admin that you need to manage. If your search returns results, the matches will be displayed in a small window that appears.
- In the results window, click on the user record.
- You must click Save Changes to proceed to the next step (even if no changes were made).
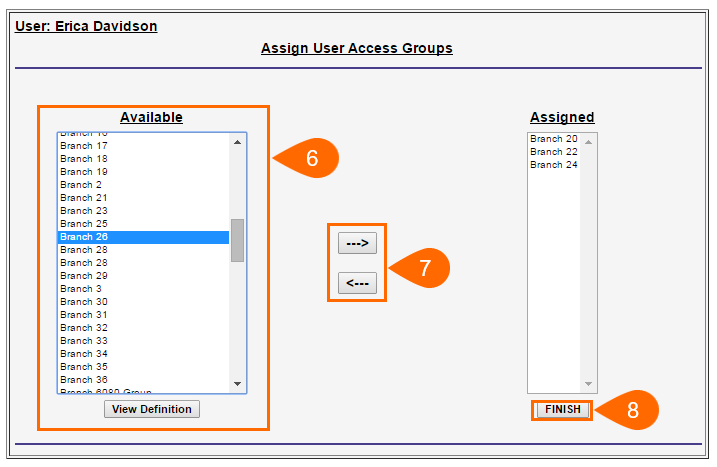
- Locate and select an access group from the Available section. You can:
- Add more than one access group by pressing and holding the CTRL key on your keyboard while making your selections.
- View more details about an available access group by selecting View Definition.
- Use the right pointing arrow to move your selected access groups to the Assigned access groups section.
- If you need to remove an access group, select the access group in the Assigned section and use the left arrow to move the access group back to the Available section.
- If you need to remove an access group, select the access group in the Assigned section and use the left arrow to move the access group back to the Available section.
- Select Finish to save your changes.
Was this helpful?