Placed Candidates NPS Survey
is an optional premium product. Please contact your account manager if you would like to learn more about how automations can transform your processes and your client and candidate engagement.
Overview
This article explains how to use to create an automation that sends out NPS surveys to placed candidates, providing an opportunity for candidates to rate their overall experience through the placement process.
Steps to Create a Placed Candidates NPS Survey Automation
To create your Placed Candidates NPS Survey automation, follow these steps in :
Create the Automation and List
- Create a New Placements based automation, selecting Date Based.
- Create a New List using the filter criteria "Placement Status Is OfferAccepted" (or another placement status of your choice) and "Placement Date Added After" with a date of your choice. We've included the recent placement date added filter to ensure only newly added placements will enter the automation.
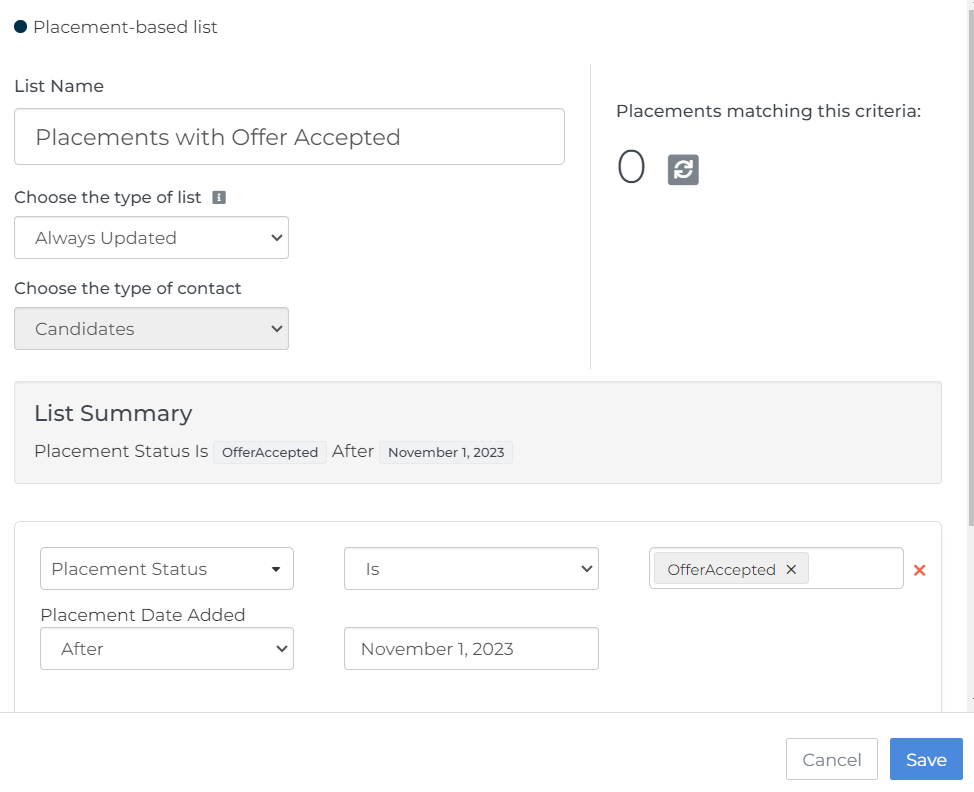
- If you wish, you can add more conditions to this list to restrict which candidates will enter the automation, using fields such as Categories, Programmes, or Groups (Record Management groups) or fields from the related assignments or placements.
- Click Save to return to the workflow screen.
- Click Save again in the List Criteria box to save this list to the workflow.
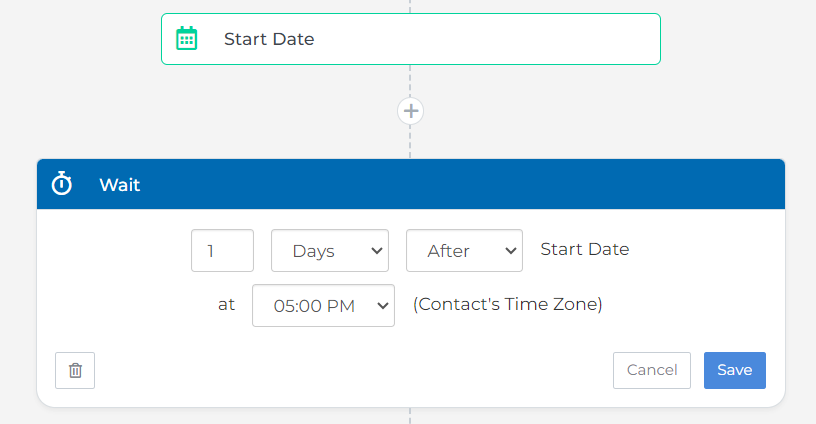
- Add a Wait Step after the Start Date date:
- In this example we’ve added a wait step of 1 Day prior to sending the email containing the survey link. You can extend this if you prefer to add more of an interval before sending the email.
Create the NPS Engagement Survey
At this stage we’re going to create a new NPS engagement survey. If you already have a template made, you can skip to the next section.
- Click into Engagements from the menu options on the left side of the page.
- Click Add New Engagement in the top right and then select Candidate NPS Survey.
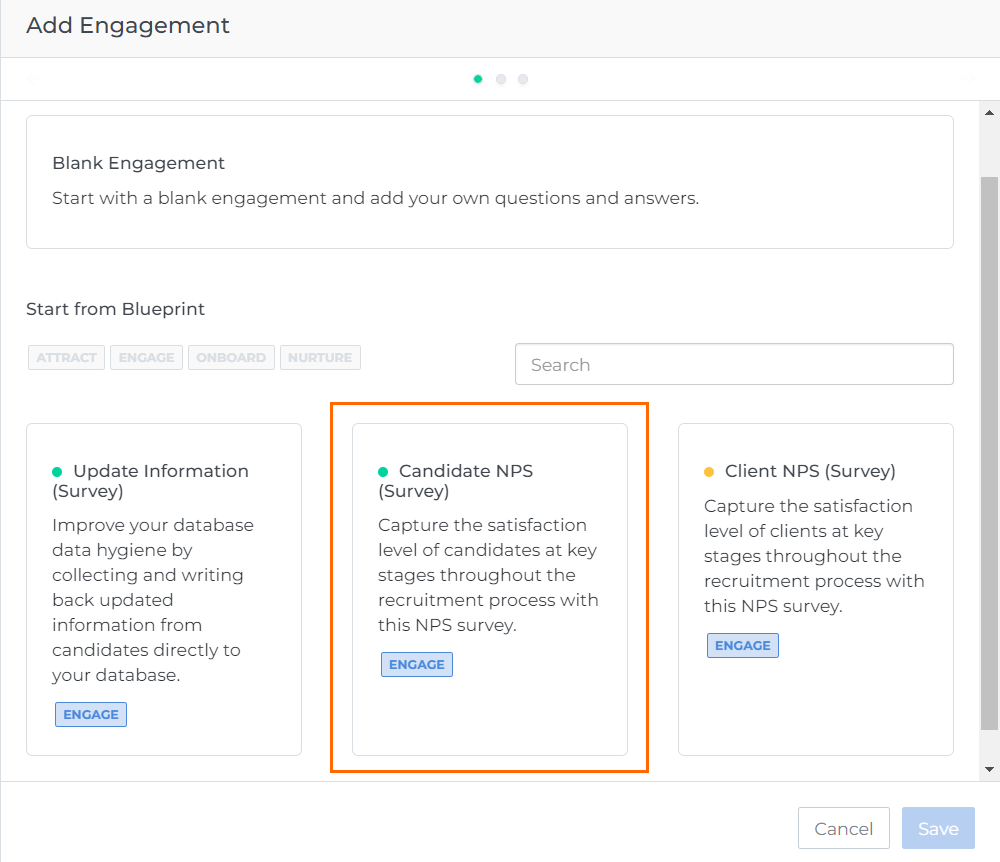
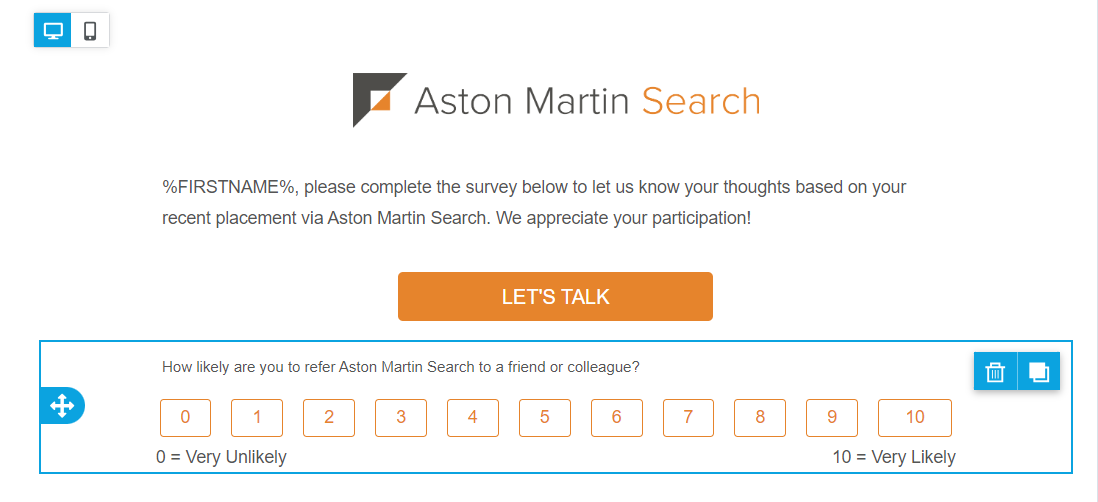
- Click Save to confirm. The engagement layout will open, as shown below:
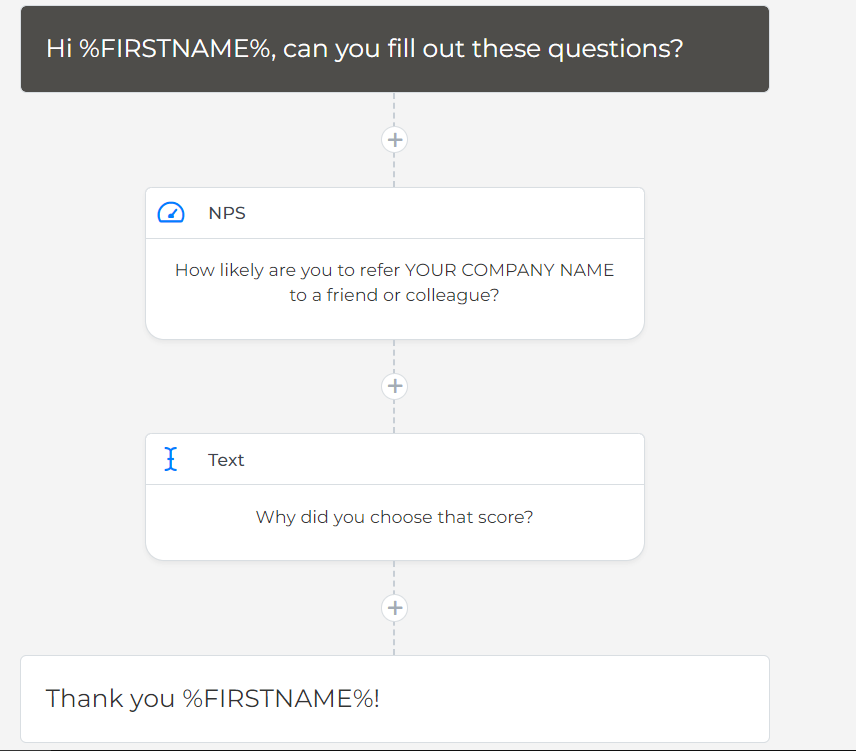
- Edit any of the survey question text to your preference. Make sure you also update "YOUR COMPANY NAME" to the name of your company.
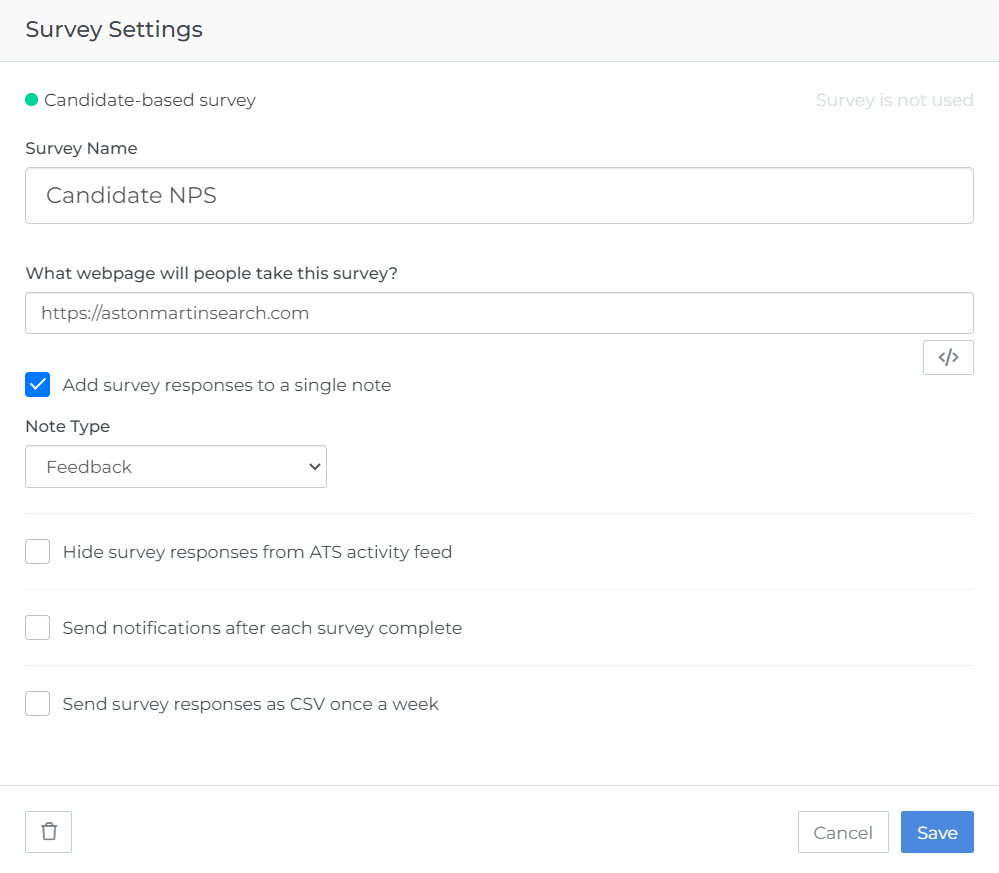
- Click into Survey Settings to update the Survey Name and add the page on your website this will open to.
- In this example, we’ve also checked the Add survey responses to a single note option. This will save a note in with the survey responses included.
- In the Engagement section, click into either of the two questions to reveal the Question Settings menu.
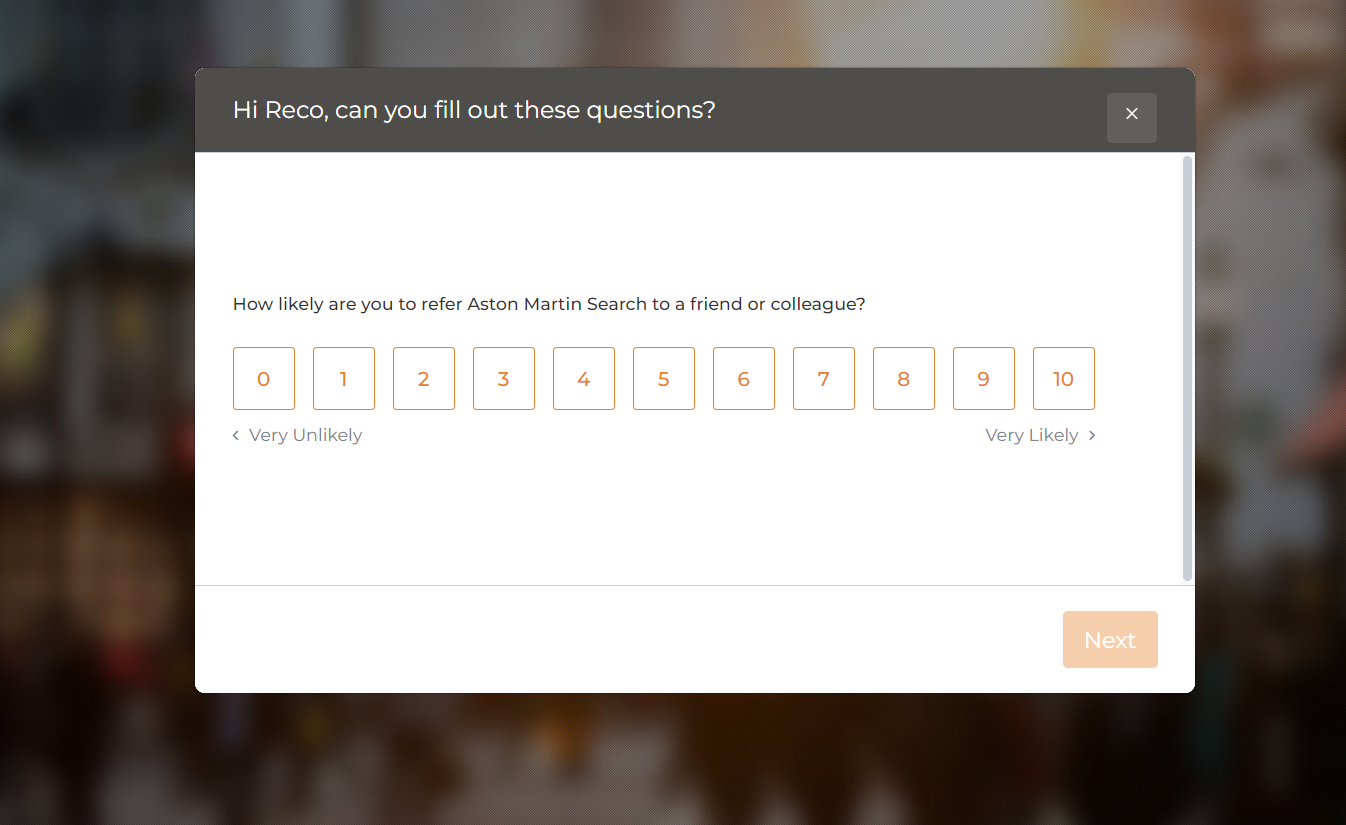
- We’re using a standard 0-10 scoring range here, which you can change to your preference.

- We’re using a standard 0-10 scoring range here, which you can change to your preference.
- Once you're happy with the question settings, click Save.
- Click Test Survey to view a preview of your survey and make any necessary corrections.
- Click the back arrow to return to your automation workflow.
Add the Send Engagement Step and Email
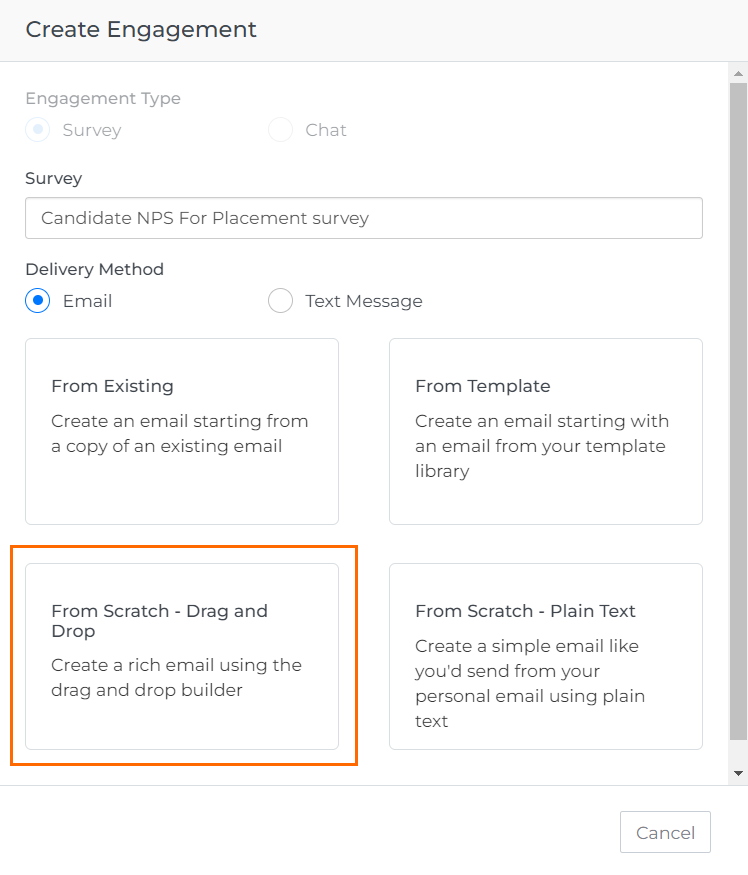
- Add a Send Engagement step to your automation, and select the NPS engagement survey you will be using.
- In this example we'll be sending the survey link via Email. Select to build From Scratch - Drag and Drop. The Email Editor will open.
- Under Email Settings, customize the Subject line to your preference, adding in any mail merge fields of your choice.
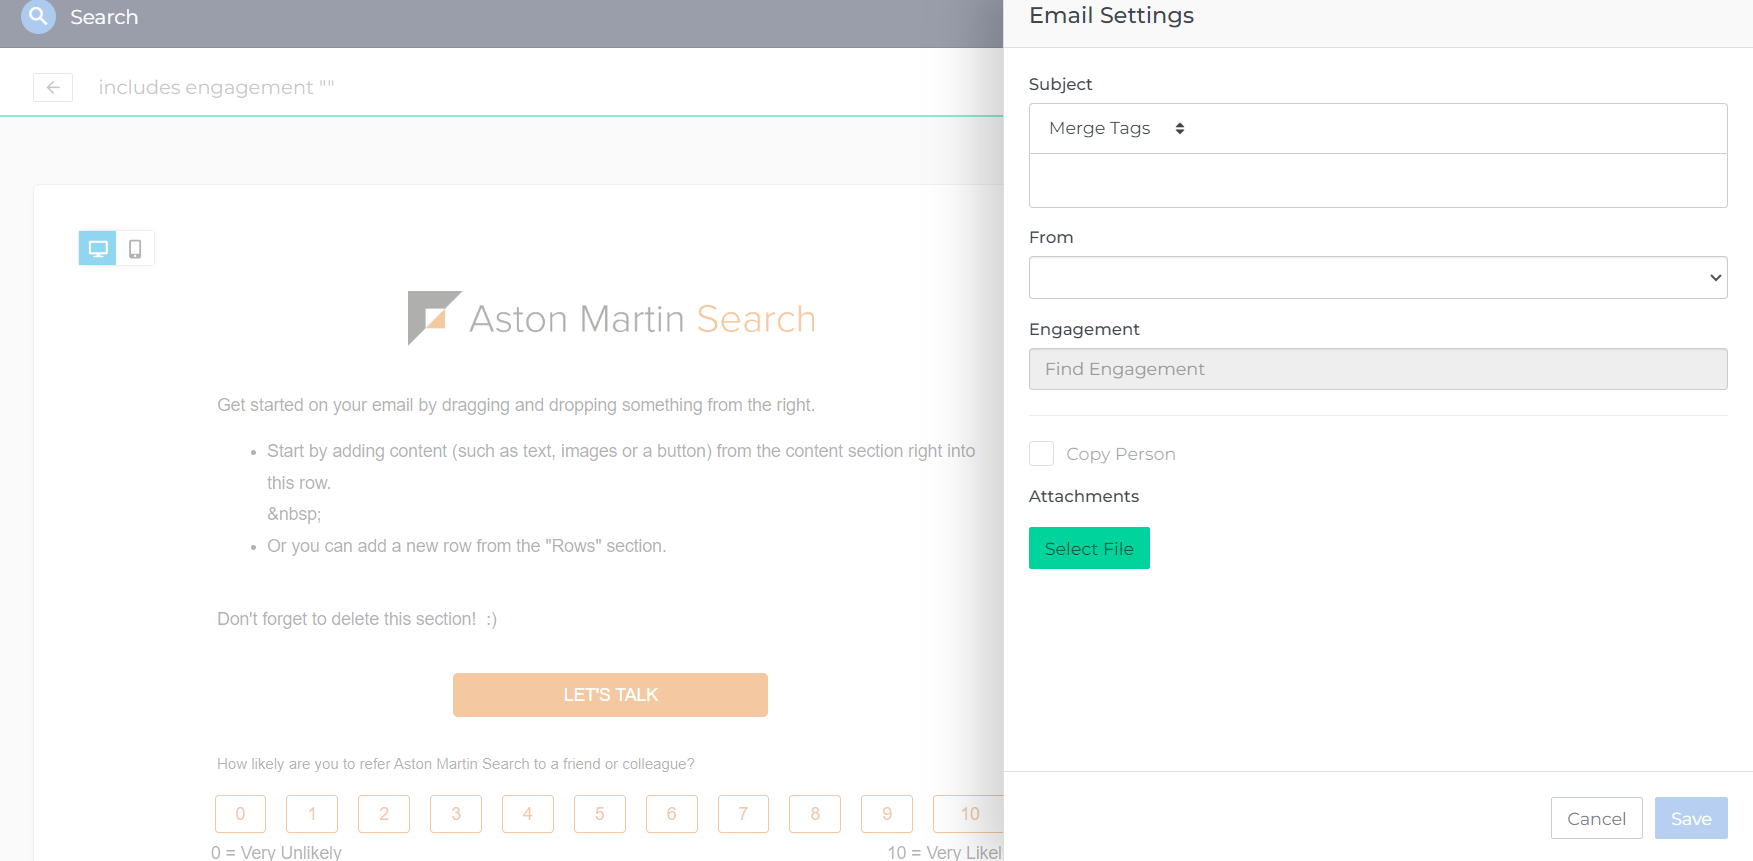
- In this example, we’re sending the email from a Generic Email address, but you can send it from the Candidate Owner if you prefer.
- Note that the survey preview section has been added to this email automatically.
- Customize the content of the email to your preference, using the drag and drop editor to add images, text boxes, and content.
- Click Preview to see how your email looks on desktop or mobile devices, and make any necessary edits.
- Click Preview to see how your email looks on desktop or mobile devices, and make any necessary edits.
- When finished with the layout and content, click Send Test.
- Here, you can enter your email address and receive a test email to check the mail merge fields are populating correctly. You can select a real record from your database, or will randomly select a record for the test.
- Here, you can enter your email address and receive a test email to check the mail merge fields are populating correctly. You can select a real record from your database, or will randomly select a record for the test.
- Once you're happy with your email, click Save and return to the automation workflow screen using the back arrow.
Configure Automation Settings
- Click into Automation Settings.
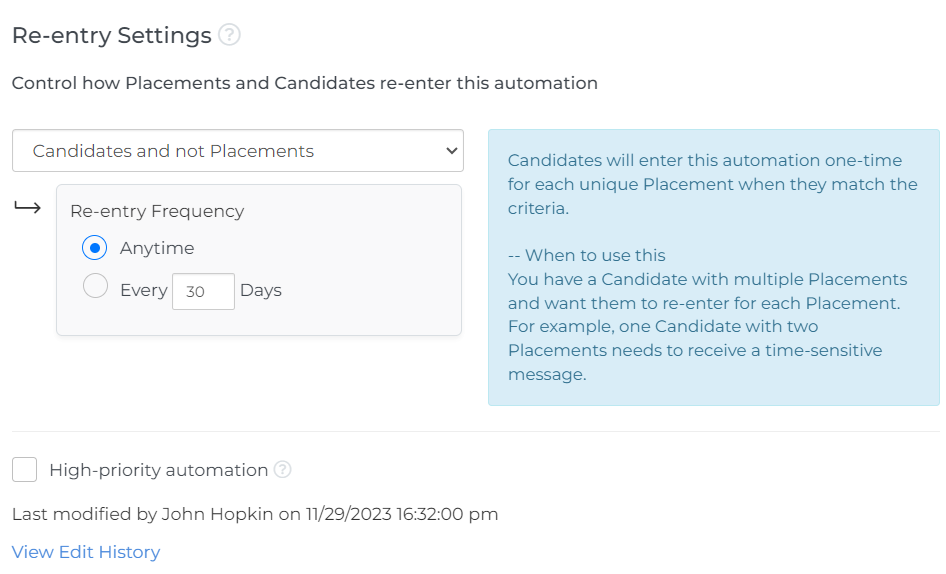
- Under Re-entry settings, ensure that Candidates and not Placements can re-enter the automation Anytime. This ensures that candidates that have multiple placements in a short period of time will receive a survey for each placement they have.
- Click Save to return to your automation.
- Click the green tick to switch on your automation!
- You can view click / open rates by clicking View Metrics from the automation workflow page. You can view survey results by clicking into the Dashboard tab and viewing the widgets for recent NPS scores and cumulative NPS across the entire company.
Tips:
- You can expand this automation to include branching to send repeated engagement emails to candidates that do not respond to the initial email. This branch could include notification emails to users, to encourage them to call the candidate to ensure they participate in the survey.
- You can also branch the survey itself to provide further questions if the candidate leaves a high or low score. This could also be used to notify users if the candidate had a poor experience and is less likely to work with your company again in the future. The branches could include a simple step to add the candidate to an programme for High / Low NPS scoring candidates for further engagement.
Was this helpful?