Enrich Records from Notes
You need Bullhorn Amplify Edition to use this feature.
In this article, you’ll learn how to use Amplify Enrich to automatically update candidate, contact, and job records based on the text of your notes.
This feature saves time by reducing manual updates and helps maintain data integrity by ensuring fields stay current whenever new information is added through a note. It’s especially useful for intake notes or call summaries where you record details such as desired salary, employment type, or start date.
How it Works
When you add or edit a note on a candidate, contact, or job record, Amplify analyzes the text and suggests updates to relevant fields. You can:
-
Review the suggested updates.
-
Edit any values as needed.
-
Choose which updates to apply.
Once you save the note, Amplify automatically updates those fields on the related record using the values you selected.
Automatic notes added by third-party note takers don’t trigger record updates. Amplify analyzes a note only when a user manually adds it or edits it. This means fields won’t update unless a user reviews the note, makes an edit, and then saves it.
Available fields
Admin users can choose up to 20 fields for Amplify to analyze when suggesting updates for each entity, including custom fields. Amplify will use only the fields you
Amplify’s suggestions are based on the context of your note. You can choose which updates to apply and overwrite suggested values with your own text, so you always have full control.
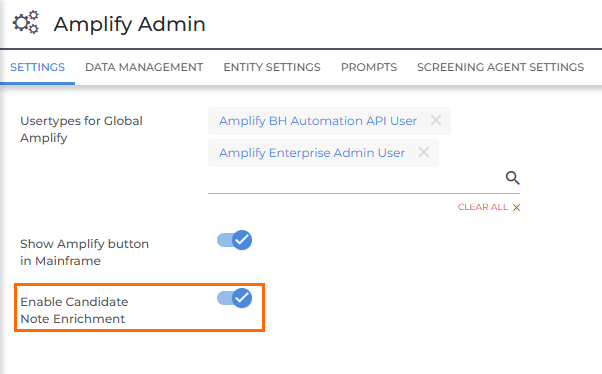
Enabling Note Enrichment
Note Enrichment is turned off by default. An Admin user can enable it in Amplify Admin.
To enable the feature:
-
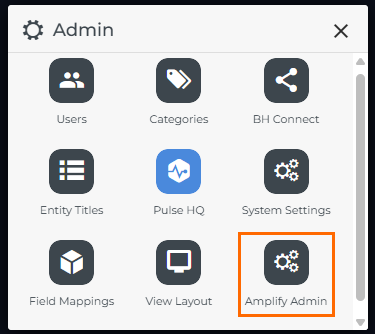
Go to Menu > Admin > Amplify Admin.
-
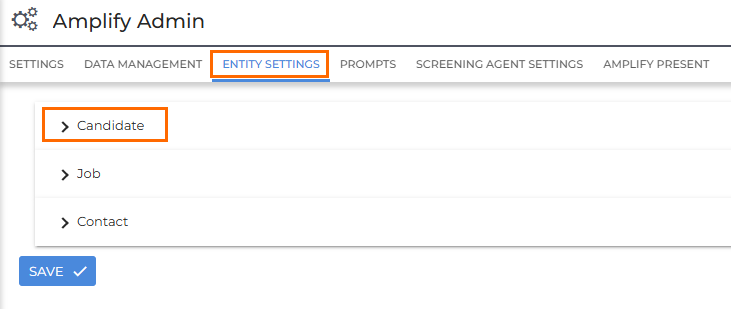
Open the Entity Settings tab.
-
Expand the entity you want to enable Note Enrichment for (Candidate, Job, or Contact).
-
Under Enrich Fields, toggle Note Enrichment to the ON position.
This setting applies to all users in your Bullhorn corporation and cannot be limited to specific users or departments.
Configuring Field Selection
Admin users can configure which fields Amplify should enrich from notes. You can select up to 20 fields for each entity, including custom fields, and this configuration applies to all users in your corporation.
To configure available fields:
-
Go to Menu > Admin > Amplify Admin
-
Click the Entity Settings tab.
-
Expand the section for the entity you want to configure.
-
Under Enrich Fields, review the current list. You can add, remove, or edit fields as needed.
-
If you don't see a list of fields, make sure Note Enrichment is toggled to the ON position.
-
-
After making any changes, click Save.
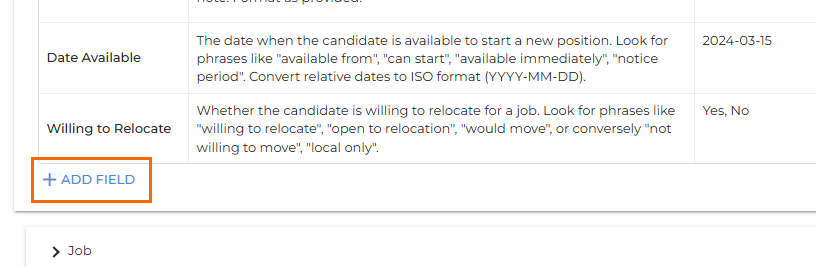
Add Field
To add a new field:
-
Click Add Field at the bottom of the table.
-
Search for and select the desired field from the dropdown. The field will appear at the bottom of the list.
-
Then complete the following:
-
Description: Provide guidance on what type of information belongs in this field and what phrases Amplify should look for in notes. Be as specific as possible, and include formatting instructions if needed. You may also include directives such as “If unsure, do not guess.”
-
The description also allows you to account for regional or business-specific variation. For example, if a field is configured with a default description suited to US formatting (such as a zip code) you can update it to reflect the format used in your region. The more specific and accurate your description, the more consistent the suggestions will be.
-
-
Examples: Enter examples of correctly formatted values to help Amplify recognize appropriate data and apply consistent formatting.
-
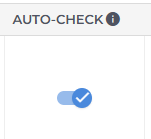
Auto-check: When enabled, this field will automatically be checked when a high-confidence update is detected. If disabled, users must manually check it to apply the update.
-
Remove Field
To remove a field, click the trash can ( ) icon. A confirmation dialog will appear before the field is removed from the list.
Edit Field
To adjust a configured field, click into the Description or Examples column and update the text as needed.
Configure Default Selection
For each field, you can choose whether it's automatically checked when Amplify detects a high-confidence suggestion. This gives you more control over how recommendations are applied, helping to prevent unintended field updates while still surfacing relevant suggestions for review.
Use the Auto-check toggle to set the default for each field.
-
Auto-check enabled: The field will be pre-selected whenever a high-confidence update is detected.
-
Auto-check disabled: The field won't be pre-selected. Updates are still detected and recommended, but users will need to manually check the box to apply the update.
Reset Selection
Click Reset to Defaults to restore the original recommended field list.

How to Enrich Records from Notes
-
Open a candidate, contact, or job record and add a new note.
-
You can also edit an existing note to check for updates to relevant fields.
-
-
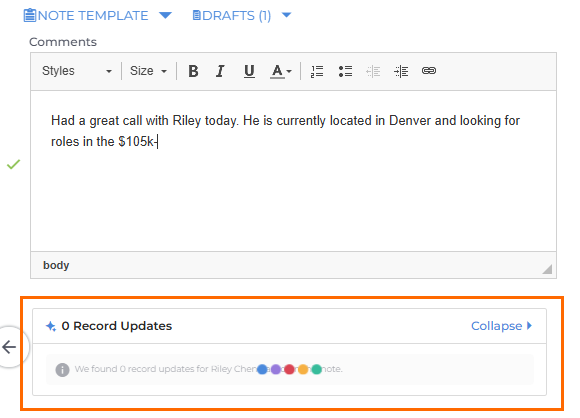
As you type, the Record Updates section below will check for potential updates.
-
After you finish typing (or click outside the note field), Amplify displays all suggested record updates.
-
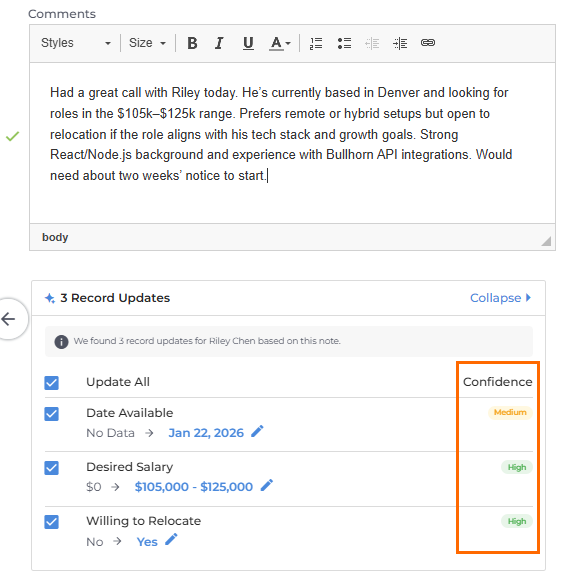
Review the list. The Confidence column shows Amplify’s certainty in each suggestion.
-
High and Medium confidence updates are checked by default. Low confidence updates are unchecked by default. Note that your admin may have configured different default selection behavior for specific fields in Amplify Admin.
-
-
Check or uncheck updates as needed, and click the pencil icon (
 ) to edit any value before applying it.
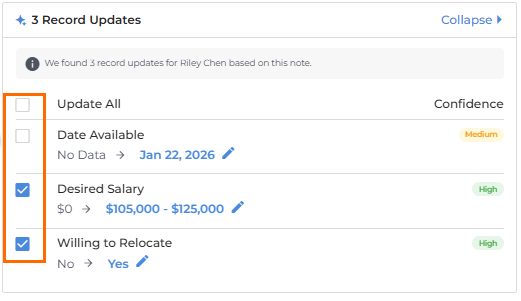
-
Click Save to add your note and apply the selected field updates to the record.
If you edit your note after reviewing the suggested updates, be sure to check them again before saving — recommendations may change based on your edits.
FAQ
Which fields can Amplify update from notes?
An admin can configure up to 20 fields per entity (Candidate, Contact, or Job). Amplify only suggests updates for the fields selected in Amplify Admin.
Does Amplify automatically apply field updates?
No. You choose which updates to apply. You can also edit any suggested value before saving.
Can low-confidence suggestions still be applied?
Yes. Low-confidence suggestions are unchecked by default, but you can select them and adjust values as needed before saving.
Can admins control which fields are auto-selected when Amplify makes suggestions?
Yes! Admins can use the Auto-check toggle in Amplify Admin > Entity Settings to set the default selection behaviour for each field, so you can choose whether a high-confidence update to a particular field comes pre-selected or whether users need to check it manually before applying an update.
Can I enable Note Enrichment for only certain users or departments?
No. Note Enrichment is enabled at the corporation level and applies to all users once turned on.
Does editing an existing note trigger suggestions?
Yes. Editing any existing note on a candidate, contact, or job can trigger new or updated suggestions based on the revised text.
Do third-party note takers trigger field updates?
No. Notes created automatically by third-party note takers don’t trigger updates. Amplify only analyzes and suggests updates after a user edits the note, so there’s no risk of records changing based solely on a notetaker’s output.
Best practice is for users to review the autogenerated note after the call, make any necessary edits, verify the suggested updates, and then save.