Completing and Submitting the Form I-9
Completing and submitting the Form I-9 is similar to completing other documents. However, there are a couple things to look out for.
Completing the I-9
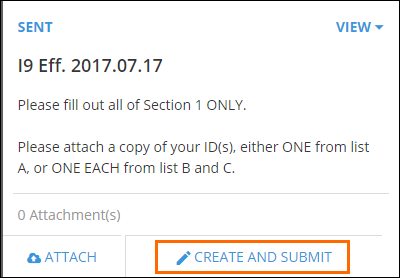
- After logging into your portal, locate the I-9 document and select Create and Submit to open the form.
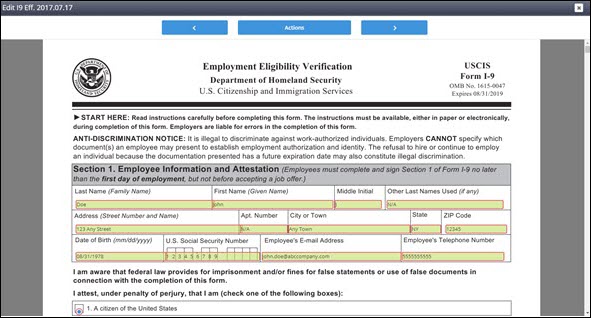
- Complete Section 1 (page 1) of the I-9.
- Required fields are highlighted with a red border.
- If a required field in not applicable, enter N/A.
- Hyphens or spaces should not be used for any document numbers, including the SSN field.
- When signing the I-9, you must check the box attesting that your signature is legally binding and then select Accept.

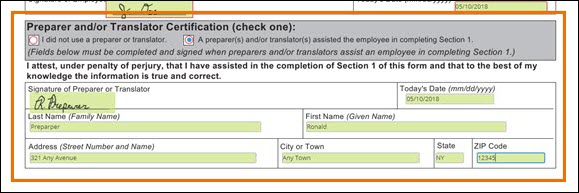
- If a Preparer/Translator is assisting with completing the I-9, they need to complete and sign the designated section on the bottom of page 1.
- The Preparer/Translator does not have a separate login. They complete their portion side-by-side with the employee.
- The Preparer/Translator does not have a separate login. They complete their portion side-by-side with the employee.
Submitting the I-9
- Once the form is complete, select

- Choose

- Select OK on the confirmation popup that appears.
Once the form has been submitted, the Onboarding portal will update:
- The I-9 card will move to the right half of the screen.
- The card will be highlighted in orange to designate that the I-9 has been submitted.
- When the I-9 has been approved, the card will change to green.
- Employees will not be able to edit the I-9 or attach files.
- An Onboarding Administrator will need to unsubmit the I-9 for the employee to make any additional changes.
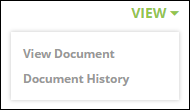
You can use the View option on the I-9 card for the following options:
- View Document - displays a PDF copy of the I-9.
- Document History - displays a list of edits and status changes made by the employee or administrator.
Was this helpful?