Build a Report - Classic
Overview
Reports give you access to your data. You can examine your data in almost limitless combinations, display it in easy-to-understand formats, and share the resulting insights with others.
Build a Report
Report Builder is a drag-and-drop tool for accessing your data quickly and comprehensively. Use it to set up new reports and edit existing ones.
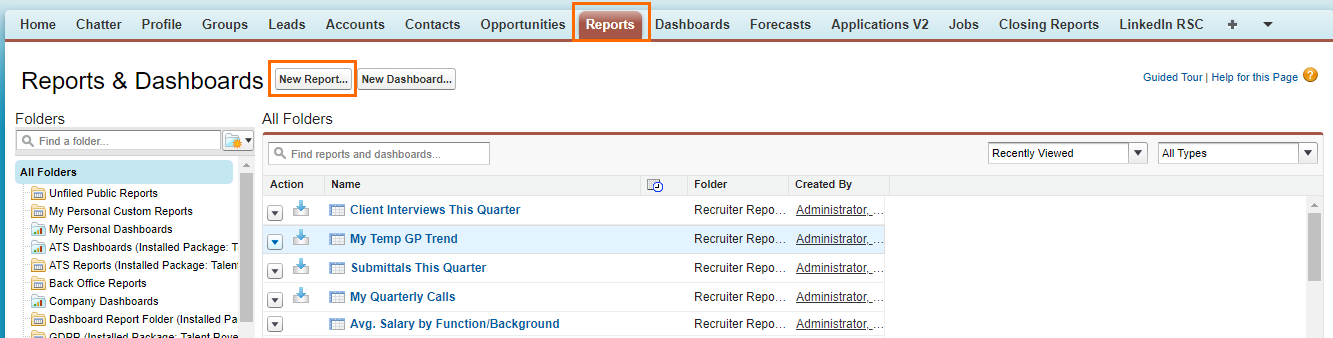
- Navigate to the Reports tab.
- Click New Report.
- Choose a Reports Type.
- The report type you choose determines which records are returned and which fields are available in your report.
- Select Create.

The report opens and shows a report type preview.
The default columns for the report type are added to the Preview Pane automatically. The duration fields show the time frames. If you don’t see the time period that you are interested in, you can change the dates, such as This Week or This Month.
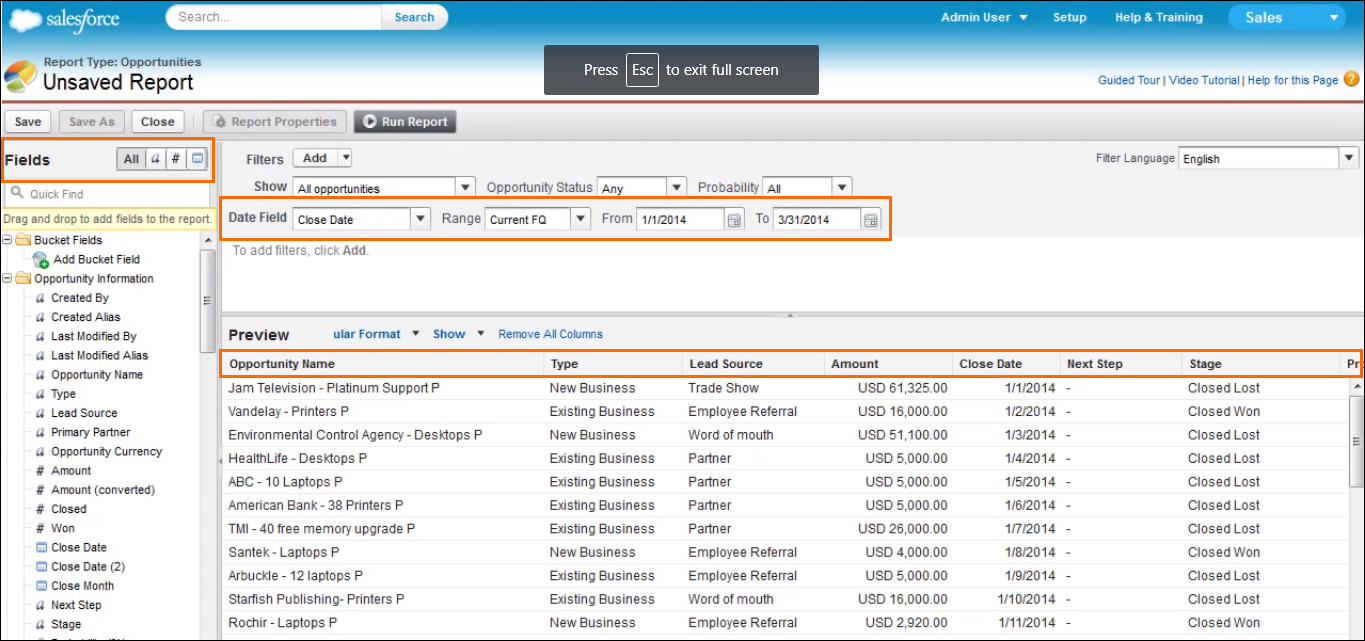
The report builder consists of three panes:
- Fields pane: Lists all the fields available in the report type
- Filters: Lets you set standard and custom filters
- Preview Pane: Lets you see your report as you build it, using a limited number of records
You can collapse the Filters pane to give you more room to view.
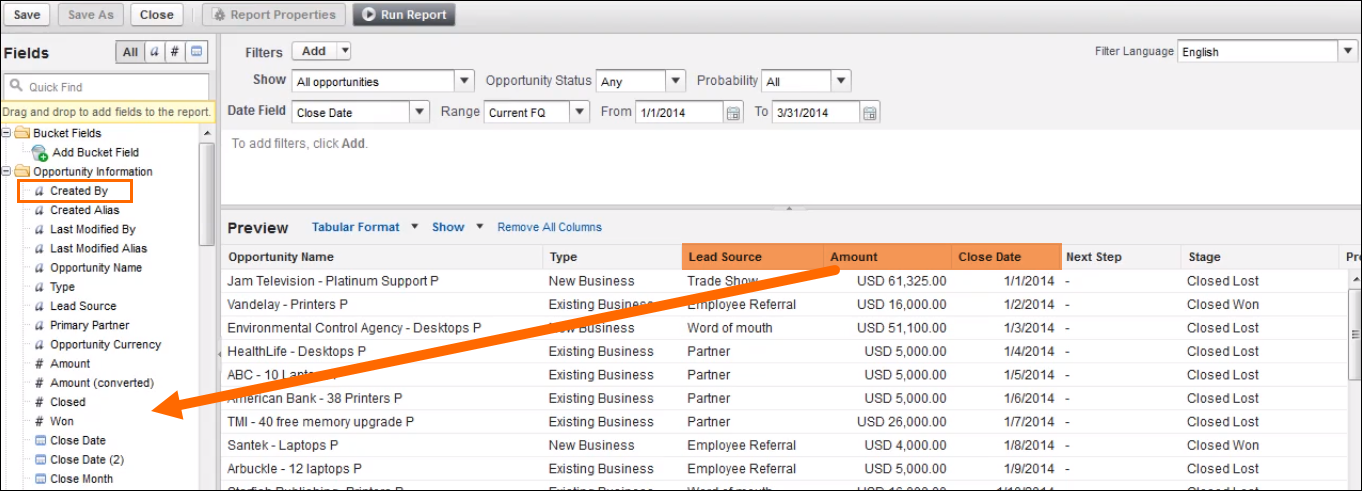
Drag and Drop
Drag and drop makes it easier to remove columns; drag a column from the Preview pane and drop it in the Fields pane. Add new columns by dragging a Field from the Fields pane and dropping it in the Preview pane.
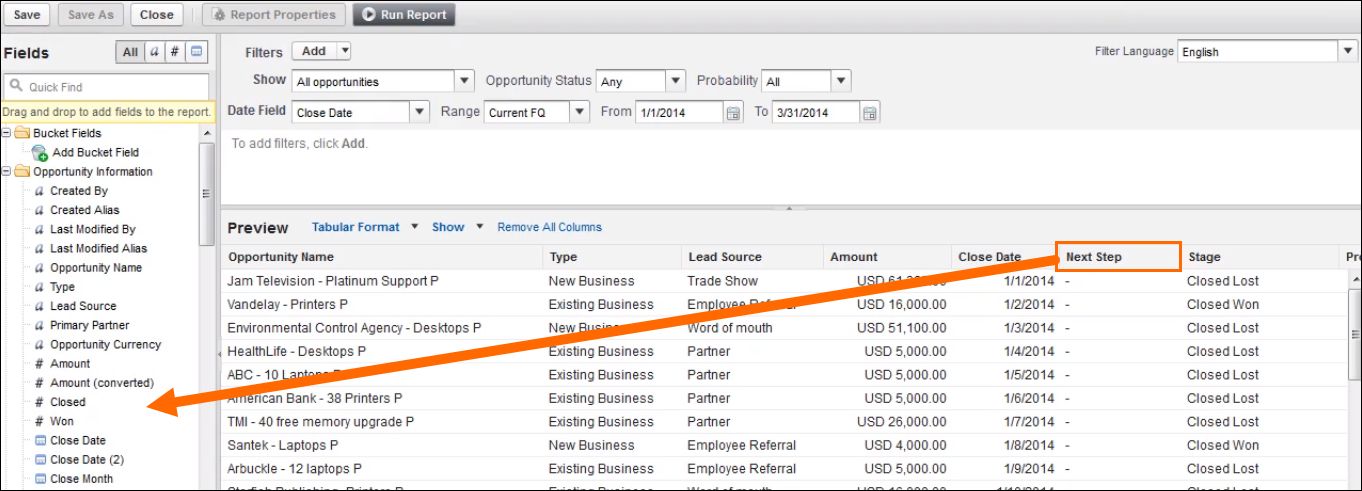
You can also double click a field to add it or hold down the Control Key to add or remove multiple fields at once, just highlight the columns in the Preview pane and drag and drop in the Fields pane.
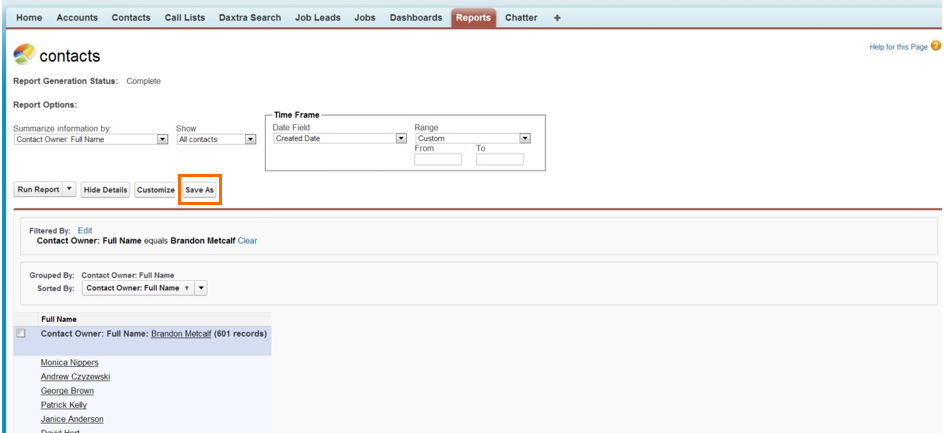
Grouping
Each column has a menu. To group the report:
- Select the Action dropdown next to the Column.
- Choose Group by this Field.
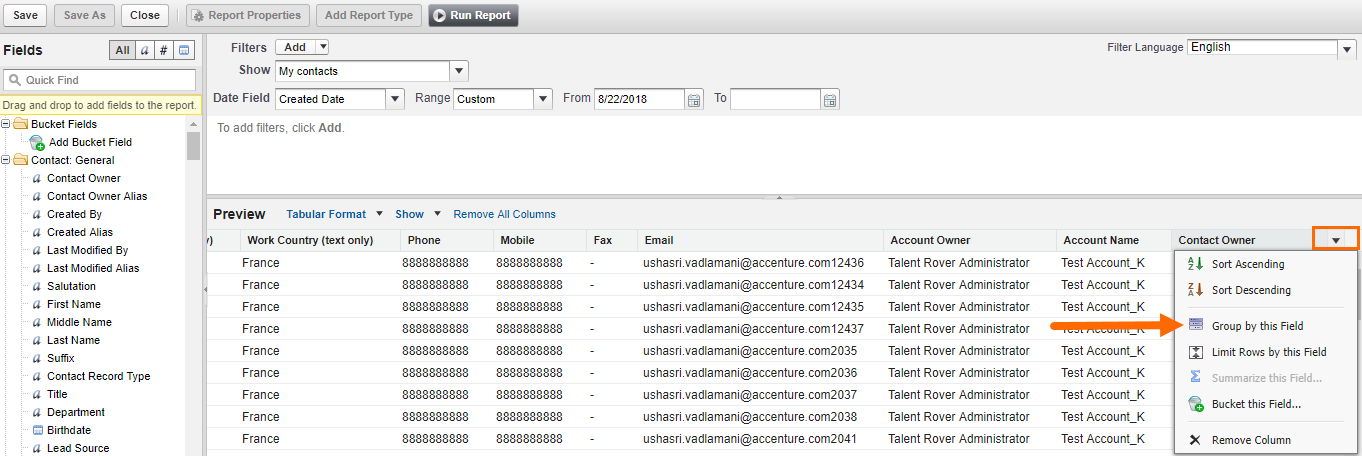
- The report format changes automatically from Tabular to Summary.

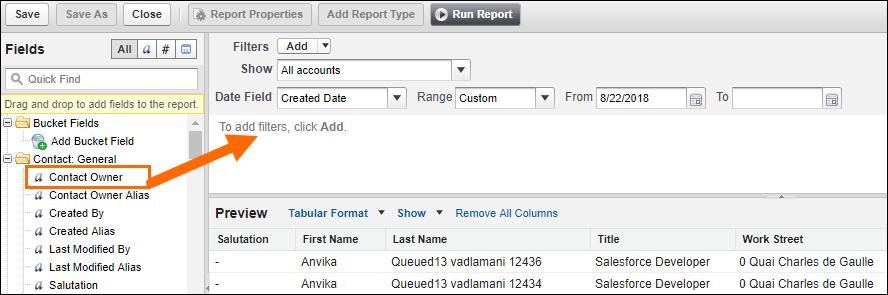
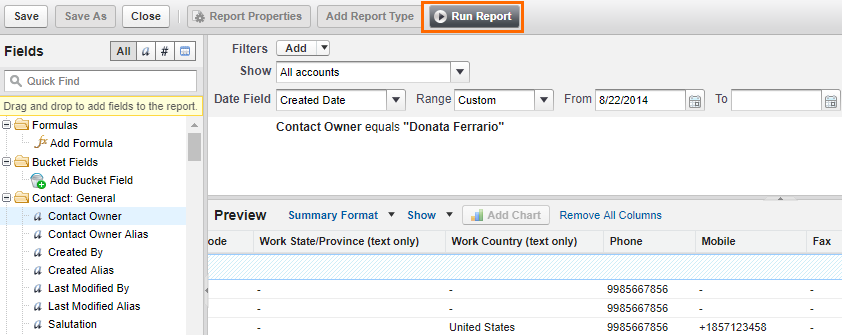
Filter
The report builder screen lets you work with filters. For example, you can add a filter of the Contact Owner field, showing only the contacts that you own.
- Drag a column from the Fields pane.
- Drop the column in the To add filters, then Add.
- Select the equals Action dropdown and choose an option.
- Type the name in the next field over.
- Select OK.
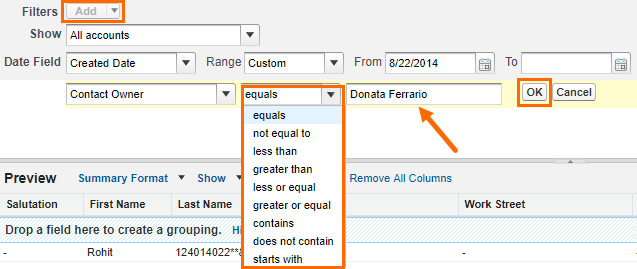

Another way you can filter is to click the Add button next to Filters.
- To remove the filter, select Remove.

- Run Report to see the full results of all your data. (The preview only shows up to 50 records)
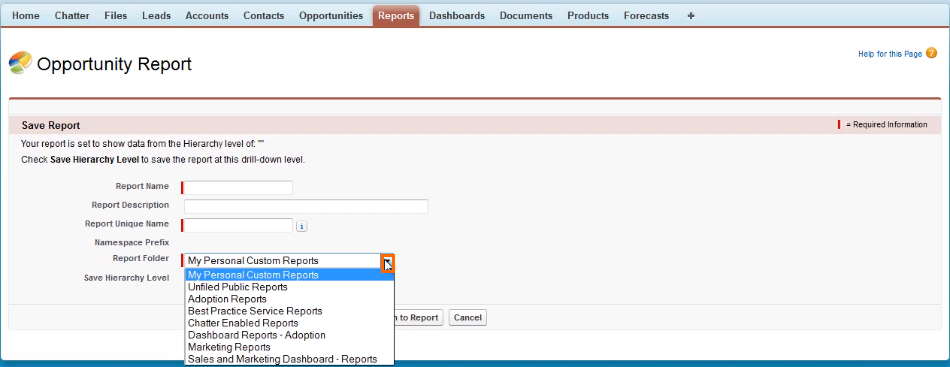
- Save As to confirm your changes.
If you want this report to be visible to others, be sure to save it in a folder that they have access to. You also have the option to save in your personal folder that no one else has access to.