| Package: Presentations |
Generate & Email a Presentation
![]()
Presentations allow Recruiters to group similar Candidate and send for interview/hire consideration. Presentations can be generated from a few areas within Jobscience- these options are listed below.
Contact List View, Global Search Results, AMS, or Job Order>Application Related List
-
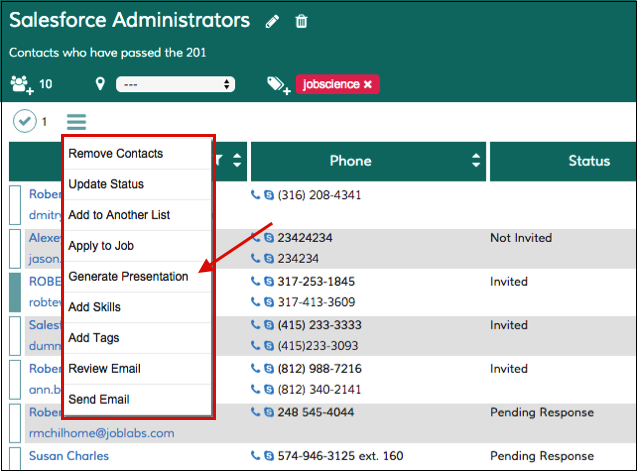
Select Candidates by placing a checkmark to the right of their names.
-
Click the Generate Presentation button.
AMS Move
-
From the AMS, select the Candidates you want to include in the Presentation by placing a checkmark to the left of their name.
-
Click the Move icon at the top of the screen and select the Stage or Stage / Substatus which your Admin setup to launch the Presentation.
Short List
-
Select Candidates by placing a checkmark to the right of their names.
-
Click the Menu icon to the right of the counter. A drop-down menu is displayed.
-
Click the Generate Presentation button.
| Note: If any of the above options are not available, these can be enabled by contacting JobscienceCustomer Success. |
Regardless of the option selected above, the reminder of the generate process is the same and follows these below steps including email sending...
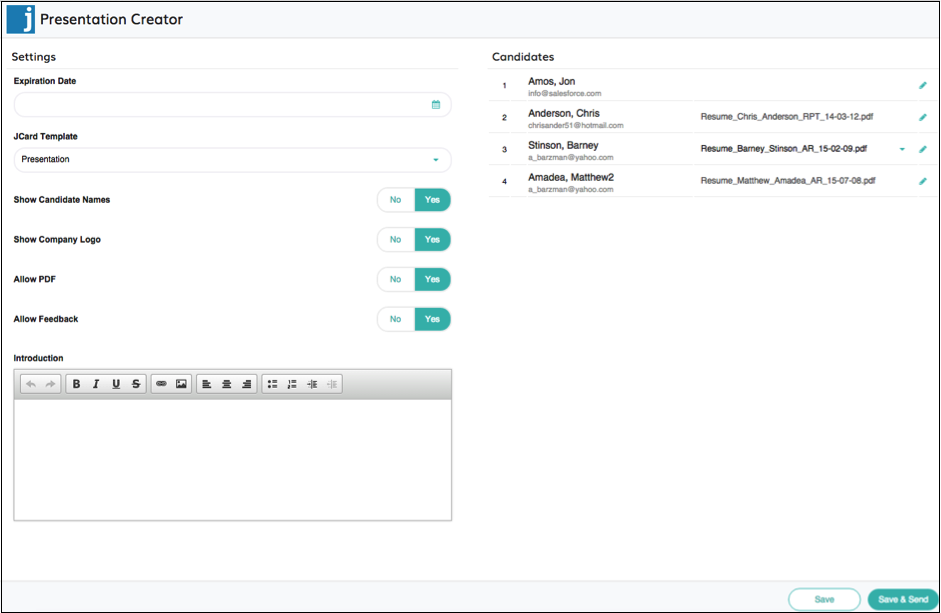
The Presentation Creator dialog displays.
-
Click the Expiration Date field and select an expiration date for the presentation from the calendar that displays.
-
If you do not wish for the Presentation to expire, skip this step.
-
-
Click the JCard Template field and select the template you would like to use from the Template dialog box that displays.
Note: It is recommended that you use the presentation's template; however, you can create new templates and use those instead. -
If you want to show Candidate names in the presentation, click the Yes button; otherwise, click the No button.
-
If you want to show the company logo in the presentation, click the Yes button; otherwise, click the No button.
-
If you want to allow PDFs in the presentation, click the Yes button; otherwise, click the No button.
-
If you want to allow feedback on the presentation, click the Yes button; otherwise, click the No button.
-
If you want to include an introduction in the presentation, type it in the Introduction section. You can use the formatting tools to change the look and feel of how it displays.
-
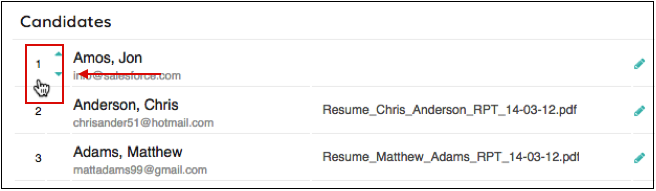
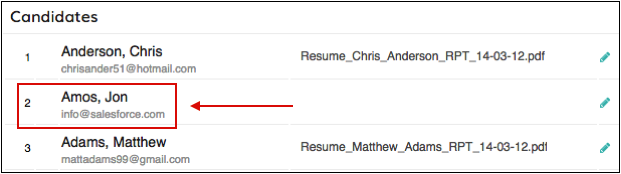
The Candidates are listed in the order they will appear in the Presentation. To change the order, hover over the number to the left of the Candidate whose sort order you want to change. An up and down arrow are displayed to the right of the number.
-
Click the down arrow to move the Candidate down in the sort order; click the up arrow to move the Candidate up in the sort order. The number of times you click an arrow determines how many spots the Candidate moves up or down in the sort order.
-
For example, if you click the down arrow next to "Amos, Jon" one time, Amos, Jon is moved from the first spot to the second spot.
-
-
You can select which PDFs to include in the presentation for each Candidate.
Click the down arrow to the right of the PDF file name.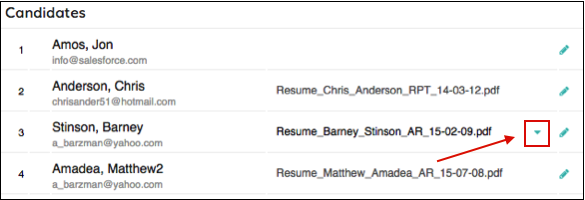
-
The Resumes dialog box is displayed.
Select a file from the list and then click the Ok button.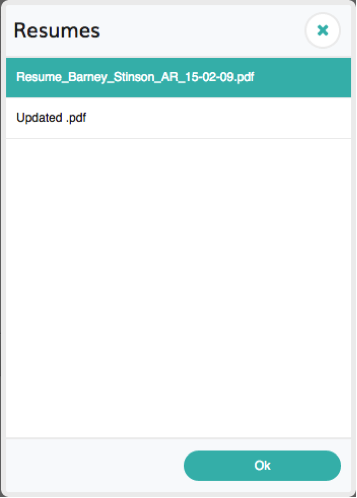
-
If you want to add notes about a Candidate, click the Edit icon to the right of their name.
The Candidate Notes dialog box is displayed.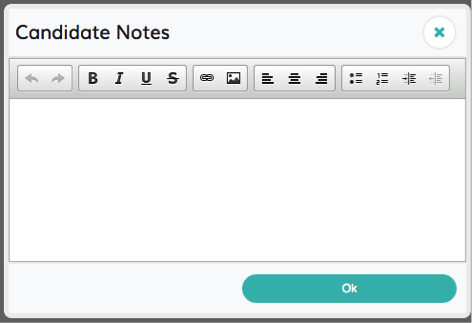
-
Type your notes in the box, use the formatting tools if desired, and then click the Ok button to save your notes.
-
These notes will automatically show up if you are using the default Presentation templates. If you are using your own custom templates, please contact your Account Manager to learn how to include the notes in your template.
-
-
When you are finished creating the presentation, click one of the following two buttons:
-
Click the Save button to save the presentation.
The Presentation Detail screen is displayed.
-
Click the Save & Send button to display the Email Presentation(s) screen.
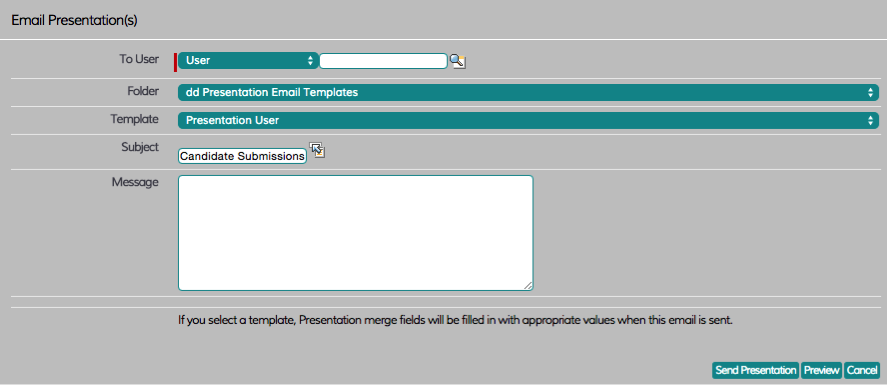
Perform the following steps:
-
Fill in the To User field.
-
Click the Folder field to find a template. The default Folder and Templates are already showing up by default.
-
If you do not want to use the default template, click the Template field and select a template from the drop-down list.
-
In the Subject field, enter a subject for the presentation.
-
If you want to include an additional message, enter it in the Message box.
-
Click the Preview button to preview the presentation and then click the Send Presentation button to send it.