: Replace Salesforce Email on Contacts
Overview
The component can replace the standard Salesforce email functionality on Contact record detail pages and on Contact List Views. This article contains the configuration steps for a System Administrator to make this change.
Steps
Configure Contact Detail Page
Add the component on the Contact detail page in page builder:
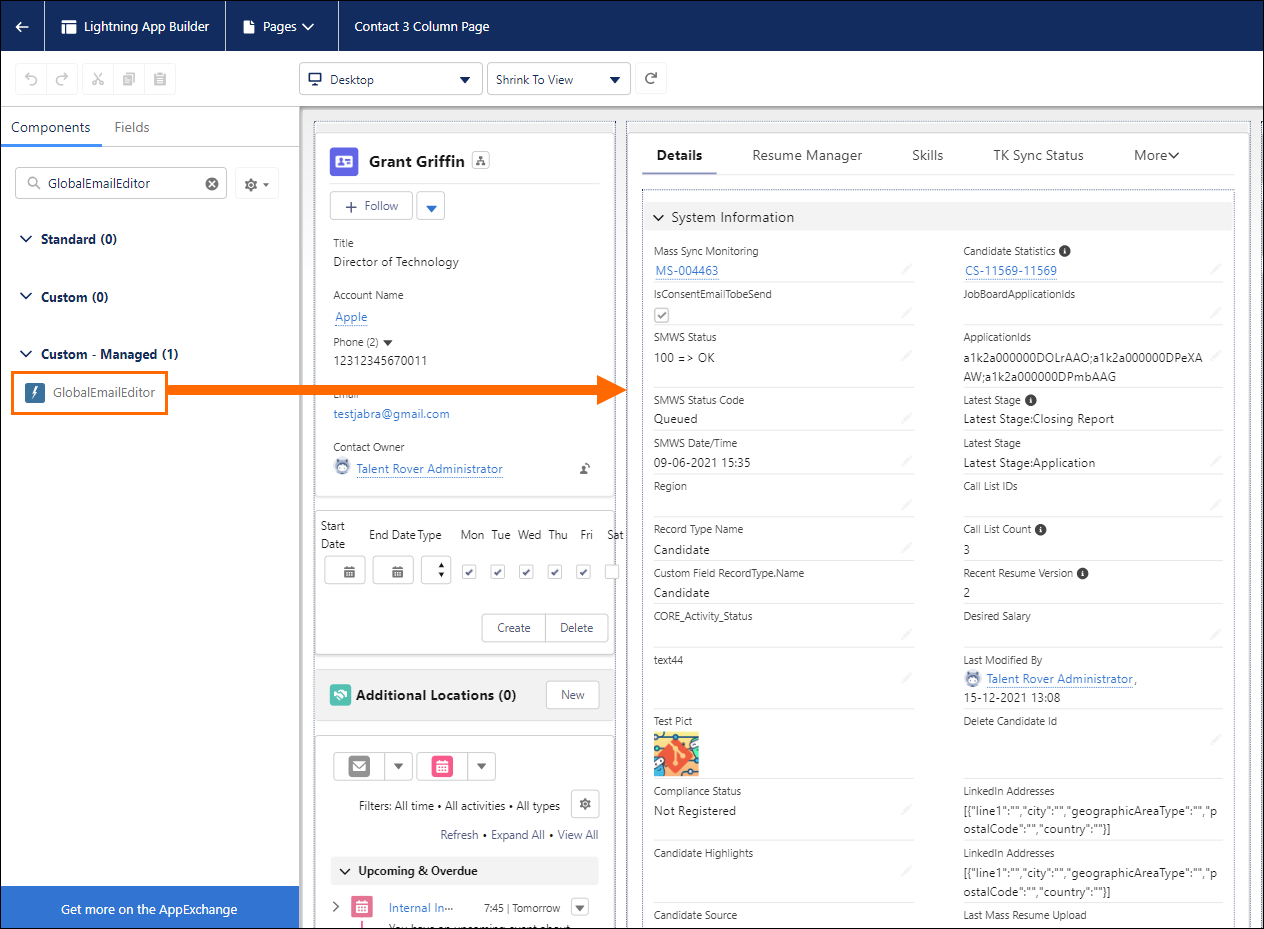
- Open a Contact detail page in your org.
- Click the gear icon in the top right corner of the page and choose Edit Page to open the Page Builder.
- In the Components section, search for “GlobalEmailEditor”.
- Drag-and-drop the GlobalEmailEditor component to the desired place on the page.
- The section where you are dropping it to will turn green.
- The section where you are dropping it to will turn green.
- Click on the GlobalEmailEditor component on the page to see list of its attributes.
- Adjust attribute values, if needed.
- Click the Save button.
- Activate the page if it was not already activated.
- Activate the page if it was not already activated.
Add the Activities component below the component
This simulates the default Salesforce email component activity timeline.
- Locate the Activities component under the Standard section in the Components column. The Activities component may also already be on the page.
- If you don't see any options under Standard, click the X next to the search.
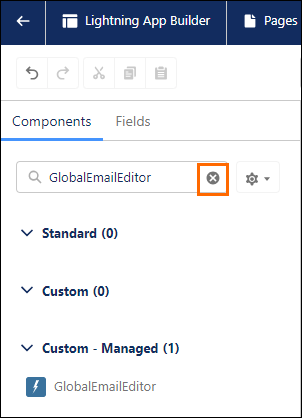
- If you don't see any options under Standard, click the X next to the search.
- Drag and drop it onto the page under the previously added component.
Remove the Standard Salesforce email editor from the Activities component.
For testing purposes, to compare the Standard Salesforce email editor and , you may want to skip this step.
- Go to Setup > Object Manager > Contact > Page Layouts.
- Select the desired Page Layout to edit.
- Click Mobile and Lightning Experience Actions.
- Click the Email action then drag and drop it into the list of fields at the top.
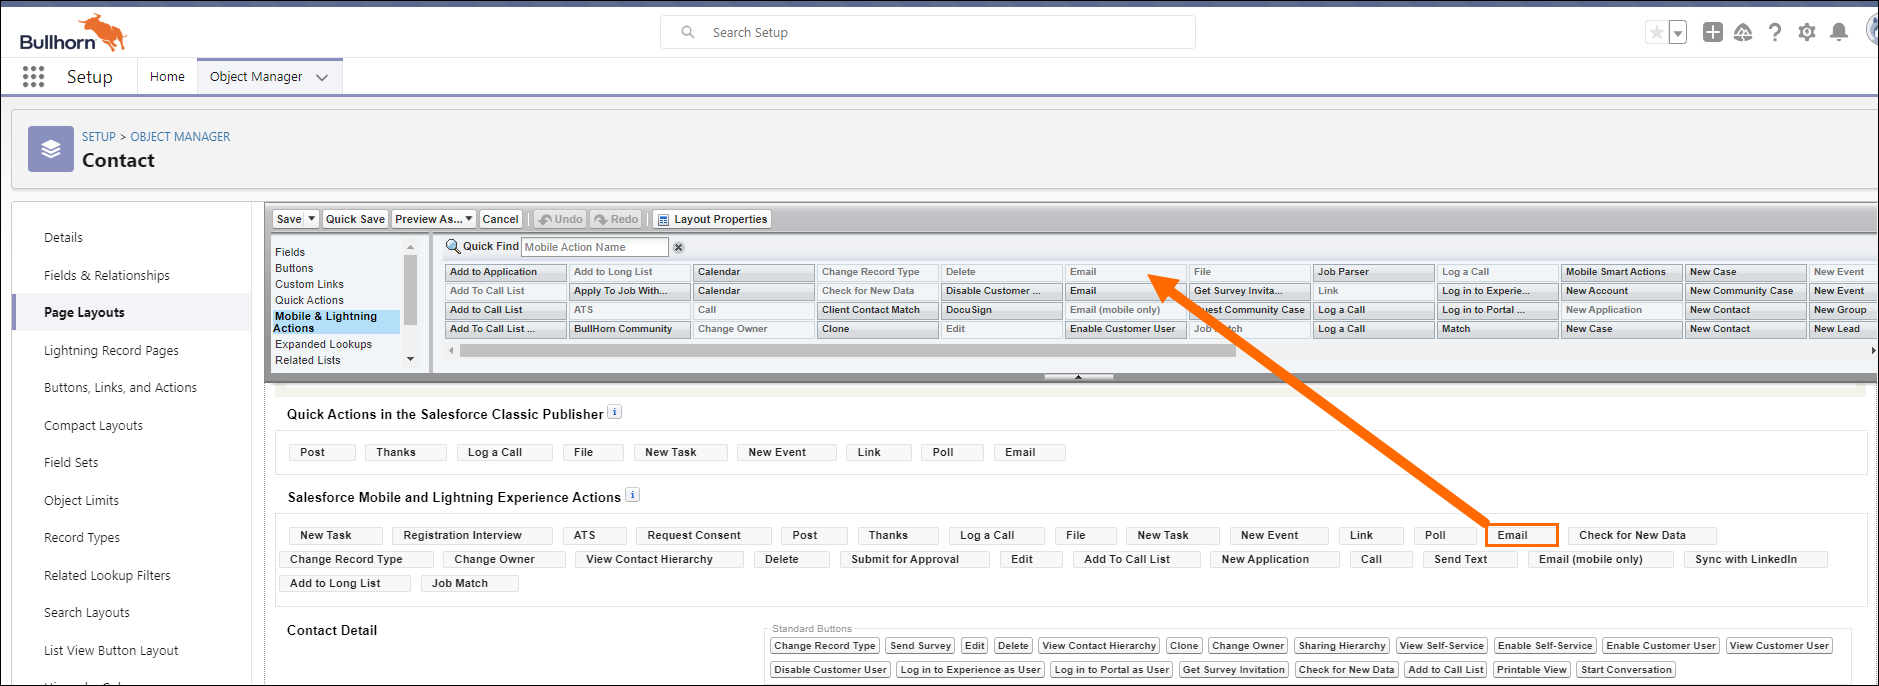
- Click Save.
Configure Contact List View Action
- Go to Setup > Object Manager > Contact > Search Layouts for Classic.
- On the List View line, click the drop-down and select Edit.
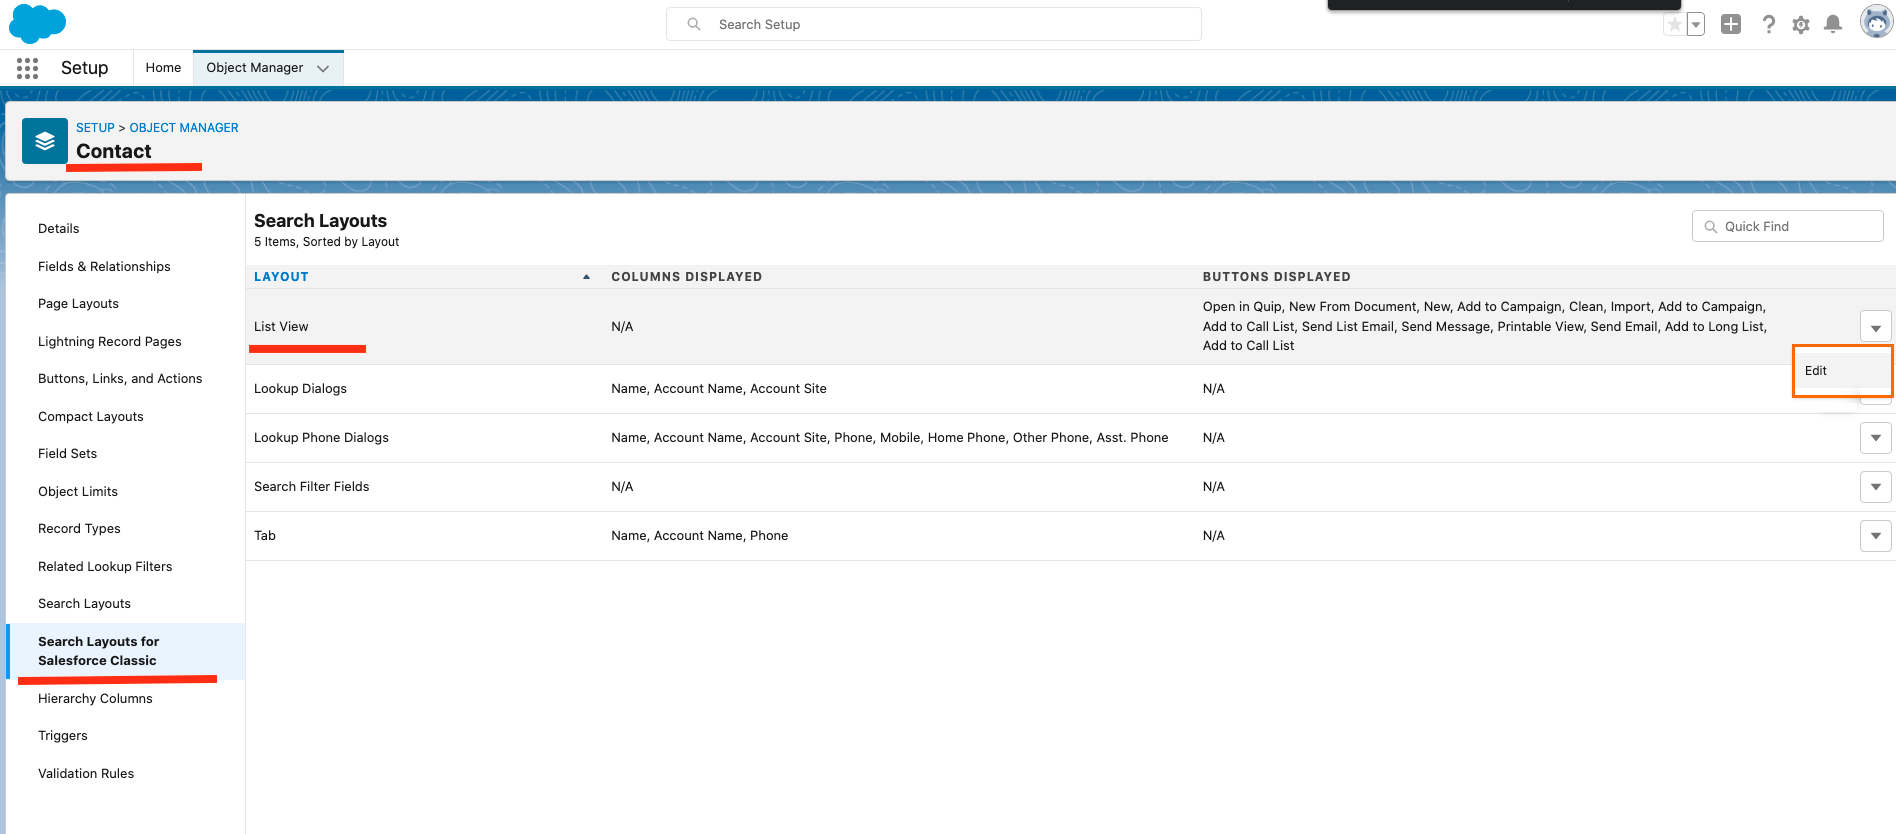
- Deselect Send List Email action to remove the old list email action.
- In the Custom Buttons section use the right arrow to move the Send Email action to the Selected Buttons column.
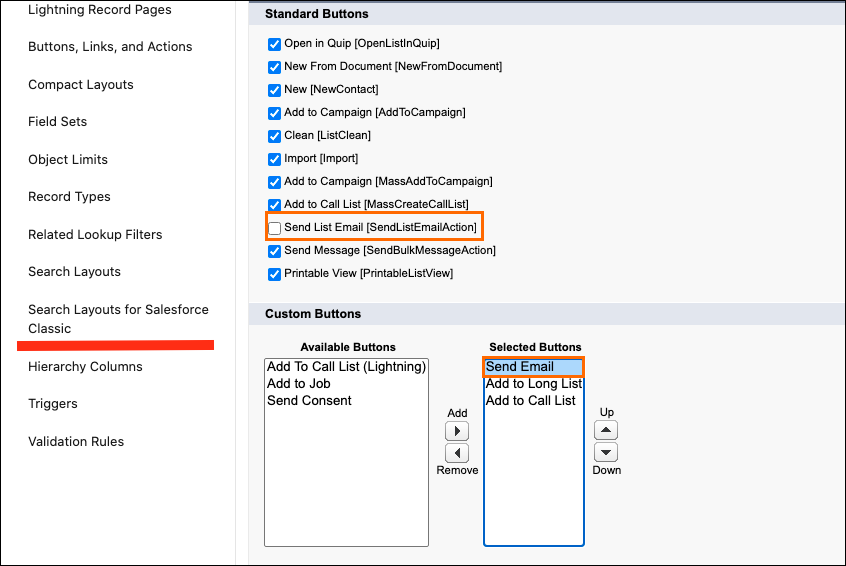
- Click Save.
Available Design Attributes
This table describes the available design attributes for GlobalEmailEditor in the Page Builder.
|
Type |
Description |
Default value |
|---|---|---|
|
Text |
Email Activity Configuration emailPageType |
SendEmail |
|
Checkbox |
If true, one column design applies |
true |
|
Checkbox |
Swap email editor columns |
false |
|
Checkbox |
If true, displays the email form in open mode |
false |
|
Checkbox |
Show cancel button (should only be used when “displays the email form in open mode” is false) |
true |
|
Checkbox |
If true, subject and body fields are required |
false |
|
Checkbox |
Shows a button that allows users to add a CC (redundant when showCcComponent is true) |
true |
|
Checkbox |
Shows a button that allows users to add a BCC (redundant when showBccComponent is true) |
true |
|
Checkbox |
Show the CC field on the email (automatically true if any ID in the initialCcList) |
false |
|
Checkbox |
Show the BCC field on the email (automatically true if any ID in the initialBccList) |
false |
|
Checkbox |
Allows for an email address to be added to the To field |
false |
|
Checkbox |
Allows for an email address to be added to the Cc field |
false |
|
Checkbox |
Allows for an email address to be added to the Bcc field |
false |
|
Checkbox |
If true, the To field will search for/accept users |
false |
|
Checkbox |
If true, the Cc field will search for/accept users |
false |
|
Checkbox |
If true, the Bcc field will search for/accept users |
false |
|
Checkbox |
Show toast message indicating that the email was successfully sent |
true |
|
Checkbox |
Display the Header. Should only be used when the component is not displayed in a modal |
false |
|
Checkbox |
Create Email Task For Candidate - works together with TR custom settings Create_Email_Task_For_Candidate__c to allow task creation for candidates in Default Resume section |
false |
|
Text |
The text for the icon that is displayed in the Header |
|
|
Text |
Lists of ids to initially fill the To field (string of ids separated by semicolon) |
|
|
Text |
Lists of ids to initially fill the CC field (string of ids separated by semicolon) |
|
|
Text |
Lists of ids to initially fill the BCC field (string of ids separated by semicolon) |
|
|
Text |
Field API name used to set the email address |
|
|
Text |
Record Id - could be used to overwrite default email recipient by overwriting the record Id value from the record detail page with the hardcoded Id value from this attribute |
|
|
Text |
SLDS icon name - icon that is displayed in the Header, when Display the Header is true |
standard:email |
|
Text |
Subject field value - predefined text for email subject |
|
|
Text |
Body field value - predefined text for email body |
|
|
Text |
htmltext | html - template Type |
html |