I-9 Dashboard 2.0
The I-9 Form I-9 to verify the identity and employment authorization of individuals hired for employment in the United States. Dashboard 2.0 gives recruiters a centralized view for managing and tracking I-9 and E-Verify An online system that confirms the eligibility of an Employee to work in the United States. The process compares information entered by an employer from an employee’s Form I-9, Employment Eligibility Verification, to records available to the U.S. Department of Homeland Security and the Social Security Administration to confirm employment eligibility. records. From one place, you can see where each employee is in the I-9 process, identify records that need attention, search and filter by a wide range of criteria, and export data for compliance reporting.
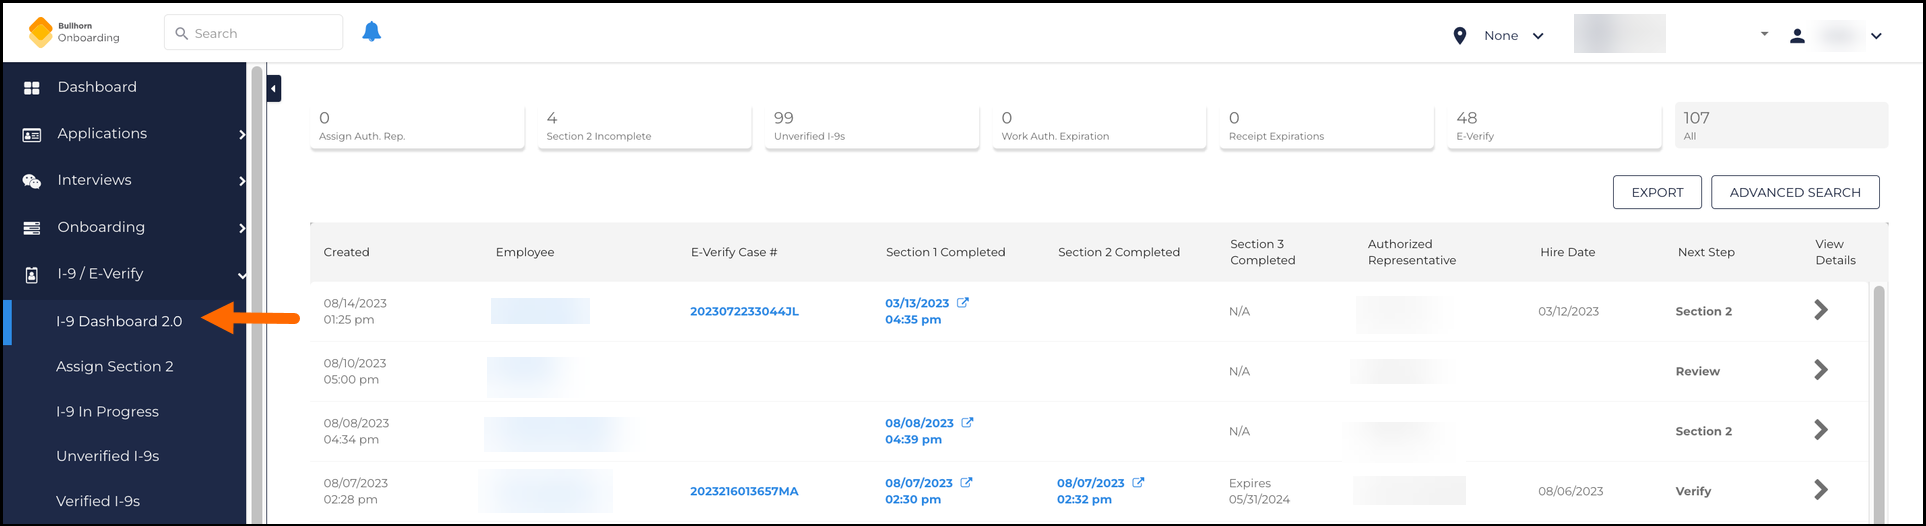
To access the I-9 Dashboard 2.0, navigate to from the left navigation panel.
Review the I-9 Process before exploring I-9 Dashboard 2.0.
Common Reasons You Might Use the I-9 Dashboard
-
Review I-9 and E-Verify case status for active employees.
-
Identify records with incomplete sections or unassigned authorized representatives.
-
Find employees who completed Section 2 but do not yet have an E-Verify case.
-
Monitor employees whose work authorization documents are expiring.
-
Search for a specific I-9 by employee name, SSN, or date range.
-
Export I-9 data for a compliance audit or internal report.
-
Reassign or update an authorized representative on an existing record.
Filter by Last Activity
The dashboard filters records based on Last Activity Date, which is tied to the Signature Request containing the I-9 form. Adjusting this range is often the first step when records are not showing up as expected.
The default range is the last 60 days. Available options are: 24 Hours, 7 Days, 30 Days, 60 Days, 180 Days, and 365 Days.
To use a custom range, select Custom and enter a start and end date. Date ranges are capped at 365 days.
Filter by Record Status
Across the top of the dashboard, status tiles display counts for key I-9 categories. Selecting a tile filters the list to show only records matching that status within the chosen Last Activity range.
Available categories include:
-
Assign Auth. Rep.: I-9s awaiting an assigned authorized representative.
-
Section 2 Incomplete: I-9s missing required Section 2 data.
-
Unverified I-9s: I-9 records that have not yet been manually verified by a recruiter. This tile only populates when the Two-Stage I-9 Verification Enabled setting is turned on (Configuration > Settings > System Settings > Form
Any document that needs to be completed and signed by a Candidate I-9 & E-Verify). This tile is always present, but only holds data when the setting is on. -
Verified I-9s: I-9 records that have been manually verified by a recruiter under the two-stage verification workflow.
-
Work Auth. Expiration: Records approaching document expiration.
-
Receipt Expirations: Records with expiring receipt documents.
-
E-Verify: Displays all I-9s associated with E-Verify cases, regardless of case status.
-
All: Displays every active I-9 record within the selected Last Activity date range. Excludes deleted or inactive onboarding workflows.
Unverified I-9s and E-Verify track separate concepts. Unverified I-9s shows records that have not yet been manually verified by a recruiter under the two-stage verification workflow. The E-Verify tile shows all records that have an associated E-Verify case, regardless of case status. An I-9 can be unverified (not yet reviewed by a recruiter) while still having an E-Verify case, and vice versa.
These quick filters help recruiters immediately identify where action is needed.
Use Advanced Search
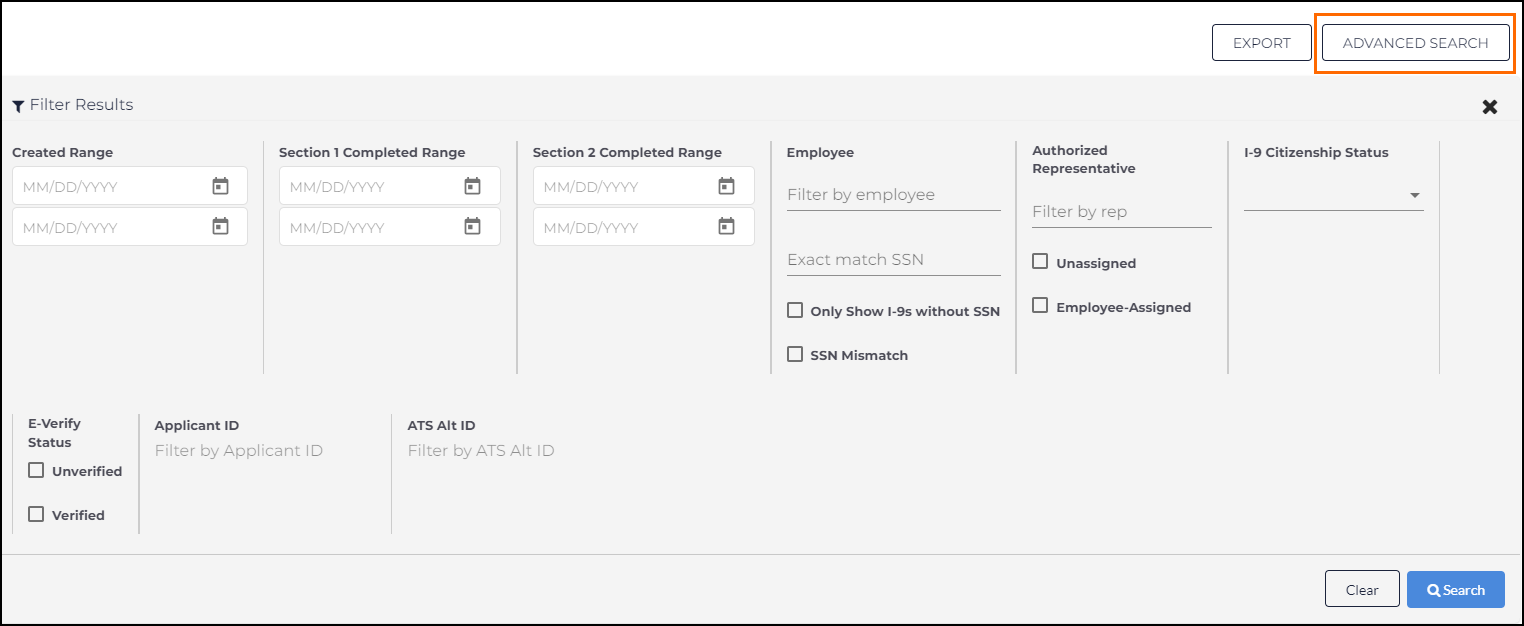
Select Advanced Search to refine your view and locate specific I-9 records.
The Filter Results panel includes multiple options for narrowing down your search:
Date Ranges
-
Created Range: Filter by the date the I-9 record was created.
-
Section 1 Completed Range: Filter by when the employee completed Section 1.
-
Section 2 Completed Range: Filter by when the authorized representative completed Section 2.
Employee and SSN Options
-
Filter by Employee: Search by employee name.
-
Exact Match SSN: Locate a record using a full Social Security Number.
-
Only Show I-9s Without SSN: Displays records missing SSN data.
-
SSN Mismatch: Displays records where the SSN entered in Section 1 and Section 2 do not match.
Authorized Representative
-
Filter by Rep: Search by authorized representative.
-
Unassigned: Displays records without a designated representative.
-
Employee-Assigned: Displays records with a representative assigned by the employee.
Citizenship and Verification Status
-
I-9 Citizenship Status: Filter by employee attestation type:
Citizen
Noncitizen National
Lawful Permanent Resident
Alien Authorized to Work
-
E-Verify Status: Choose to view Unverified or Verified records.
IDs
-
Applicant
(or Candidate or Talent) Customer talent - the person applying or hired for the job ID: Filter by internal applicant record ID. -
ATS Alt ID: Filter by an alternate applicant tracking system ID.
Once you set your filters, click Search to apply or Clear to reset all fields.
The fields available in Advanced Search cannot be customized.
Dashboard access and permissions: All user roles can view the I-9 Dashboard 2.0. The ability to edit records, reassign authorized representatives, or take action on eDocs requires User-level access or higher. The Create and View E-Verify Cases permission controls E-Verify case creation and is available down to the User role by default. There is no role restriction on exporting records.
Data Table
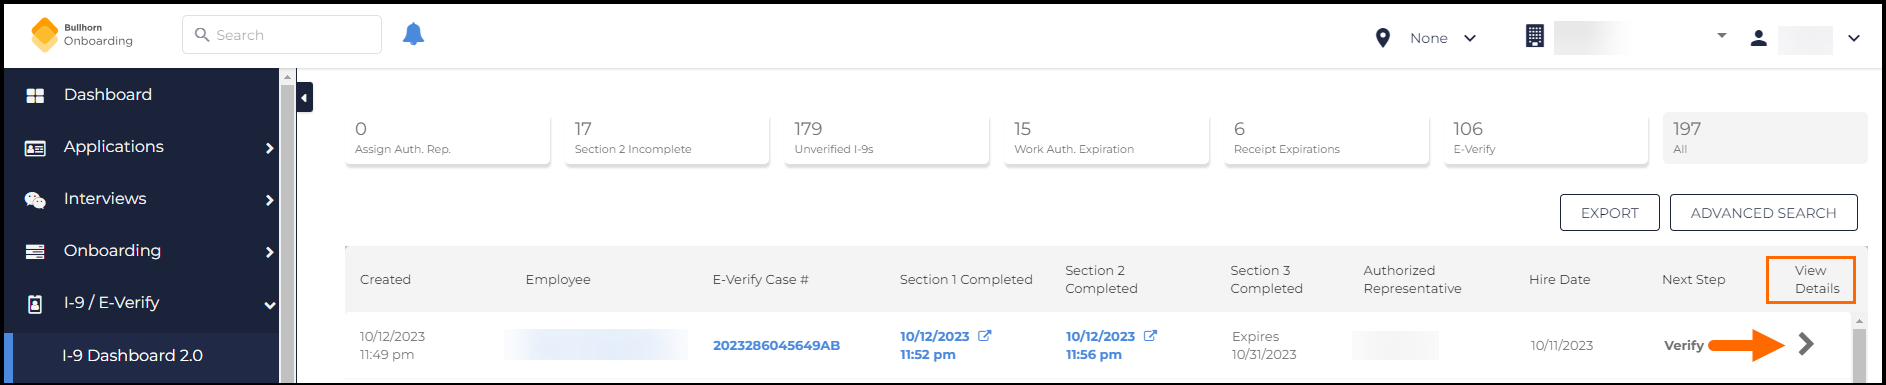
The data table lists all I-9 records matching your current filters. The data table displays active signature requests from the past 12 months. Many columns are sortable — click a column header to sort. Use Advanced Search to narrow the list further.
The data table includes the following columns:
| Column | Details | Sortable? |
|---|---|---|
| Created | The date/time the onboarding request containing I-9 Section 1 was assigned to the employee | Y |
| Employee | The name of the employee the I-9 was assigned to. This links to the Applicant record | Y |
| E-Verify Case # | The E-Verify case number associated with the employee (if available) | Y |
| Section 1 Completed | The date/time Section 1 was completed. Links to PDF | Y |
| Section 2 Completed | The date/time Section 2 was completed. Links to PDF | Y |
| Section 3 Completed | The date/time Section 3 or Supplement B was completed. Links to PDF OR the date Section 3 must be completed for an employing with expiring Employment Authorization | Y |
| Authorized Representative | The name of the Authorized Representative that completed I-9 Section 2 | Y |
| Hire Date | The date the employee was hired as indicated on I-9 Section 2 | Y |
| Next Step |
The next step to be completed by the recruiter for the I-9. The possible statuses are:
|
N |
| View Details | This Column is not Sortable. Opens the Details panel for the I-9 record | N |
Details Panel
The Details Panel is used for displaying the status of an I-9 record . This interface makes it easy to identify exactly what recruiters need to do next and gives clear opportunities to request additional information on-demand.
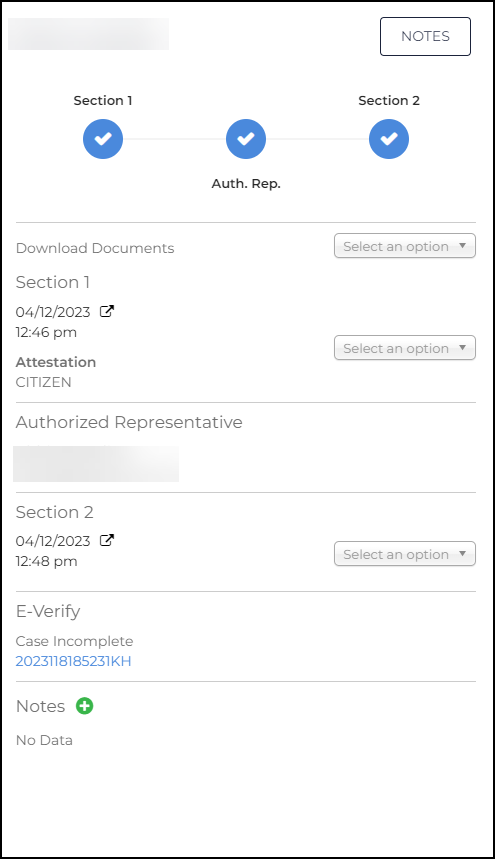
The Details Panel contains the following sections:
| Section | Description | |
|---|---|---|
| Title | Contains the Employee Name and a Notes button to access I-9/E-Verify notes left for the employee |

|
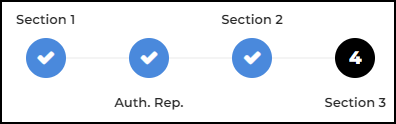
| Step Indicator | Visual representation of the progress |
|
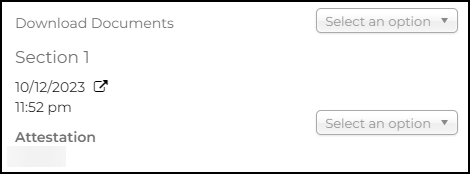
| Section 1 | If complete, displays the date/time at which Section 1 was completed, the employee’s attestation, and CTAs to view or reorder I-9 Section 1 |
|
| Authorized Representative | If assigned, shows the name and contact information of the selected Authorized Representative with the ability to edit/assign a new one. if not assigned, shows an interface allowing for assignment of an authorized representative |
|
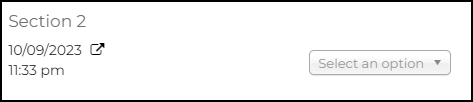
| Section 2 | If complete, displays the date/time at which Section 2 was completed, the Hire Date of the employee, and CTAs to view or Revise I-9 Section 2 |
|
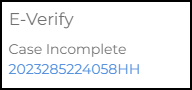
| E-Verify | If available, shows E-Verify case number and case status, links back to the E-Verify Dashboard |
|
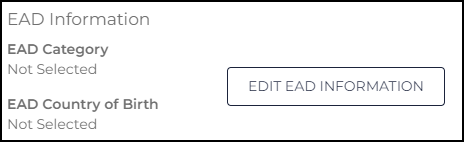
| EAD Information |
Shows the EAD Category and EAD Country of Birth. This section also allows the EAD information to be edited This section appears only when the I-9 Section 2 - Display 'Employer Requested Information' Page setting is enabled. Navigate to to access this setting. |
|
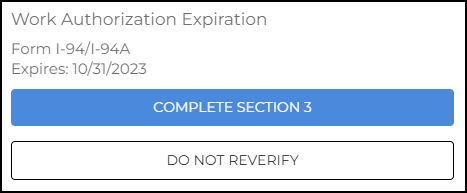
| Work Authorization | If an employee presented a work authorization document which is expiring, this section indicates the name and expiration date of the document, with the ability to Complete Section 3, or ignore reverification |
|
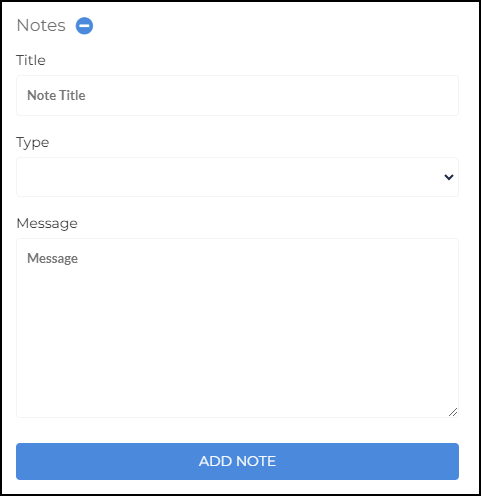
| Notes | Allows recruiters to view and leaves notes with the topic of I-9 or E-Verify |
|
Export
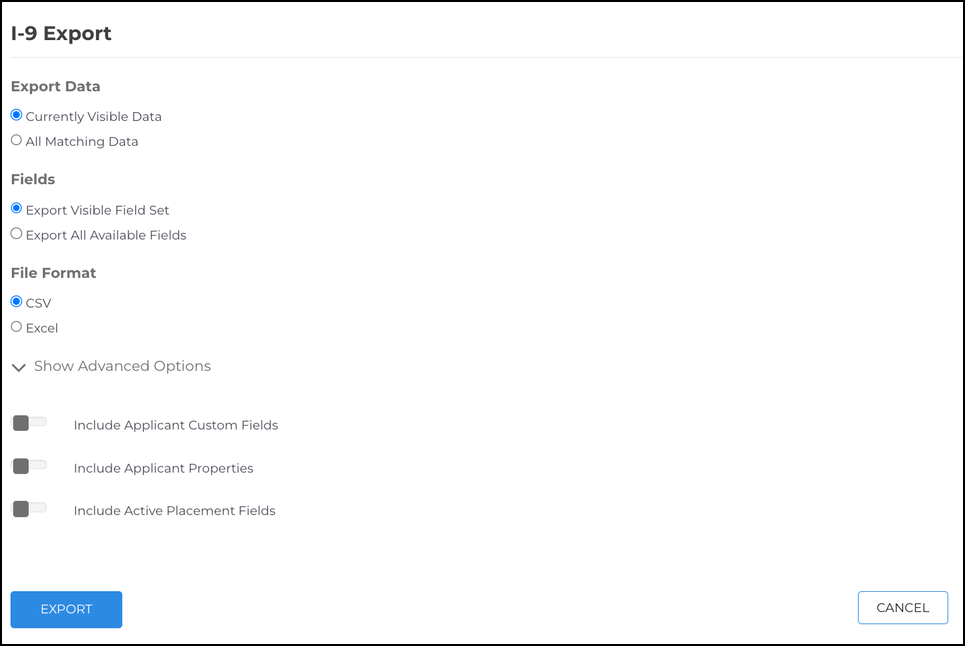
On I-9 Dashboard 2.0, recruiters and managers have the ability to configure an export of I-9 records without intervention from Support. Select Export from the top right of the table and choose from the following export options:
Choose What Records to Export
This table describes the two export scope options. The choice determines whether the export is limited to what is visible on the current page or captures everything matching your filters.
| Option | Description |
|---|---|
| Currently Visible Data | Exports only the records currently visible in the filtered data table, accounting for pagination. The file downloads immediately. |
| All Matching Data | Exports all records matching the current filters, regardless of pagination. This export runs in the background and takes longer to complete. A toast notification appears when the file is ready to download. |
Choose Which Fields to Include
This table describes the two field set options. Use Export All Available Fields for compliance audits or any situation where you need the most complete dataset.
| Option | Description |
|---|---|
| Export Visible Field Set | Exports only the columns currently visible in the data table. |
| Export All Available Fields | Exports all columns that exist on I-9 records, up to 74 distinct fields. |
Choose a File Format
Select CSV or Excel depending on how the exported data will be used.
| Format | Description |
|---|---|
| CSV | Saves the export as a .csv file. |
| Excel | Saves the export as a .xlsx file. |
Advanced Options
The following advanced options can be toggled on:
- Include Applicant Custom Fields
- Include Applicant Properties
- Include Active Placement The relationship between a hiring organization, Job opportunity, and a Candidate; describes an employee’s potential or current job within an organization Fields
Troubleshooting
Use these steps to resolve the most common issues with the I-9 Dashboard 2.0.
If the dashboard shows no results
Check the Last Activity date range. The default is 60 days, so records older than that will not appear. Expand the range or use Custom to set a wider window. If records are still missing, open Advanced Search and confirm no filters are overly restrictive.
If a record’s I-9 sections appear incomplete
Click View Details on the record to check progress for each section. Confirm that Section 1 has been submitted by the employee and that an authorized representative has been assigned for Section 2. If Section 1 is complete but Section 2 shows no authorized representative, the Next Step column will show Section 2. Assign a representative from the Details panel.
If the Next Step column shows E-Verify but no case was created
E-Verify is enabled for your organization but Auto Order is off, or the automatic submission did not trigger. Open the record’s Details panel and use the E-Verify option to create the case manually. If the I-9 was completed more than 3 business days ago, select a Late Verification Reason before submitting.
If you cannot find a specific employee
Use Advanced Search to search by employee name, Applicant ID, or Exact Match SSN. If the employee’s I-9 was created outside the current Last Activity range, expand the date filter. Records are available for up to 12 months in the data table.
If an employee’s SSN shows a mismatch
Use the SSN Mismatch filter in Advanced Search to locate all affected records. Open each record’s Details panel to review the Section 1 and Section 2 SSN entries. To correct the SSN, navigate to the employee’s Applicant record, open the Onboarding tab, click ... next to the completed Section 1 document, and select Begin Correction. The employee will need to re-enter their information through the correction workflow.
If the Work Auth. Expiration tile shows records you have already handled
Open the record in View Details and confirm whether Section 3 has been completed or whether reverification was marked as ignored. If neither action has been taken, complete Section 3 or select Ignore Reverification as appropriate.
If an export is taking a long time
Large exports using All Matching Data run in the background. Do not close the tab. A toast notification will appear when the file is ready. If the notification does not appear after several minutes, refresh the page and try the export again.
If E-Verify case status is not updating
The dashboard syncs E-Verify case data automatically. If a case status looks stale, refresh your browser. If the status has not changed after 24 hours for a case showing Verification in Process, this may indicate a delay on the DHS side. No action is needed unless the status changes to TNC.
Common Questions
These questions cover the most common points of confusion when working in the I-9 Dashboard 2.0. Each answer is written to stand alone.
How often does I-9 data refresh?
The I-9 Dashboard 2.0 refreshes automatically based on configured sync schedules. If a record looks out of date, refresh your browser to make sure you are seeing the latest data.
Can I search by employee name or SSN?
The I-9 Dashboard 2.0 supports search by both employee name and Social Security Number. Open Advanced Search and enter the employee’s name in Filter by Employee, or use Exact Match SSN to search by Social Security Number.
How do I reassign an authorized representative?
To reassign an authorized representative, open the record using View Details and select Edit under the Authorized Representative section. You can assign a new representative from there.
Can I see which employees have expiring work authorization?
The I-9 Dashboard 2.0 includes a Work Auth. Expiration tile that filters to records approaching expiration. Open any record’s Details panel to see the document name and expiration date, and to initiate Section 3 if needed.
What is the difference between Unverified I-9s and the E-Verify tile?
Unverified I-9s shows records that have not yet been submitted to E-Verify. The E-Verify tile shows all records that have an associated E-Verify case, regardless of case status. If your organization uses E-Verify, the Unverified I-9s tile is the fastest way to find records that still need a case created.
Why does a record show Review in the Next Step column even though the I-9 is not done?
Review appears in two situations: when the employee has not yet completed Section 1, and when the entire I-9 is fully complete. If you expected action to be available and see Review instead, open View Details to confirm the current status of each section.
Scenarios
The following scenarios describe how recruiters use the I-9 Dashboard 2.0 in common situations. Each scenario is self-contained and includes the context needed to match it to a specific question or task.
A recruiter needs to find all employees who completed Section 2 but do not yet have an E-Verify case
Open Advanced Search and set a Section 2 Completed Range covering the relevant period. Click Search. In the data table, review the E-Verify Case # column. Any row with a blank E-Verify Case # has not been submitted. Click the row to open the Details panel. If the Next Step shows E-Verify, use that option to create the case. If the I-9 was completed more than 3 business days ago, select a Late Verification Reason before submitting.
The Section 2 Incomplete tile is showing a count, and the recruiter needs to identify who needs follow-up
Click the Section 2 Incomplete status tile to filter the dashboard to affected records. Open each record’s View Details panel to check whether an authorized representative has been assigned. If no representative is assigned, use the Authorized Representative section to assign one. If a representative is already assigned, confirm they received the notification and follow up if needed. The Next Step column will show Section 2 for all records in this view.
A recruiter is notified that an employee’s work authorization is expiring and needs to complete Section 3
Click the Work Auth. Expiration status tile to see all records with expiring documents. Locate the employee and click View Details. The Work Authorization section shows the document name and expiration date. Click Complete Section 3 to begin the reverification process. If reverification does not apply to this employee, select Ignore Reverification instead. The record will be removed from the Work Auth. Expiration tile once either action is completed.
A manager needs to export all I-9 records from the past year for an external audit
Use Advanced Search to set a Created Range covering the full year. Click Search to confirm the records are visible. Select Export from the top right of the table. Choose All Matching Data to capture records beyond what is visible on the current page. Select Export All Available Fields for the most complete dataset, and choose CSV or Excel based on the auditor’s requirements. The export runs in the background. A toast notification appears when the file is ready.
A recruiter is trying to locate an employee record but cannot find it by name
Use Advanced Search and try Exact Match SSN if the Social Security Number is available. If the name might be spelled differently in the system, search by Applicant ID instead. If the record is still not appearing, check the Last Activity date range — records older than the current filter window will not show in the table. Expand the range to 180 Days or 365 Days, or use Custom to enter a specific window covering the employee’s onboarding date.