Custom Mapping Tool: Filters Settings
Overview
The Filters tab allows you to configure filtering options for the custom mapping.
Steps
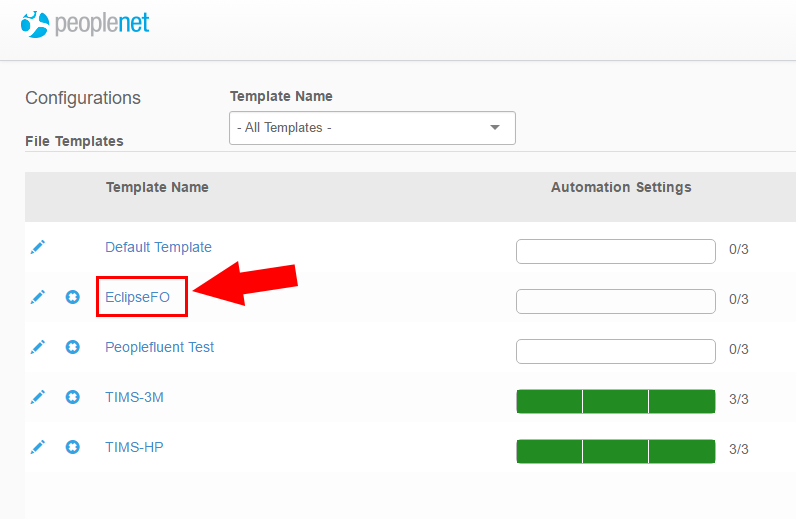
- Select a template from the list in the Configurations menu.
- You may choose a newly created template or one already in use.
- Click the Report Settings tab for the template to make changes.

- Enter the required report details as needed.
- For more information on configuring other Report Settings, see Report Settings.
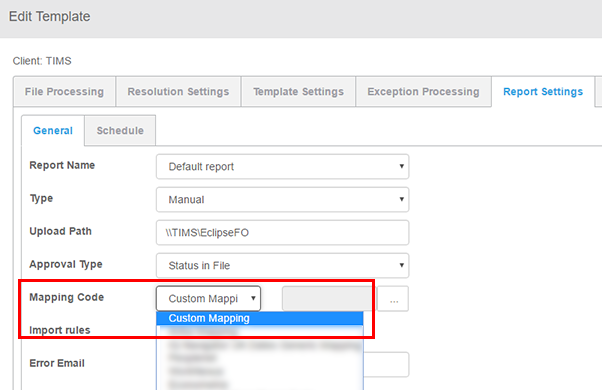
- From the Mapping Code dropdown, select Custom Mapping.
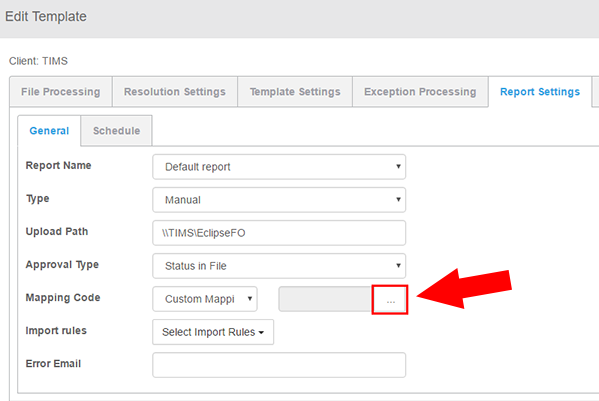
- Click the More button
 to the right of Mapping Code to open the mapping tool.
- Select the Filters tab.
- Complete the following sections as needed:
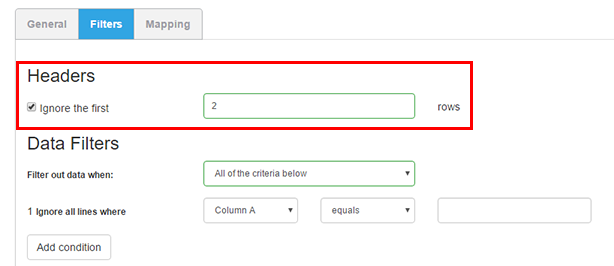
Headers
Here, you can indicate if there is a header row on your file that should be ignored during import.
- You can specify how many rows should be ignored.
- To indicate which rows should be ignored, click Ignore the first and then enter the number of rows that should be ignored.
- If there are no header rows to be ignored on your target file, leave the option unchecked and undefined.
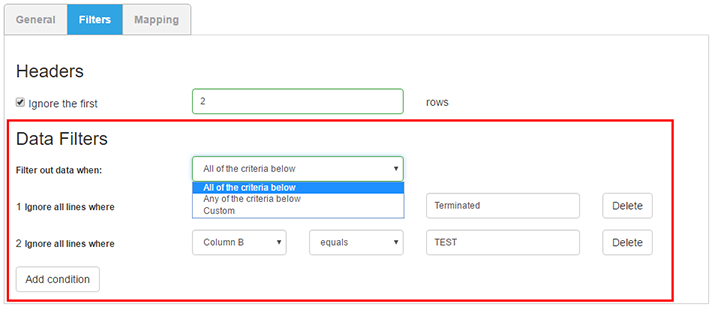
Data Filters
- In addition to filtering out header row details, you have the option of filtering out other details in the file. The filter is customizable, so you may exclude details based on what you specify. You can sort out and ignore anything from last names, statuses, keywords, or any other data found on the file.
Filter out data when: allows you to specify when rows should be excluded:
All of the criteria below - this ignores details that meet all conditions you specify below.
- Any of the criteria below - data will be ignored if it meets any single condition you specify.
- You may add more conditions with Add condition.
- Remove a condition with Delete.

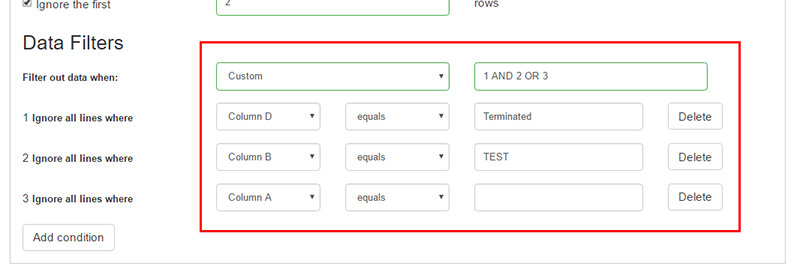
Using Custom data filters?
When using the Custom filter, you'll need to set up and save some conditions first. Then, you may enter an "AND" or "OR" statement in the field next to Custom. In the below example, we entered the phrase 1 AND 2 OR 3 to indicate that rows should be ignored if conditions #1 AND #2 are met; OR if condition #3 is met.
- When you're done making changes on this tab, click Save Map to save your changes.
- Alternatively, select another Custom Mapping Tool tab to configure more options.
Related Articles
Was this helpful?
