| Edition:Growth, Corporate, Enterprise | Audience: Timezone Admin |
Set a Timezone
This article explains how to set a specific timezone against a user or a group to ensure that all data is collected within the correct time period according to the user's location.
To find out how timezones are calculated in more detail, see How Timezones Work with Bullhorn Analytics.
Activity Showing for the Incorrect Day
If you are based in APAC/West Coast America, you may notice that some activity shows on the incorrect day within Bullhorn Analytics. This is likely due to timezone differences between your Bullhorn ATS and Bullhorn Analytics.
If set up correctly, your Bullhorn Analytics data should always report based on the local date that an action was made. For example, if a record was updated locally in Australia on October 2, but this was October 1 in the UK, it will only show when running a query on October 2 (assuming relevant timezones have been set).
Steps to Apply a Timezone
-
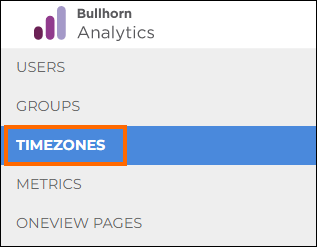
Go to Admin > Timezones.
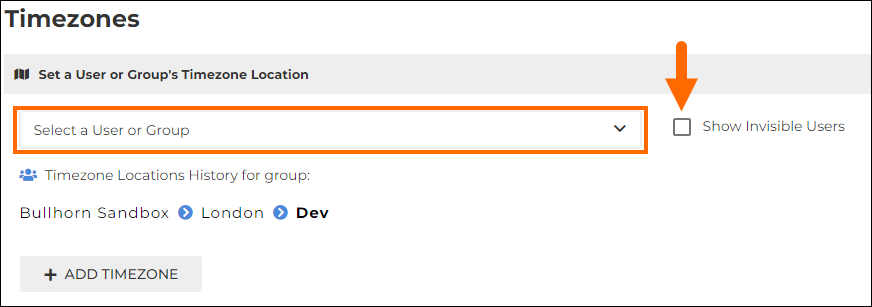
- Select the relevant user or group from the dropdown menu. Check the Show Invisible Users checkbox to include inactive or orphaned users.
- Once selected, the user/group will show at the top, along with any existing timezones that are set (the default is GMT). It will also show any inherited timezones from higher up groups beneath, if applicable.
- Once selected, the user/group will show at the top, along with any existing timezones that are set (the default is GMT). It will also show any inherited timezones from higher up groups beneath, if applicable.
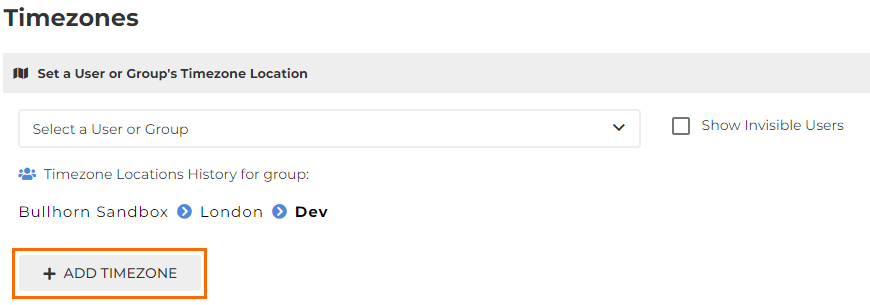
- Click Add Timezone to open the Timezone section.
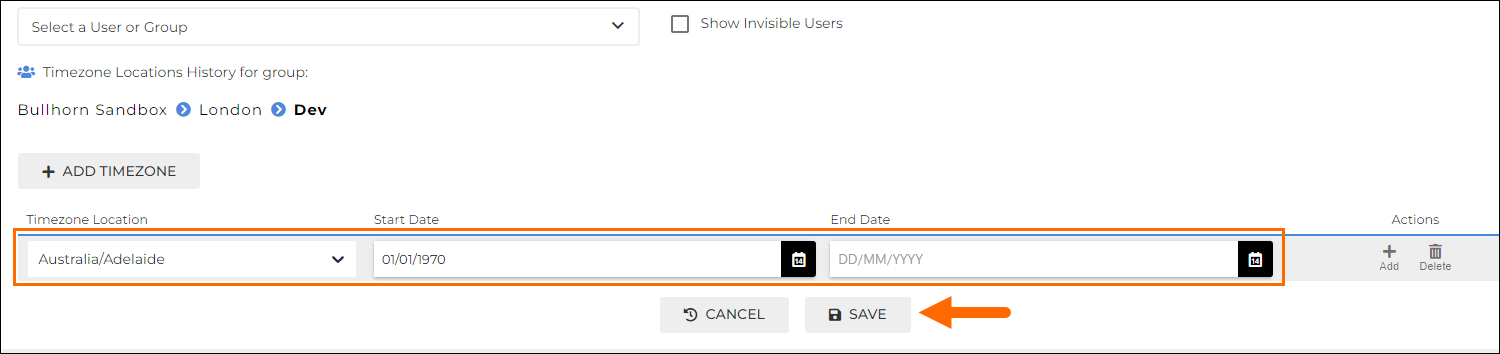
- Choose the correct timezone for the user or group and enter a start and end date if required.
- If the user/group has always been in that timezone, we recommend a default start date of 01/01/1970.
- If the user/group has always been in that timezone, we recommend a default start date of 01/01/1970.
- Click Save to apply the changes. This will recalculate the existing data to the new timezone, and may take a couple of minutes to apply.