| Edition: All Editions | Audience: Scheduled Reports Admin |
Scheduled Reports Admin
Users with the Scheduled Reports Admin permission can oversee and manage every Dashboard scheduled report across the organization from a centralized view. This ensures consistent report delivery and enables system-wide troubleshooting without requiring the original creator’s credentials.
Managing Organization-Wide Reports
Having a centralized view of your organizations scheduled reports is essential for maintaining business continuity and oversight. You can use the Admin functionality to perform tasks such as:
-
Audit Distribution: View all active reports across all teams and departments.
-
Maintenance and Control: Edit, pause or delete reports created by any user.
-
Troubleshooting: Investigate delivery failures and verify recipient lists.
-
Team Transitions: Instantly clone and take ownership of reports when employees change roles or leave the company.
-
Review Access : Monitor which stakeholders are receiving dashboard data via email.
Accessing the Admin Menu
Ask your Bullhorn Analytics administrator to grant access to the Scheduled Reports Admin permission:
-
In Users Admin, open the user's profile and navigate to Admin Permissions. Check the box for Scheduled Reports Admin to enable access. For detailed instructions, see Setting App and Admin Permissions.
Once the permission is active, log in to Bullhorn Analytics and go to Admin->Scheduled Reports.
Scheduled Reports Admin View
The Scheduled Reports Admin menu provides a centralized view of every scheduled report across your organization, including their status, frequency, and last sent date.
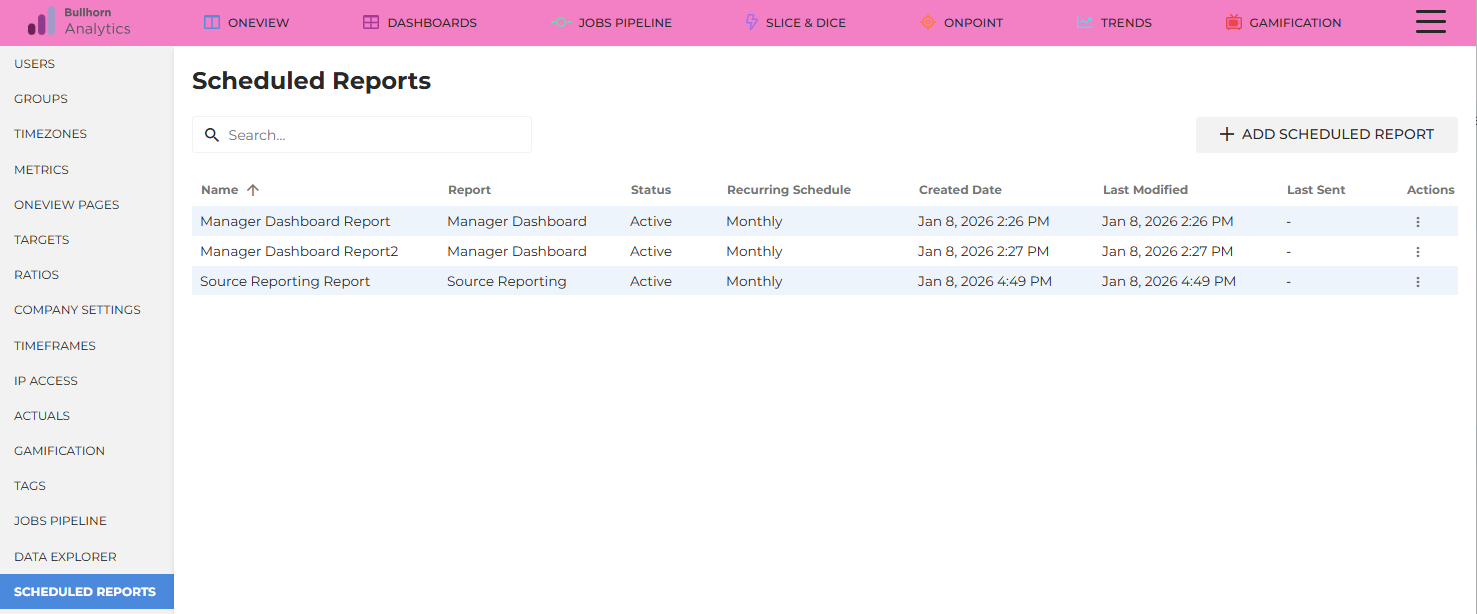
The report list includes:
-
Schedule Name: The unique title assigned to the scheduled report. Note: Select a name to open and edit that schedule directly.
-
Report Source : The specific dashboard providing the data.
-
Owner: Original creator of the report.
-
Status: The current state of the report (Active, Paused, or Ended).
-
Recurring Schedule: Frequency of the scheduled report (e.g., Daily, Weekly, Monthly).
-
Next Schedule: The date and time the report is next due to send.
-
Timeline: Created, Last Modified, and Last Sent dates.
-
Actions: A dropdown list (⋮) to Edit or Clone, or Delete the report. This column is pinned to the right of the table.
Managing Scheduled Reports
Admins can modify, duplicate, or stop any existing scheduled report to ensure data reaches the right people at the right time.
Cloning a Report Schedule
Admin Workflow: This section applies to users with the Scheduled Reports Admin permission, cloning reports from the centralized Admin menu. If you are a standard users looking to clone your own report schedule this workflow does not apply. See Dashboards: Scheduled Reports instead.
The Clone feature allows you to duplicate an existing report schedule instantly. This is the most efficient way to transfer a schedule from a former employee to a new owner or to use a complex report schedule as a template for a different team.
-
Locate the report schedule in the centralized list.
-
Click the three-dot menu (⋮) and select Clone.
-
A new report editing interface will open with all details (recipients, frequency, dashboard source) automatically populated. Adjust the name or details as required and click Save Schedule.
-
By saving the cloned version, you (the Admin) become the owner of the new scheduled report.
If the Clone button is disabled, ensure you have saved all pending changes on the current screen first.
-
Editing a Report
-
Locate the report schedule you want to update in the centralized reports list.
-
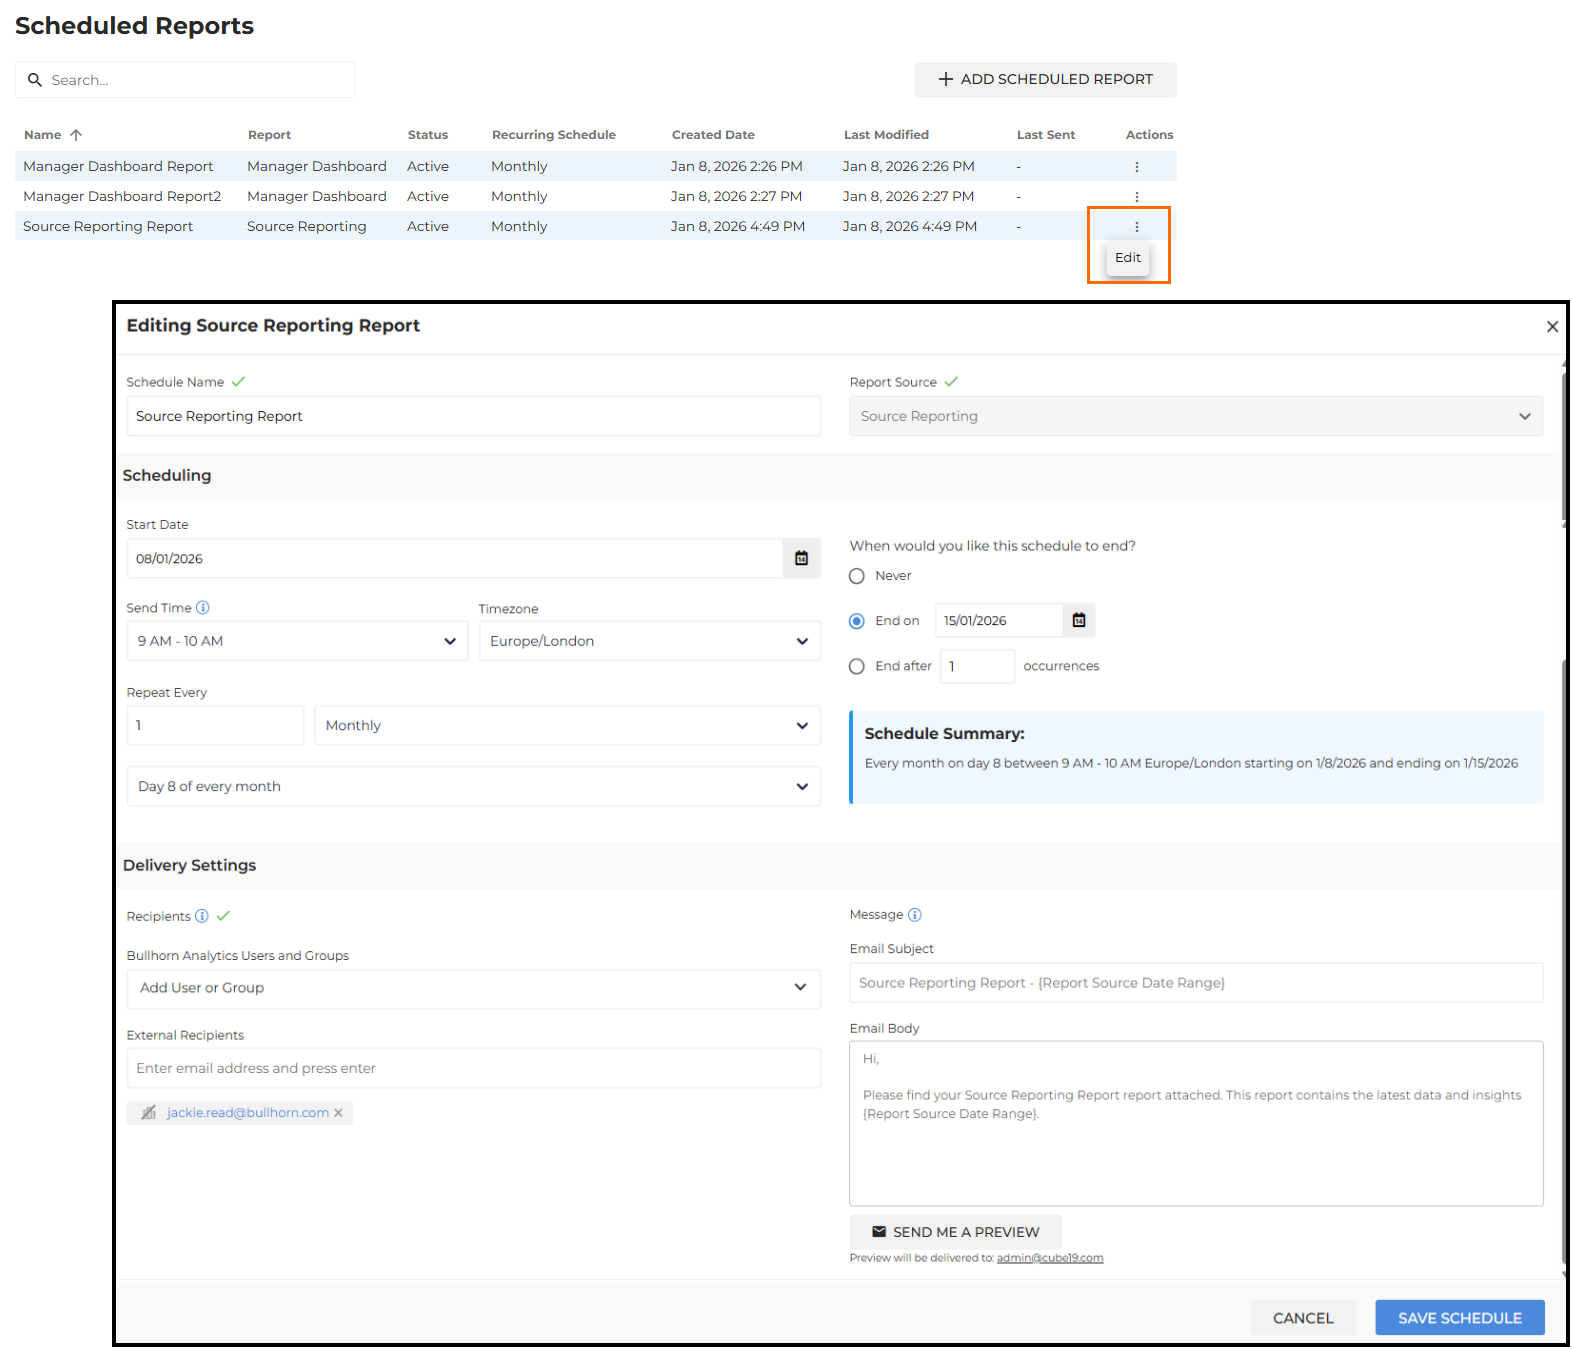
Click the three-dot menu (⋮) next to the report name and select Edit. Alternatively, select the report name to open and edit the schedule directly.
-
The Edit Scheduled Report interface will display.
-
-
Update the parameters as required:
-
Change the frequency or specific schedule.
-
Adjust the start or end dates.
-
Update the recipients (users, groups, or external emails).
-
Modify the email subject or content.
-
Adjust the Report Width (Standard or Wide).
-
-
Click Save Schedule to apply your changes.
Deleting a Report
Scheduled Reports Admin users have permission to delete any report schedule.
-
Locate the report you want to update in the centralized reports list.
-
Click the three-dot menu (⋮) next to the report name and select Delete.
-
A confirmation prompt will appear:
-
-
Click Confirm to permanently remove the scheduled report.
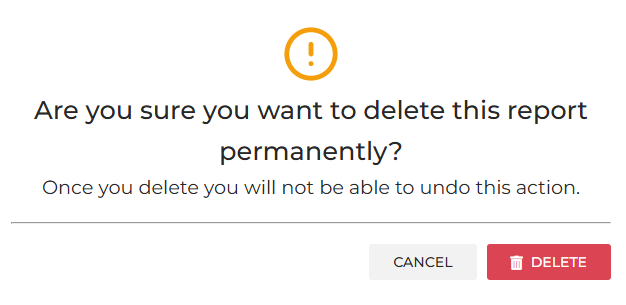
Alternatively, you can click Edit next to the report name or select the schedule name to open the interface and select the Delete button at the bottom of the report interface screen.
Pausing a Report
To pause a report schedule:
-
Follow the steps to edit the report.
-
Change the End Date to any date in the past.
-
Click Save Schedule to apply your changes.
If the report is no longer required, use Delete instead to keep the Admin list organized.
Changes take effect for the next scheduled send. Any reports currently in the process of being generated or sent will use the previous settings.
Troubleshooting Delivery Issues
If a scheduled report is not being received, use this checklist:
-
Verify Status: Confirm the report status is Active (the start date has passed, and the end date has not been reached).
-
Check Ownership: Scheduled reports require an active owner. If the original creator has left the company or been marked as inactive, the report will fail. To fix this, Clone the report to take ownership, then delete the original version.
-
Verify Recipients: Ensure all email addresses are correct and that recipients are active Bullhorn Analytics users. Reports will not be delivered to inactive, deleted, or expired accounts. If the email is correct and the user is active, ask them to check their spam or junk folders.
-
Review the Admin Table: Check the Last Sent column in the Scheduled Reports Admin table. If a delivery failed due to owner or recipient status, it will be marked as Failed.
-
Check Date Range Logic: If the report data appears static or outdated, verify the dashboard filters. Relative Filters (e.g., "Last Week") update dynamically, while Custom Date Ranges remain static.
-
Confirm Schedule: Review the frequency settings (Daily, Weekly, etc.) to ensure they match the expected send days. Also, check the send time; remember that reports are generated based on the time zone of the report owner.
-
Check Recipient Access: If the dashboard uses a Logged in User or Logged in User's Group filter, only recipients with dashboard access can be added to the report. Recipients without access will not appear in the recipient list and cannot receive the report.
-
Test Generation: Send a preview to yourself from the Admin menu to confirm that the report generates successfully.
Frequently Asked Questions
Can I transfer ownership of a report to another user?
No. While you cannot re-assign the original report, you can use the Clone feature. When you clone a report, you become the owner of the new version.
Can I see who receives each report?
Yes. When you edit a report in the admin menu, you'll see all recipients, including individual users, groups, and external email addresses.
Why do some recipients have a warning icon next to their name?
The warning icon means that the recipient doesn't have permission to view the dashboard in Analytics. They'll still receive the PDF, but they won't get a link to the live dashboard. This is expected for external stakeholders.
How do I know if a report is currently active?
Check the status column in the Admin menu. The report shows as "Active" if the start date has passed and the end date has not yet been reached. If the report owner is inactive, the report may still show as "Active" status but will result in a Failed delivery.
What happens if the report creator leaves the company?
The report will fail because it requires an active owner. To ensure continuity, Clone the report to take over ownership, then delete the original version to keep your reports list current.
Why is the Clone button grayed out?
The Clone button is disabled if there are unsaved changes on the page. Save your current work to re-activate the button.