Import a List into Bullhorn Automation
This article contains steps for customers to import contacts into with a .CSV file.
This feature isn't available to all clients and requires the ability to import lists into based on their ATS. If they don't see an Import option on their menu, this isn't currently active for their company.
For Bullhorn ATS Clients, we recommend importing any new candidates or sales contacts into using their Custom Import tool.
Doing this first will allow to accurately update candidate or client records in the ATS with new activity. By default, you won't have access to use the Import tool.
Import Procedure
Download the Import Template
The first procedure in the process is to download the import template. The customer does the following:
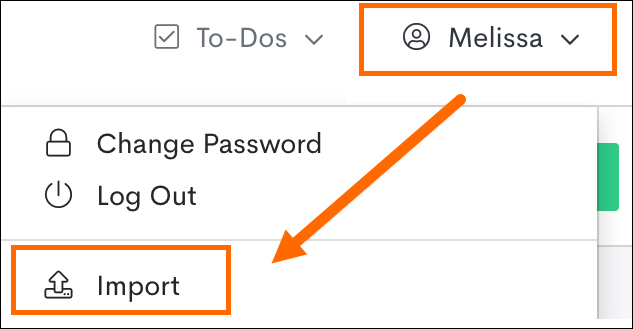
- In , click on their name in the upper right corner to bring up their Settings menu, then select Import.
- Follow the first three steps on the page as shown below:

- When the customer clicks the link in the first step, the Bullhorn Automation Import Template will automatically download as a .CSV file with pre-existing headers. Don't change the column titles in this template.
Add Data to the Import Template
Now the customer can add data to the import template. They do the following:
-
Add the following columns of data to this template.
The headers of the columns must remain exactly as they are on the spreadsheet.
Column Title Required? Record Type Notes Email Yes Candidate or Sales Contact Email address of the candidate or contact. This field is required. First Name No Candidate or Sales Contact Last Name No Candidate or Sales Contact Name No Candidate or Sales Contact Source No Candidate or Sales Contact Status No Candidate or Sales Contact Type No Candidate or Sales Contact Position No Candidate or Sales Contact Company No Candidate or Sales Contact City No Candidate or Sales Contact State No Candidate or Sales Contact Zip Code No Candidate or Sales Contact Date Added No Candidate or Sales Contact Mass Mail Opt Out No Candidate or Sales Contact Is Deleted No Candidate or Sales Contact ATS Candidate/Sales Contact ID No Candidate or Sales Contact Provide the ATS ID in this column to merge Bullhorn Automation imported records to their ATS record. Category No Candidate or Sales Contact Owner Email No ATS User Owner First Name No ATS User Owner Last Name No ATS User ATS Owner ID No ATS User Phone Number No Candidate or Sales Contact Date of Birth No Candidate or Sales Contact Date Available No Candidate or Sales Contact -
Add the candidate or contact's email address in the Email field (Column A). It's recommended to add in a First and Last Name.
-
This method will create a record that exists only in this instance, so make sure to include any information that’s needed and applicable to the columns of the import template.
It's not possible to add custom fields or any additional columns to this template, as wouldn't be able to read that data. Only the data in the pre-existing columns will be mapped into .
-
- Once the customer has added their data to the template, they save the file in .CSV format.
- If the file is not in .CSV format, they won’t be able to import their file into .
Create the Bullhorn Automation List
After the customer has added their data to the template and saved the file in a .CSV format, they'll need to add this file to a list. They must do the following:
- Navigate to the Import page in .
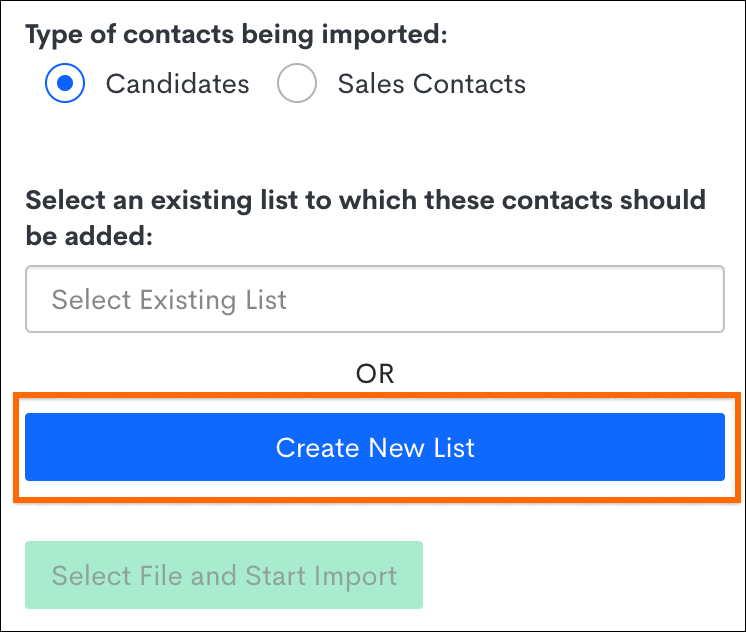
- Select the type of contacts being imported.
- The customer can only import one type of record per template—either Candidates or Sales Contacts (not a mix of both).
- If the customer is adding the contacts to an existing list, they enter the name of the list. Otherwise, select Create New List.
- If the customer is creating a new list, they'll need to enter a name for the list in the New List Name field. This is the name that will appear on the Lists
 A collection of ATS records that meets specified criteria, such as a scheduled end date or a low NPS response. page.
- If the customer is creating a new list, they'll need to enter a name for the list in the New List Name field. This is the name that will appear on the Lists
- Once they've named or selected their list, they click Select File and Start Import.
- A file window will appear for the customer to select their .CSV file. Select the file and click Open (or whichever value their system shows) to add the file to .
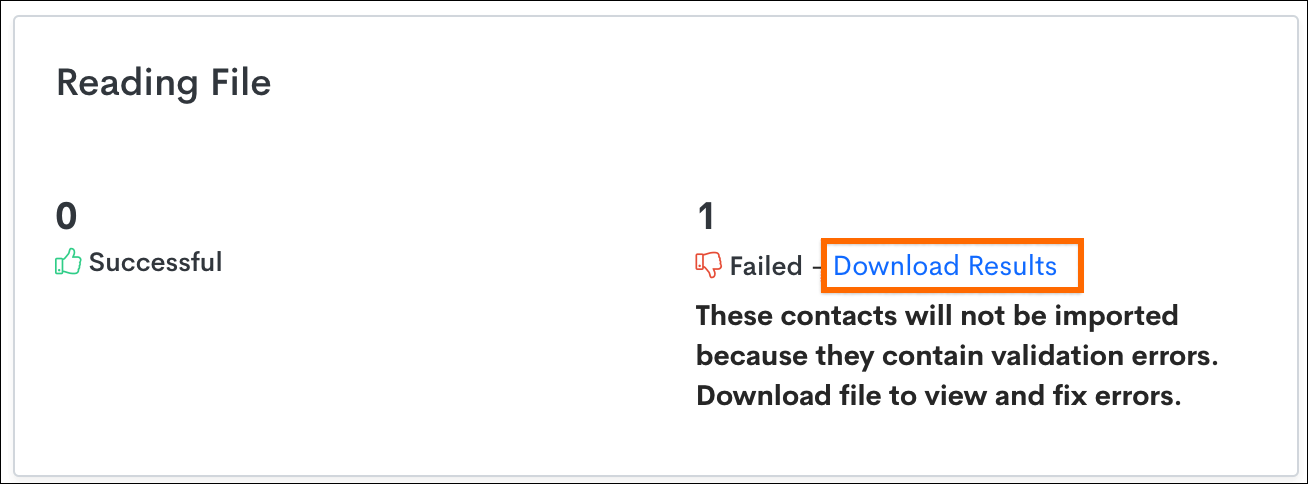
- After they've added the file, will begin validating the contacts. If there are any rows of data in their file that failed validation, the customer will be prompted to download a file containing this data. This file has a column labeled Validation Errors so they can see the reason for the failed result. There are two different possible validation errors:
- Invalid email: The email address isn't in a valid format.
- Email is not unique, a candidate with this email already exists in this file: There's a duplicate email address on a separate row in the same file.
Confirm the Imported List was Added
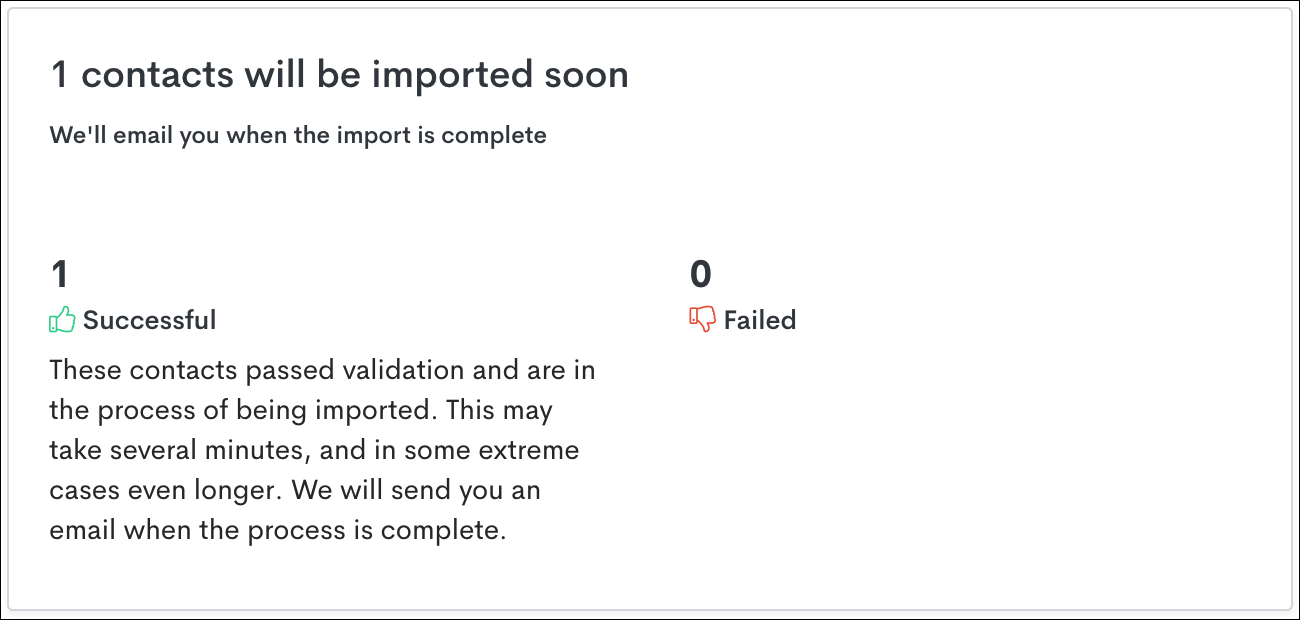
Once the customer has imported the .CSV file to their list, if any contacts were successfully validated, will send them an email confirming that the list has completed the import process.
Once they receive this confirmation email, they will know their list has begun syncing successfully in . The customer can view their Lists page to confirm that the number of contacts that were successfully validated are included on their newly added list.

After the customer has confirmed the list has been successfully synced into , the final step is to add the list to an automation as normal and begin automating!
Additional Considerations
One Time Lists
Each custom imported list is created as a One Time list. This will also create a record for each unique email that’s added to any imported lists. If the customer would like to add additional records to an existing list, they go to the Imports page, and instead of selecting Create New List, type a list name in the Select Existing List box and select it to upload the additional CSV file to that list.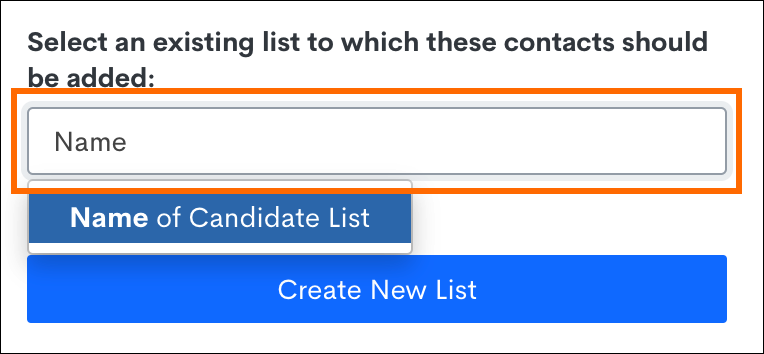
Search with One Time Lists
Customers can search for additional criteria along with any manually imported list as long as there is data stored for that search field.
For example, if they only want to view candidates on an imported list that have a certain email address, they can create the list logic with the first condition being “In List > [List Name here]” and criteria for any additional information as needed.
Delete Contacts from a List
Customers can delete contacts from a manually imported list using the import template. To do this, list only the email address(es) of the contact(s) they’d like to remove from that list, and in Column N (labeled Is Deleted) type in "TRUE" for each corresponding candidate row. Save the file as a .CSV.

Then go to the Imports page and add the file to the list that they want to remove the contact(s) from. Upon successful validation and sync, the list count will decrease and match the number of records that were validated on this upload. If the list had 10 contacts, and their import file deleted two contacts, the list count would now be at eight.
This will only remove the contact from the list. If the contact was added through the Automated Import, or if they exist on another list, they’ll still have a record inside of the customer's Instance.