How to Import Data into Bullhorn
The Custom Import tool lets you bring Candidates, Contacts, and Leads into Bullhorn from a CSV file. This is especially useful when you need to bulk upload data from another system, update large groups of records, or avoid creating records one by one. By mapping your spreadsheet to Bullhorn fields, you can ensure data is accurate, searchable, and ready for use in your workflows.
Common Import Scenarios and Issues
When you need to import data into Bullhorn, it’s usually because you have information stored somewhere else that needs to be brought into the system. Maybe you’re uploading a spreadsheet of candidates from a job board, moving contacts from another database, or cleaning up data so it’s easier to manage in Bullhorn. Below are the most common situations where admins look for help with importing data:
- How do I bulk upload candidates, contacts, or leads into Bullhorn?
- How do I import a CSV or Excel file of records from another system?
- Why are my imported records showing up as duplicates?
- Why can’t I see candidates or contacts after importing them?
- How do I confirm if my import finished successfully?
- How do I reassign or mass update imported records?
- Why are fields like company, skills, or phone numbers missing after import?
- How do I fix a bad import if something went wrong?
Create a CSV File for Import
Creating a CSV file will allow you to bulk import data. Before importing, you’ll need a clean CSV file. Correct formatting prevents errors and makes mapping easier.
-
Remove unnecessary or blank columns. These cause processing errors.
-
If you used the template, remove the header row. Leaving the header row will cause the import to fail.
Example: If Candidate Source is “LinkedIn,” that same value must be used in the Source field within Bullhorn. -
Separate multiple skills with commas only, no spaces.
Example: HTML,Java,CSS,Python -
Ensure all Contacts are tied to a Company.
-
If unknown, create a placeholder Company record named "TBD".
-
-
Ensure field values match Bullhorn’s values exactly.
-
Open your data in Excel or use the Custom Import Template with pre-filled headers.

-
Insert a row above your data and enter the exact Bullhorn field names in the header.
-
See List of Custom Import and Export Fields for supported fields.

-
-
Save a copy of the file as a CSV.
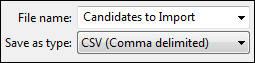
Your CSV file is created, saved, and ready to be imported.
Import Your CSV Data Using the Custom Import Tool
Once your CSV is ready, use the Custom Import tool to bring the data into Bullhorn.
Custom Import only supports CSV files. If your file is Excel, use.
-
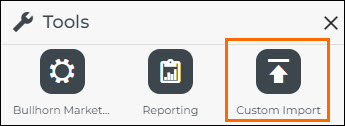
Go to Menu > Tools > Custom Import.
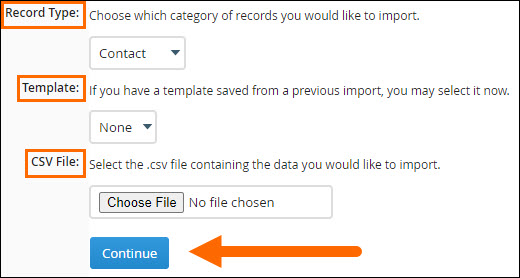
- Fill in the following fields:
- Record Type: Choose Candidate, Contact, or Lead.
- Template: If you're importing to the same fields frequently, choose a saved template. Select None for first-time imports.
- CSV File: Browse for your saved CSV.
- Select Continue.
- Fill in the following fields:
- Select Continue.
- Review the automatic field mapping. Adjust if needed.
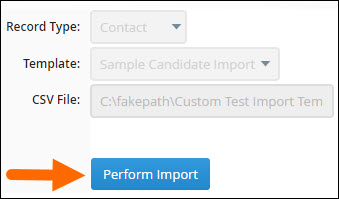
- Enter a name in the Template Name field, enter a name, then match your data to the correct field map using the drop down, and select Continue.

- Click Perform Import.
- Review the first 100 records on the first screen to ensure they are what you intend to import. Use pagination if you imported more.
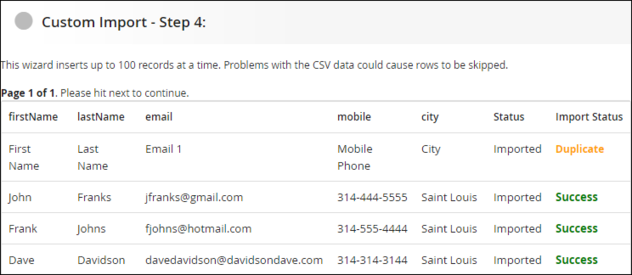
-
Select Next only once, and wait for the records to be added.
 Warning: Clicking Next more than once creates duplicate records.
If you run into problems, you can mass delete the newly added records and re-import them.
Your data is now imported.
Manage Imported Records
After you import data into Bullhorn, you’ll often want to pull those records together so you can take further action. Sometimes you need to add them to a Tearsheet, update their status from Imported, reassign ownership, or delete them if the import contained errors. This section shows you how to locate your imported records and manage them effectively.
- From the Menu, select the entity that contains your imported records.

- Clear filters and select Search.

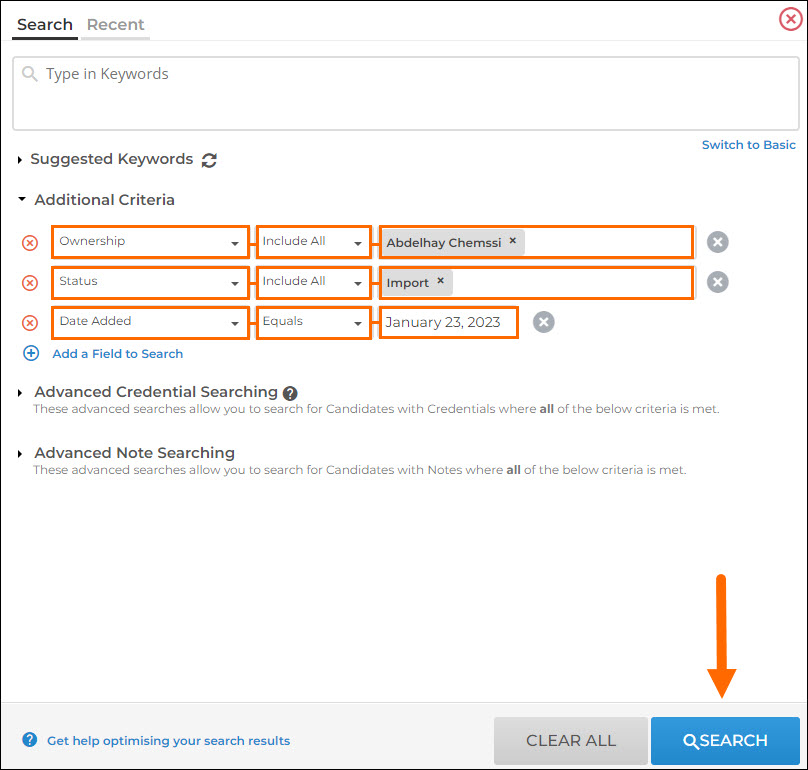
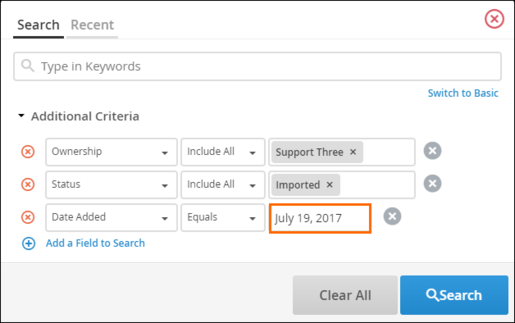
- Under Additional Criteria, set:
- Ownership > Include All > Choose your name.
- Status > Include All > Import
- Date Added > Equals > Import Date (Choose the date the import took place).
- Select Search.
The list now displays your imported records.
Take Action on Imported Record
Once you have located your records, click the Select an Action button to:
-
Add records to a Tearsheet
-
Mass update their statuses from Imported
-
Reassign ownership
-
Delete the records if the import was incorrect
Caution: Use care when deleting records; they can’t be easily recovered.
Save a Favorite Search
If you import regularly, save your search so you don’t have to rebuild it each time.
- Click Favorites.

- Enter a name for the search and select Save This Search.
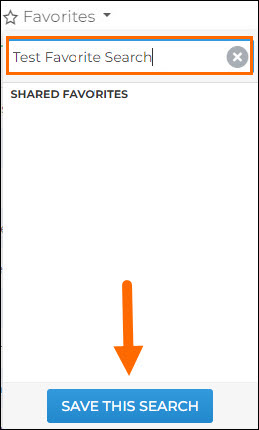
The search is saved as a favorite search.
Troubleshooting
Having trouble with a Custom Import? Check out Custom Import Troubleshooting for detailed guidance on fixing failed imports, missing data, and other common issues.
FAQ
Q: How many records can I import at once?
A: Up to 1,000 records can be imported in one batch.
Q: What status is assigned to imported records?
A: All records are automatically assigned Imported. You can mass update the status afterward.
Q: Which characters are supported?
A: The tool only supports English characters. Special characters are supported on all fields except Skills.
Q: Why were only 100 records imported?
A: All of your records were imported; they're just displayed 100 at a time. Use the pagination buttons to view additional pages.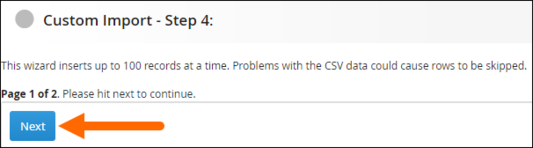
Q: Can I import data to a custom field?
Yes! Check out List of Custom Import Fields for supported fields.
Q: Are duplicate records imported?
A: No. Records marked as Duplicate are blocked. If you want to override this:
-
Go to Menu > Admin > System Settings and search for customImportCheckDuplicates.
-
For more details, see Understanding Bullhorn Record Duplicate Checking.
Q: Can I import Companies?
A: No. The tool only imports Candidates, Contacts, and Leads. Companies must be created separately.
Q: How are Companies determined for imported Contacts?
A: If the Company exists, the Contact is attached. If not, create a placeholder (e.g., TBD) to avoid duplicate Companies.
Q: How do I re-do a Custom Import?
A: Locate imported records by Status = Imported and Date Added = Day of Import, then delete them. Re-import with corrected data.
Q: How do I confirm my import finished successfully?
A: Review the confirmation screen, check record counts, and run a search for Status = Imported on the import date.
Q: Which characters does the Custom Import tool support?
The Custom Import tool only supports English characters. Special characters are supported on all fields except the Skills field.