Uploading a New Onboarding Document
Overview
This article covers how to upload a new document to the Onboarding system.
Uploading a New Onboarding Document
- While logged into BBO/Onboarding, navigate to the Onboarding tab.

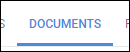
- Select the Documents sub-tab.
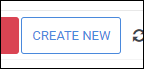
- Select Create New.
- The Edit Document window will display.
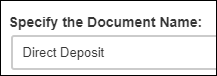
- Enter the name for your new document.
- Select a Category for the document.
- You can either select an existing category or create a new one by typing a name in the field.
- Note: You can only have 10 categories.
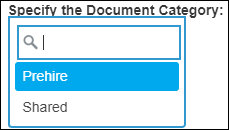
- You can either select an existing category or create a new one by typing a name in the field.
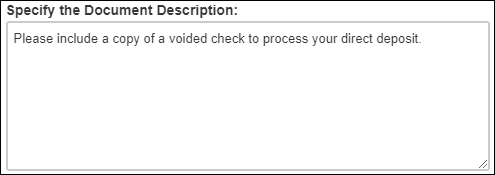
- Enter in a Document Description
- The description will display in the candidate's portal when completing the document.
- Choose whether Attachments will be allowed or not.
- If Attachments are Enabled, choose whether or not the documents should have an expiration date
- Example: drivers licenses or certifications

- Choose whether Approval will be required or not.
- If approval is required, the document will need to be approved before before the candidate can enter time.
- Select a Deadline of either Prior to Time Entry or No Deadline.
- If the deadline is set to Prior to Time Entry, the candidate will not be able to submit time until the document is submitted (and approved, if approval is required).

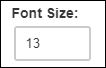
- Choose the approximate Font Size for your document.
- This will help scale the fields correctly to the document.
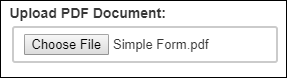
- Select Choose File to pick a base PDF file from your computer.
- Select
 to finish uploading the new document.
Was this helpful?