Job Milestones User Guide
Overview
A set of milestones can be created against a Job to represent all stages throughout the life cycle of the Job, from creation to completion.
This article covers the following topics:
Add a Milestone
You need to add a milestone in order to be able to use the feature.
-
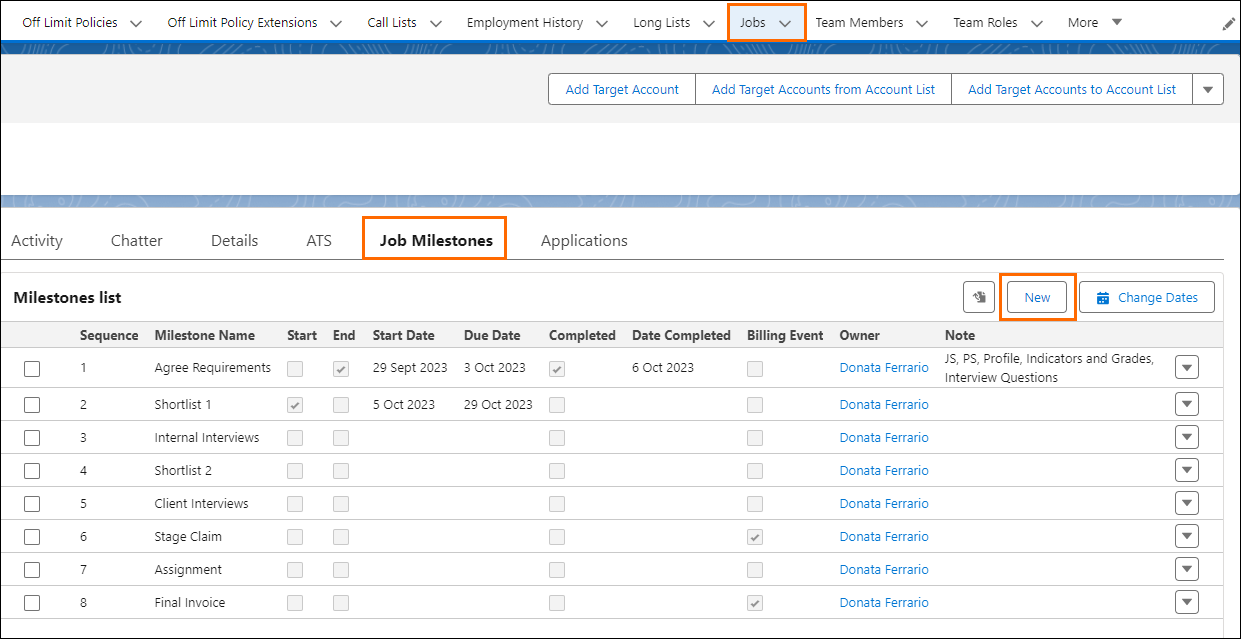
Navigate to Job > Job Milestones.
-
In the Milestone Lists section, click New.
-
In the New Milestone pop-up, enter the following, as desired:
- Milestone Name: A meaningful name given to the milestone.
- Sequence: This number displays where the milestone appears within the Milestone List for the Job.
- This number must be unique to each milestone because the milestones will be put in sequential order.
- Start Date: This date marks the beginning of the Job.
- This date can be added to estimate the expected progress of the Milestone
- Due Date: This date marks when the milestone is due to be completed.
- This date can be used to estimate the expected progress of the Milestone.
- Billing Event: This check box indicates if the milestone triggers a billing event.
- A billing event is a specific occurrence or trigger point that prompts the generation of a bill or invoice.
- Notes: Important details needed for the milestone, including any associated deliverables.
- Click Save.
Update a Milestone
As you progress through a Job, you can update the milestone with new information.
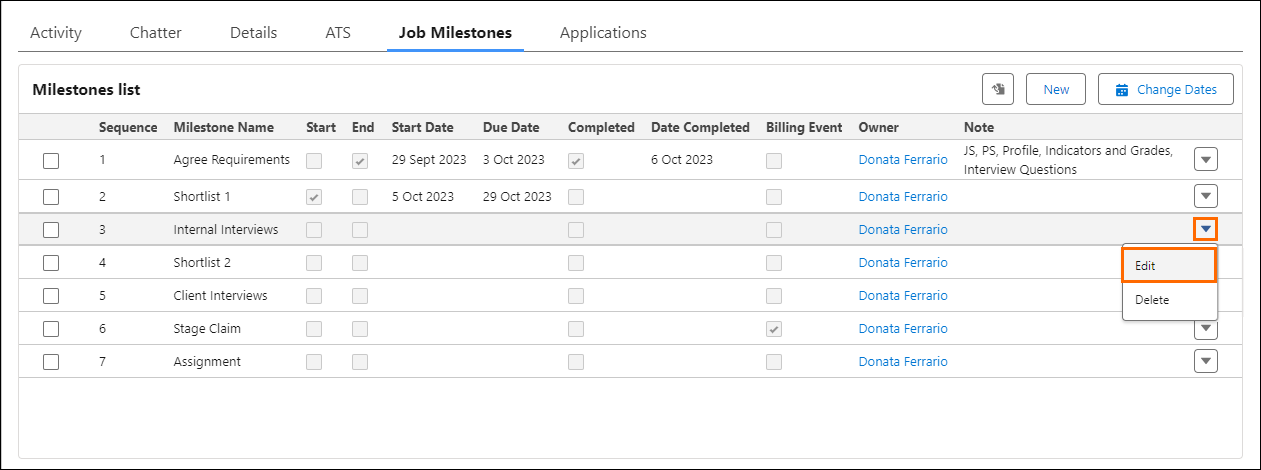
- Navigate to Job > Job Milestones.
- For the milestone you would like to update, click the drop-down and select Edit.
- In the Edit Milestone pop-up, edit the desired field(s). Below are a few fields commonly updated as a Job progresses:
- Start Check Box: This check box is used to mark the start of a milestone and can be used to indicate the progress of a Job.
- End Check Box: This check box is used to mark the end of a milestone and can be used to indicate the progress of a Job.
- Completed Check Box: This check box is used to mark when a milestone has been completed.
- The Date Completed field auto-populates when the Completed check box has been ticked.
- Click Save.
Change Milestone Dates
Dates for a Job can change for many reasons. When the date changes, you may want to move all of the dates out on a milestone.
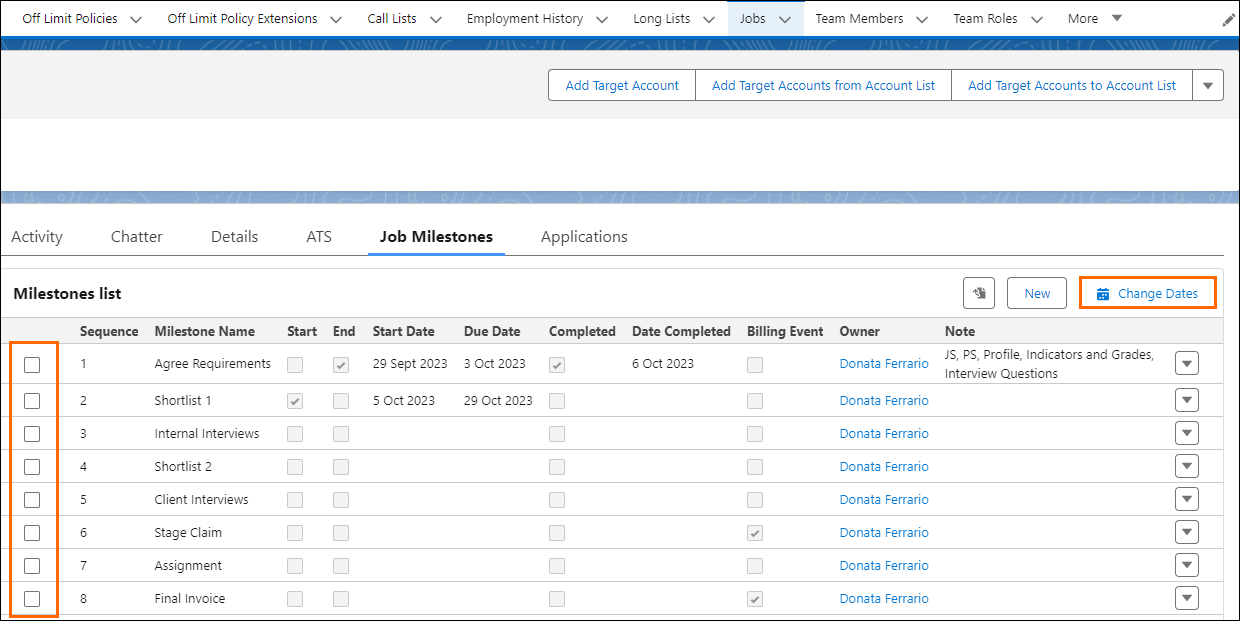
- Navigate to Job > Job Milestones.
- Select the check boxes for all of the milestones you would like to update.
- Click Change Dates.
- In the Change Date pop-up, adjust the following, as desired:
- Start Date:
- Click the drop-down to choose forward or backward.
- In the field, enter the number of days you want to move the milestone Start Date forward or backward.
- Due Date:
- Click the drop-down to choose forward or backward.
- In the field, enter the number of days you want to move the milestone Due Date forward or backward.
- Start Date:
- Click Save.
Import Milestones
Milestones can be imported from another Job. This makes implementing future milestones quick and easy.
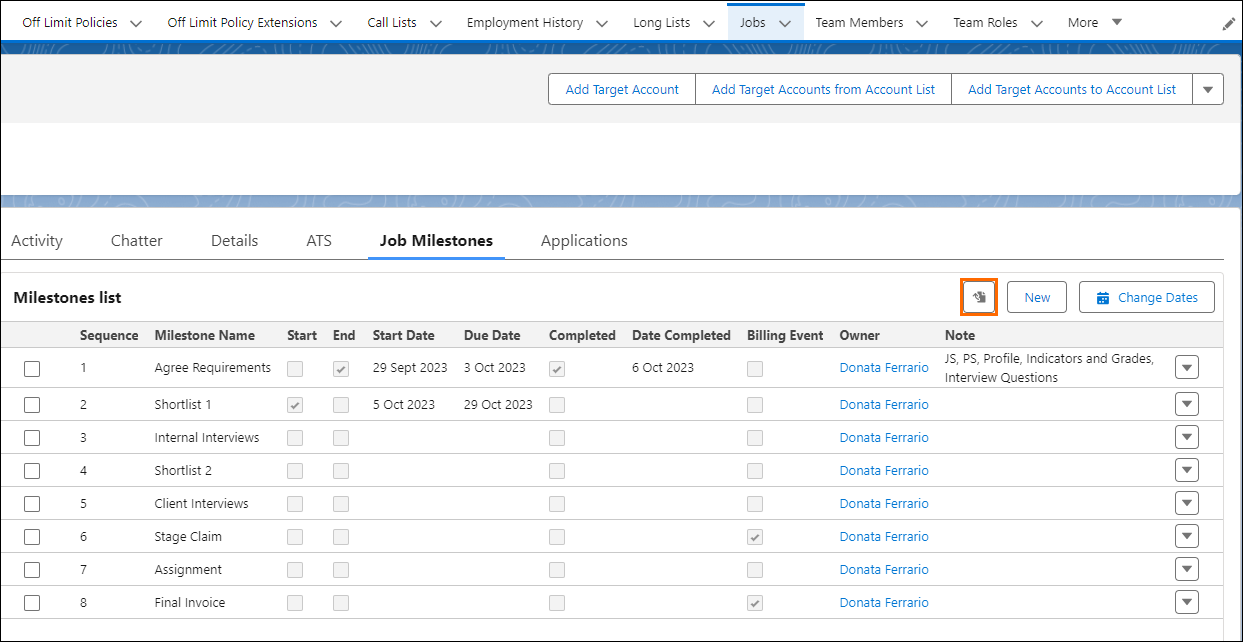
- Navigate to Job > Job Milestones.
- Click the Import Icon.
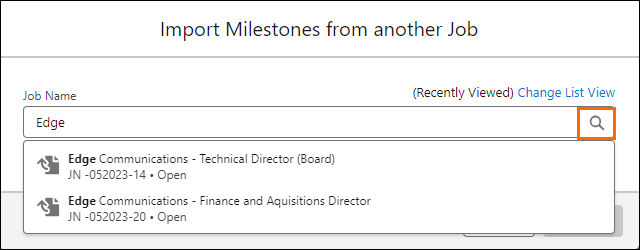
- In the Import Milestones from Another Job pop-up, enter the name of the Job for the milestones you want to copy in the Job Name field.
- Click the magnifying glass icon.
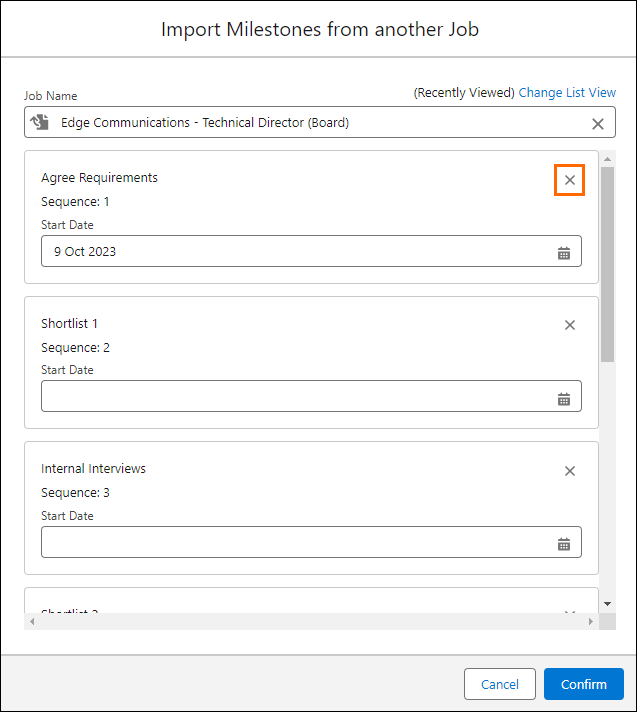
- For each milestone in the Job you would like to remove, select the X icon.
- This will remove the milestone from the import.
- This will remove the milestone from the import.
- For each milestone in the Job you would like to keep, select a Start Date.
- If the imported milestone has a Due Date, a Due Date will be auto-populated onto the new milestone. The date added will span the same time as the imported milestone.
- For example, if the current milestone has a Start Date of 12/1/23 and a Due Date of 12/8/23, there is a seven-day span between these dates. This means the new milestone Due Date will automatically set to seven days out from selected Start Date on the new milestone.
- If the imported milestone has a Due Date, a Due Date will be auto-populated onto the new milestone. The date added will span the same time as the imported milestone.
- Click Confirm.
Overdue Milestones
When any milestone exceeds its Due Date, a notification is displayed. Notifications are either a Warning or an Urgent Warning for specific milestones.
These warnings appear at the top of the Milestones List.
Warning
A Warning is the first notification that displays once a milestone becomes past due. The notification does not show the word warning, but the notification of the past due status does display. A specific milestone is mentioned in the warning.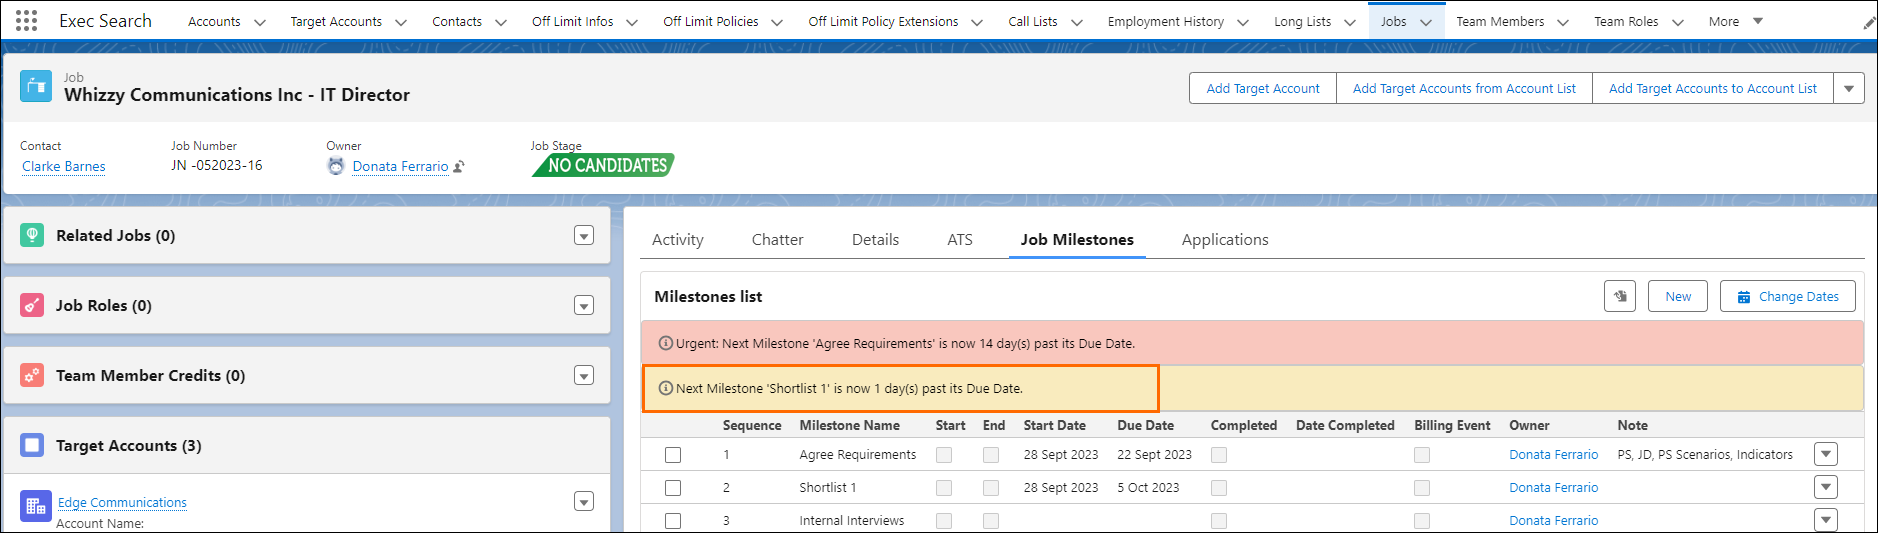
Urgent Warning
An Urgent Warning notification operates the same way but is intended to alert the user of the urgency at which the milestone needs to be addressed.
In addition to a color change for the notification, the word Urgent is displayed.
Notification background colors and the number of days that pass before a notification displays are set globally for your Org by a Bullhorn Recruitment Cloud Administrator. For example, an amber background for Warning could be set to display after one day and a red background for Urgent Warning could be set to display after seven days.