: High Volume Recruiting
In High Volume mode, becomes a powerful tool for the management of large volume recruitment. View Table, a tabular view of candidate data, has been added to allow you to group and perform mass actions on large lists of candidates.
For a more details on how to use the Tabular View, see ATS v2: Tabular View.
Tabular View Bulk Actions
This section describes the out-of-the-box functionality for each available bulk action.
Depending on your organization's needs you may want to customize the standard settings. For more information on all of the available bulk actions and their possible customizations, see Admin: Configure High Volume Recruiting for ATS v2
Bulk Actions vs Mass Actions
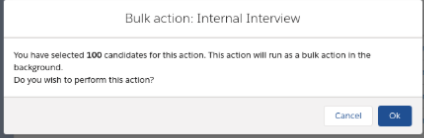
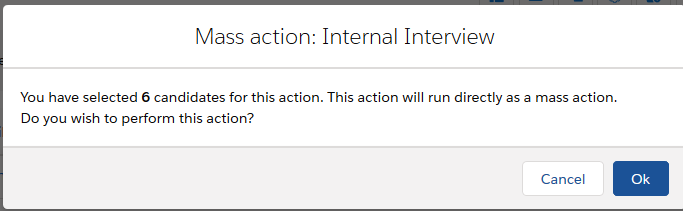
In the window that appears when a bulk action is performed it will show either Bulk Action or Mass Action depending on how many records are being processed.
Processing Time
- Mass Action: When there are fewer records, the records are processed immediately
- Bulk Action: When enough records are included to require a bulk action that takes time to process, users can check the progress in the Bulk Monitor tab of the Job record.
Internal Interview
In high volume mode, one Internal Interview is created for every selected Candidate, with the same data for every Internal Interview.
You access this screen by clicking the Internal Interview icon  .
.
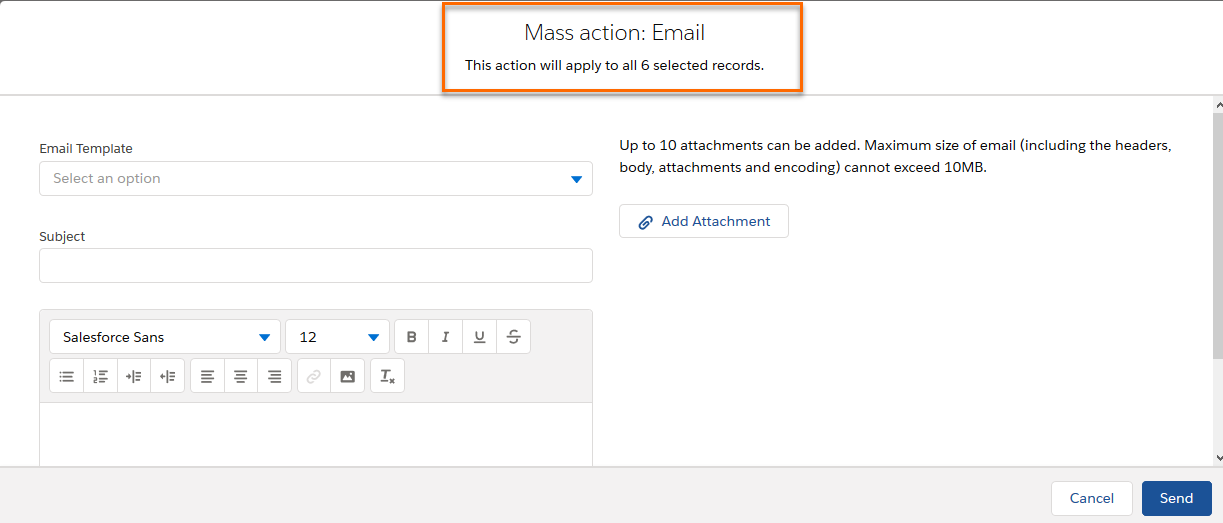
It’s possible to add attachments and send Emails from this form.
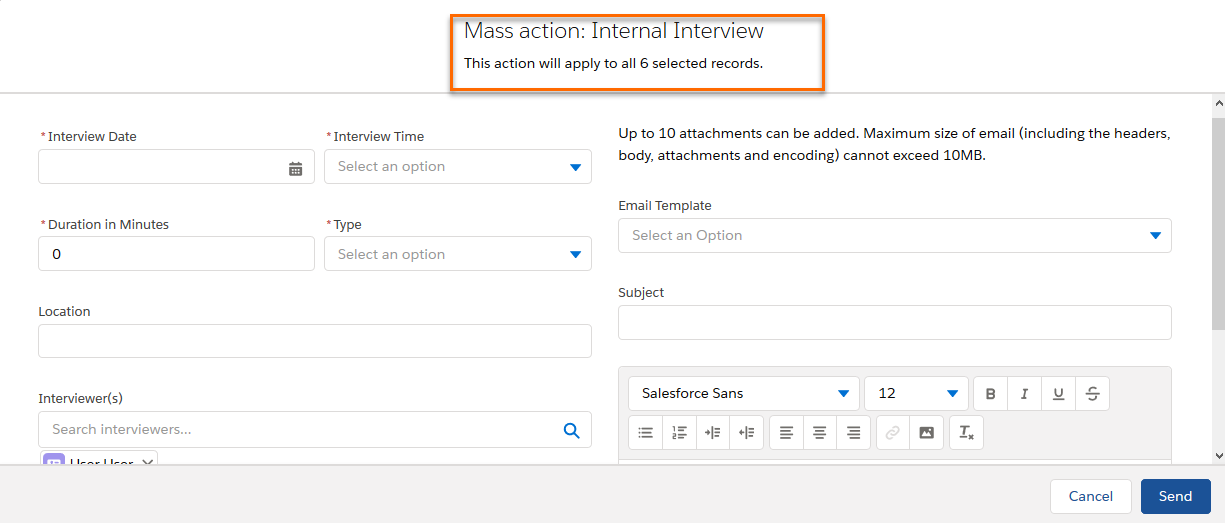
In high volume mode, the same email is sent to every selected Candidate. You have the ability to use templates and can add attachments.
You access this screen by clicking the Email icon  .
.
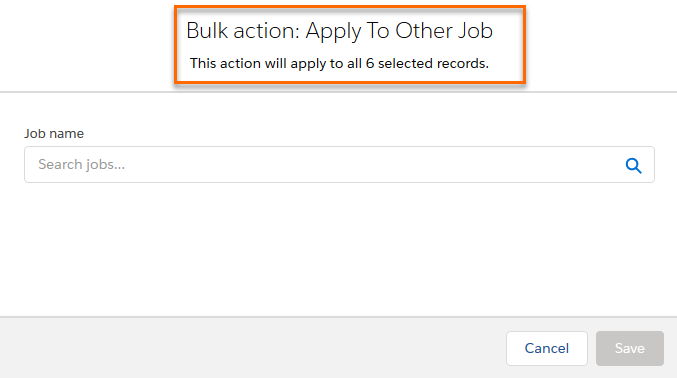
Apply to Other Job
In high volume mode this data entry page allows users to apply selected candidates to a specific job.
You access this page by clicking the Apply to Other Job icon  .
.
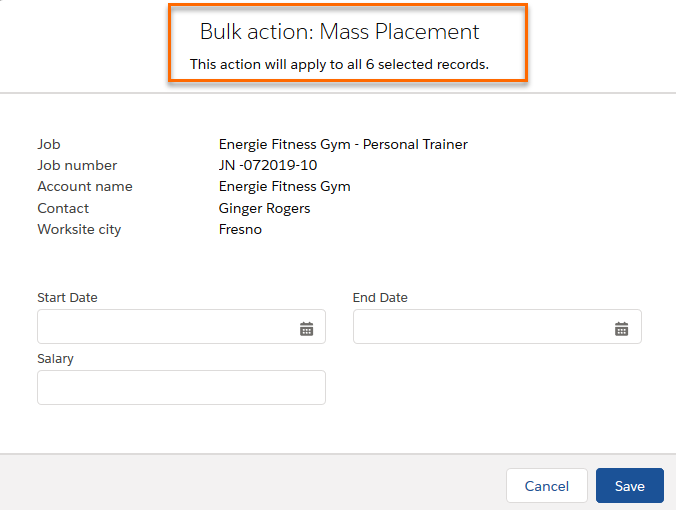
Mass Placement
In high volume mode, the mass placement screen displays Job information that will be copied to the Closing Report record for each selected Candidate. This screen is what will display if either the Mass Placement button is used or Candidates are moved to the Closing Report stage with the Move Forward button in high volume mode.
You access this screen by clicking the Mass Placement cog icon.
These fields can be customized following the same steps used for the original Job Mass Placement page. See Job ATS v2: Actions Toolbar for more information.
Move Back/Forward
In high volume mode, after selecting candidates, use the Move Back or Move Forward arrows to move the Candidates to a different stage. The available stages depends on the current stage of the Candidates, which is the same as the standard Job .
No message will be displayed when "Move Back" actions are executed:
- Application (Move Back to Application action only)
- Internal Interview
- Submittal
- Send Out
- Offer
- Closing Report (Move Forward to Closing Report action only)
Move to Submittal
Only Submit Without Email is supported in high volume mode. There is no data entry page associated with this move.
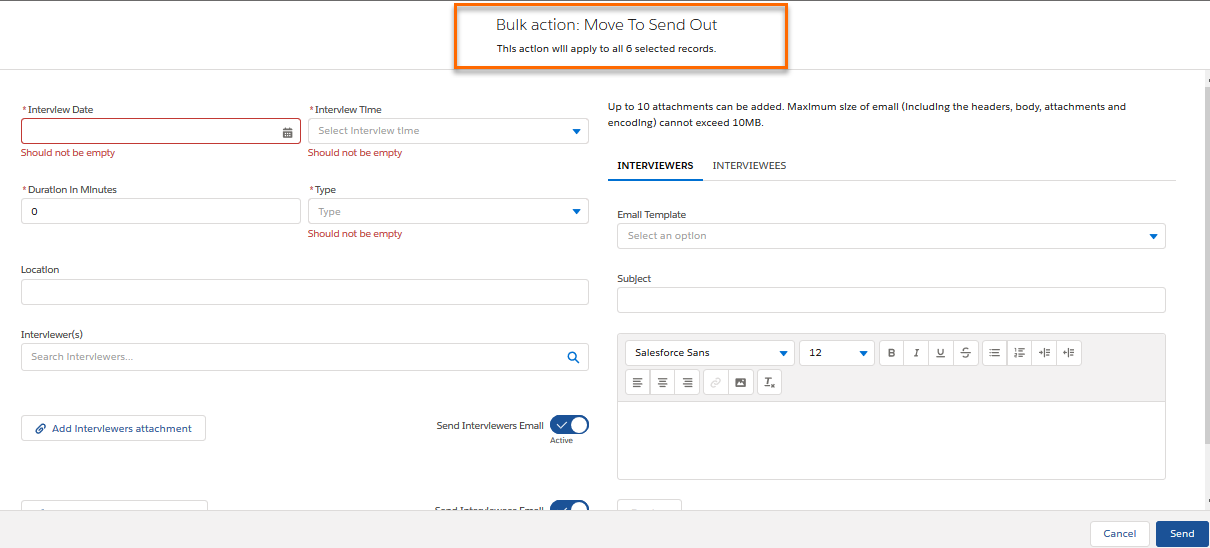
Move to Send Out
In high volume mode, a Send Out record is created for every selected Candidate with the same data on each record. It is possible to add attachments and send Emails from this form.
Move to Offer
In high volume mode, an Offer record is created for each selected Candidate with the same data on each record. There is a limit of up to 500 records at a time.
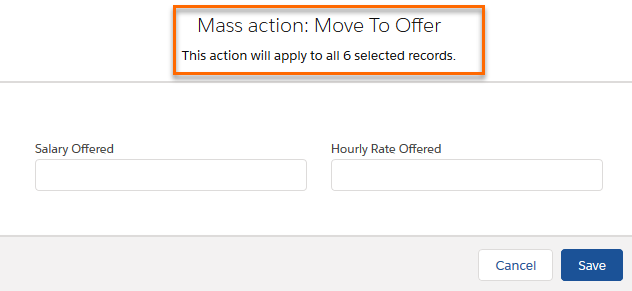
These fields can be customized following the same steps used for the original Job Move to Offer page. See Job ATS v2: Actions Toolbar for more information.
Reject/Unreject
In high volume mode, Reject/Unreject icon  rejects all selected Candidates (if not yet rejected) or unrejects them (if previously rejected). The data entered on the Reject/Unreject data page propagates to all selected Candidates.
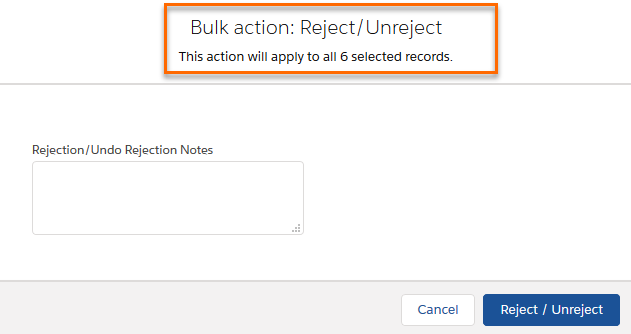
These fields can be customized following the same steps used for the original Job Reject/Unreject page. See Job ATS v2: Actions Toolbar for more information.
Add to Call List
You can select Candidates and add them to a new or existing in high volume mode with the icon  .
.
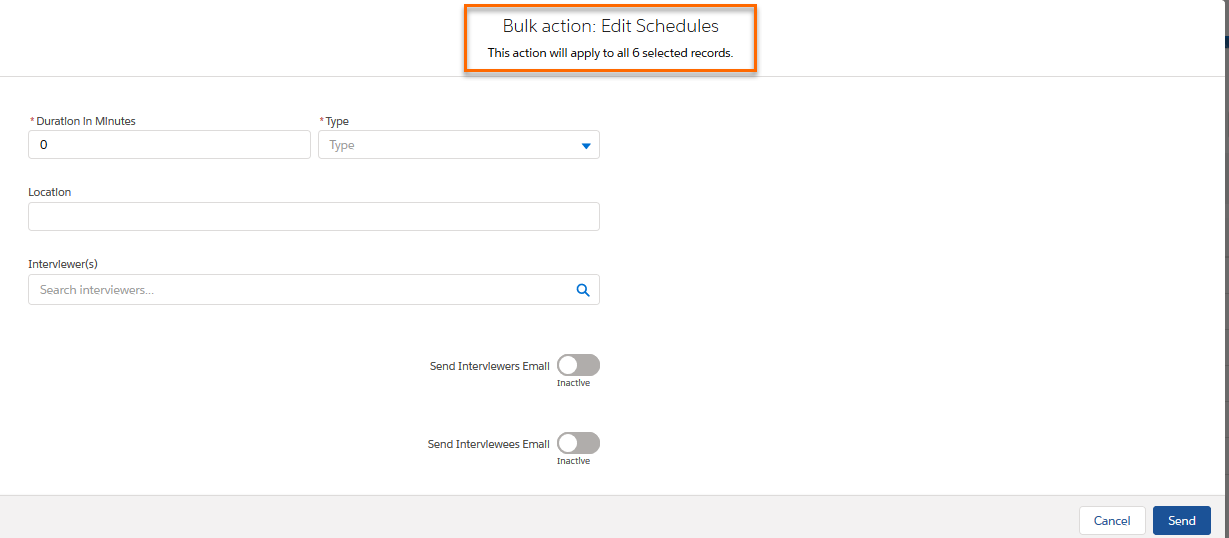
View Interview Schedule
In high volume mode the View Interview Schedule calendar icon is used to edit or cancel Interviews (Send Out Schedules). Rather than selecting Candidates and then clicking the button, first click the View Interview Schedule button to be presented with a list of scheduled Interviews. Here you will select the Candidates, then proceed to Edit or Cancel. The View Schedules screen has several features to help you select Candidates:
- Filter on the fields of the Send Out Schedule page by clicking the Filter icon
 next to the field name.
 - Sort the columns for all records selected by clicking the column header.
- The default view is 50 records per screen. If there are more than 50 records page navigation will be displayed.
- Select specific records or select all (Note: there is no option to select by page). Record Selection will be persistent across pages.
Once Candidates have been selected the Edit or Cancel Schedules option will be displayed. If you choose Edit Schedule, you will be presented with the standard Send Out Schedule page, minus the Interview Date and Interview time fields, as they cannot be edited. The data entered on this screen will propagate to all selected Send Out Schedules.
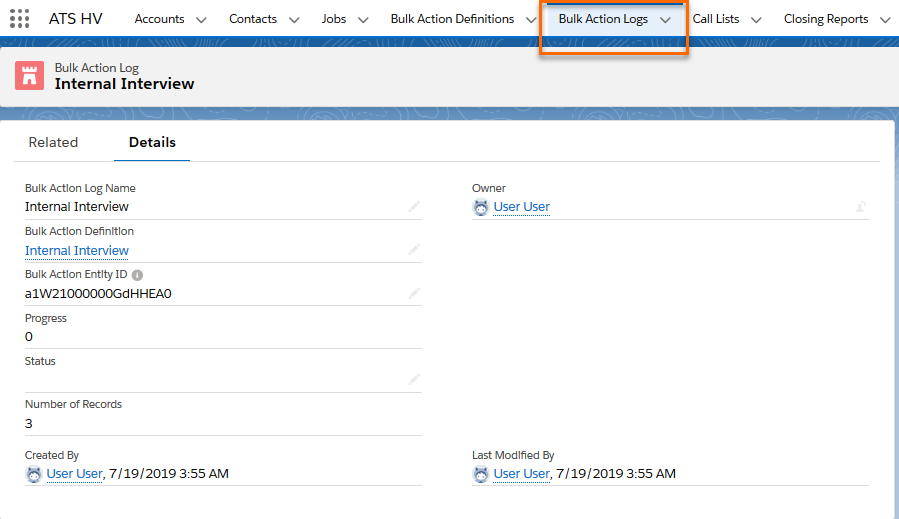
Monitoring Tools: Bulk Monitor and Bulk Action Logs
To monitor the progress of the bulk action for a particular Job, the can add the Bulk Monitor (_Bulk_Job_Monitor) component to the sub-tab.
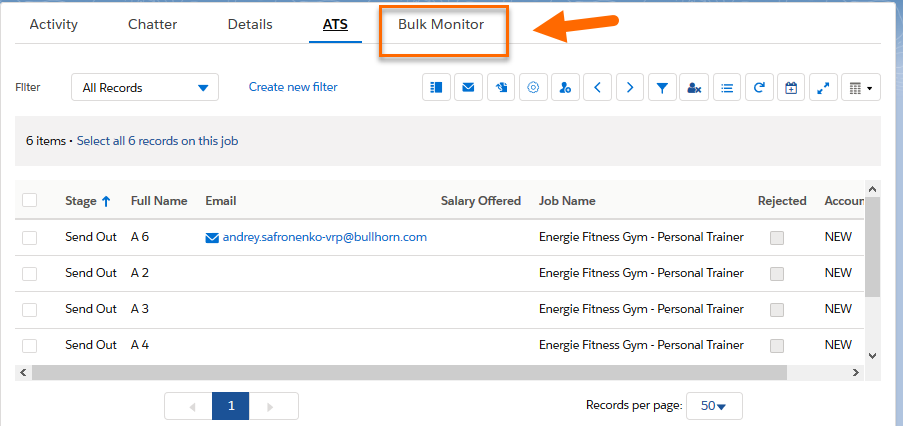
The Bulk Monitor displays the following information for each action:
- Action name
- Amount
- Job name
- Progress
- Status
- Started by
- Started on
- Duration
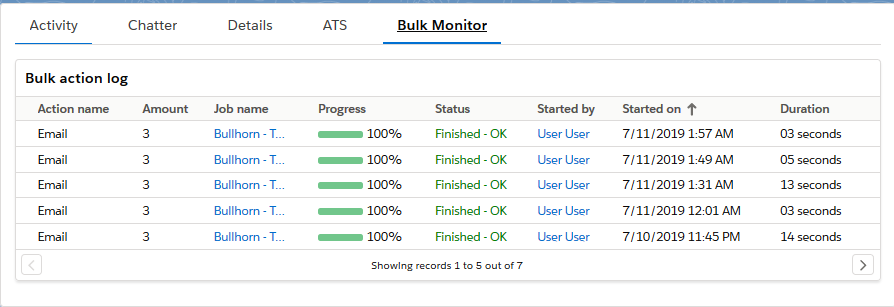
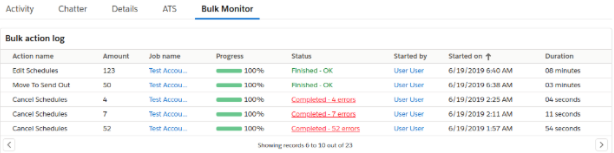
The Status field shows one of these values:
- Pending
- In Progress
- Finished - OK
- Finished - Errors
- Canceled
If there are errors, the Status will show Completed - [number of ] errors. Click the message for an explanation of the errors.
s also have access to the Bulk Action Logs object and tab, which captures more data related to the process. By default, logs are kept for 30 days. The retention period for the logs can be changed in the HV Settings Custom Metadata Type. See Admin: Configure High Volume Recruiting for ATS v2 for more information.