Job : Actions Toolbar
Overview
The Actions Toolbar displays at the top of the tab. This article describes all of the available buttons in more detail. Each action is available in both and Kanban View within .
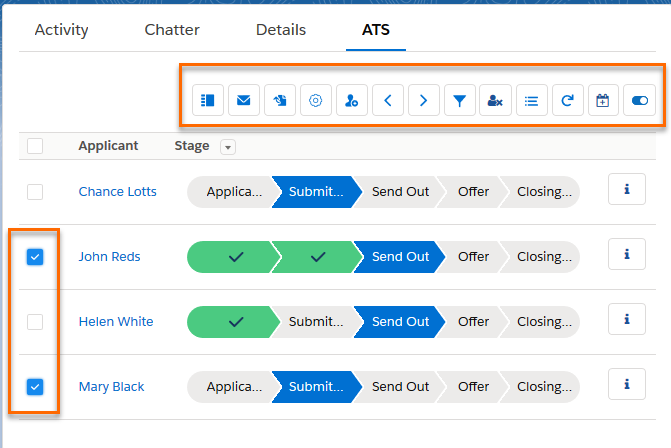
Toolbar Buttons
The following Toolbar Buttons are included:
- Internal Interview
- Apply To Other Job
- Mass Placement
- Quick Add
- Move Back / Move Forward
- Filter
- Reject / Unreject
- Add To Call List
- Refresh
- View Interview Schedules
Internal Interview 
The Internal Interview button can be used to set up Interviews between your 's internal users and Candidates.
Internal Interview is different from creating a Send Out Schedule when the interview is between a client (outside your ) and a Candidate.
Using the Internal Interview button triggers the creation of an Event, with a record type of Internal Interview, against the Candidate and Job. A Send Out V2 record is also created in the background with a record type of Internal Interview.
There is no stage update when creating an Internal Interview using the button. This is different than moving the Candidate to Internal Interview via the Move Forward or Move Backward button or by clicking the Stage to move a record. When those methods are used an update to the Stage field on the record is triggered.
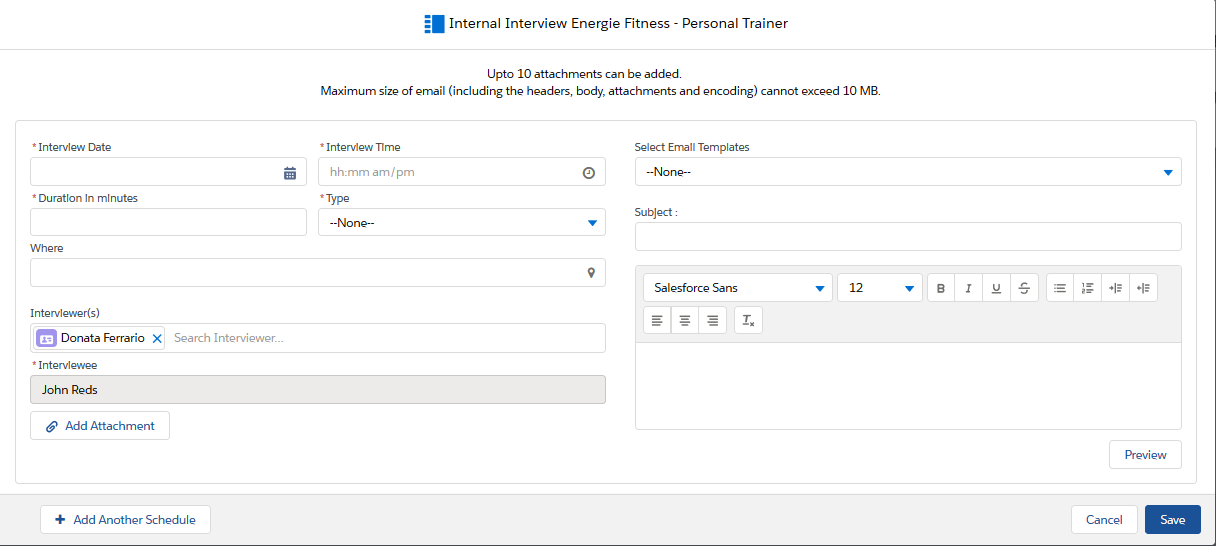
An email is sent only to the Interviewee and includes details such as Interview Date, Time, and Duration. It is also possible to attach files from the Job or Account record as well as from the user's desktop.
Interviewer’s look up field: Interviewer(s) will default to the logged in user, however, this can be replaced with different internal user(s) who will conduct the interview.
Internal users who do not have edit/create permission on the selected job won't appear in the Interviewer(s) look up filter. This is because when the Event is created it is assigned to the Interviewer and related to the Job. If the Interviewer's access to the Job is restricted the Event cannot be created.
The Email button allows users to send an email to Candidates they have selected in the . A maximum of 200 Candidates can be selected at one time.
You access this screen by clicking the Email icon .
.
After clicking the button, users will see the standard Send Email page with the To field pre-populated with the names of the selected Candidates:
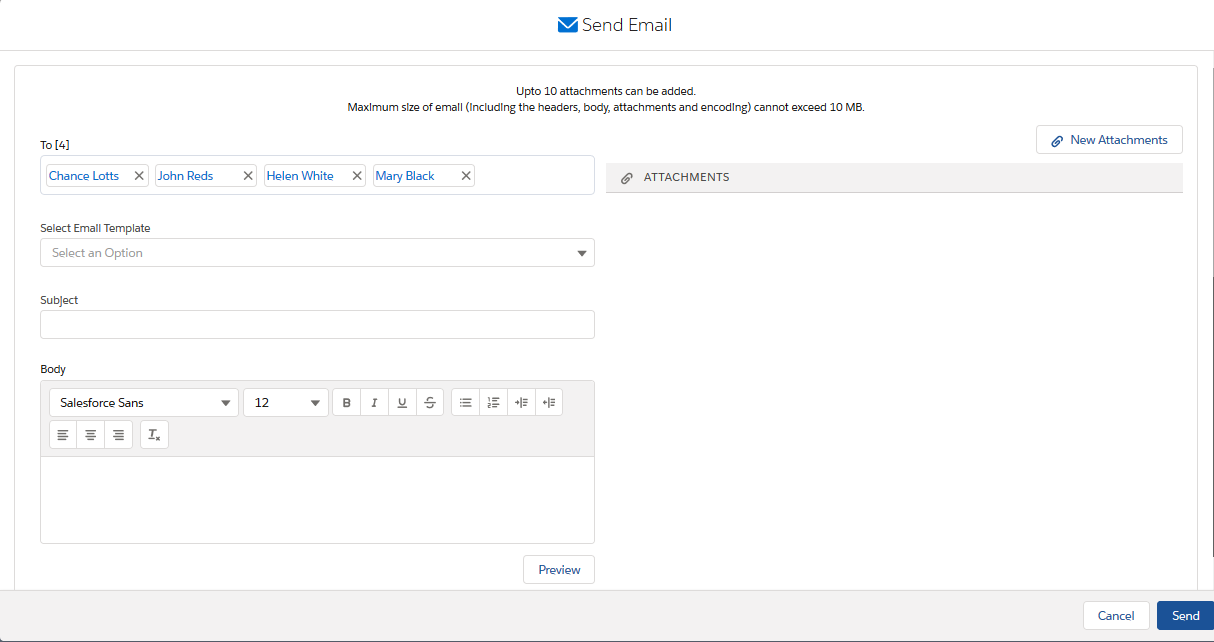
- Templates are supported (text, custom, and HTML types) and you can pick one using the Select Email Templates drop-down. The logged in user will see all templates that are in folders shared with them as long as they are marked as "Available to use".
- Only merge fields from the Job and Contact objects will be populated correctly. Click the Preview button to verify fields are displayed. If you select multiple Interviewers, the name merge field in the preview will only populate with the name of the first Interviewer.
- Text can be entered in the Email Body field if templates are not used.
- Attachments can be added using the New Attachment button. You can upload documents from your computer, or you can select from the list of documents that you own or are shared with you within your . You can also retrieve files from Job and Account records.
- The maximum file size per uploaded document is 2 MB and the total attached files size cannot exceed 10 MB. There is a maximum of 10 attachments allowed per email.
- leverages to send emails from the Send Out Schedule page.
Apply To Other Job
The Apply To Other Job button allows users to apply selected Candidates to another Job. After selecting the Candidates in and clicking this button, a pop-up will appear that allows the user to search for another Job.
You access this page by clicking the Apply to Other Job icon  .
.
Only Jobs with a Status of Open will be accessible from the look up:
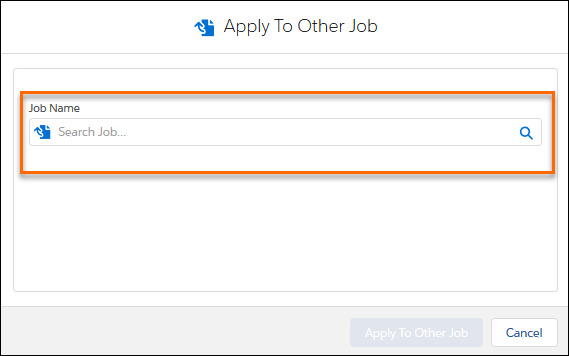
The Apply To Other Job button will become available once the Job is selected:

There is a duplicate check in place that prevents Candidates who have already applied to the open Job from being able to apply again.
After clicking the button, users will see the New Application data entry page with a section for each selected Candidates.
A maximum of 200 Candidates at a time can be selected in the and applied to another job using this button.
Mass Placement
Mass Placement allows you to place large volumes of Candidates at one time.
This is a two step process that involves selecting Candidates and entering data.
Selecting Candidates
You have two options when selecting a candidate.
Option 1
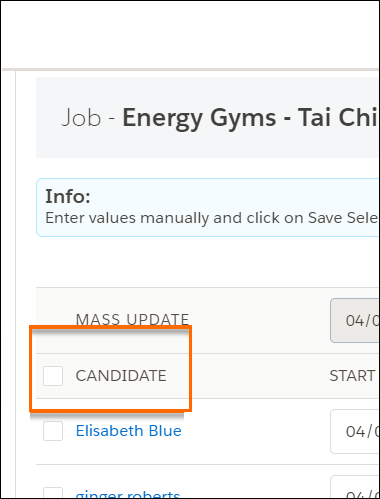
- Select multiple Candidates in and then click the Mass Placement icon. You can mark the individual checkboxes next to the Candidate’s name, or select all Candidates on the page by using the top left checkbox. You can also click the checkbox on the Stage column header in the Kanban View.
- When you click the Mass Placement
 icon, the Mass Placement pop-up window displays.
Option 2
- If you want to select all Candidates for a mass placement, regardless of how many are shown on the page, do not make a selection and instead click the Mass Placement icon .
- Next, you will be asked to mass place all Candidates from a particular stage. You can select more than one stage or all:
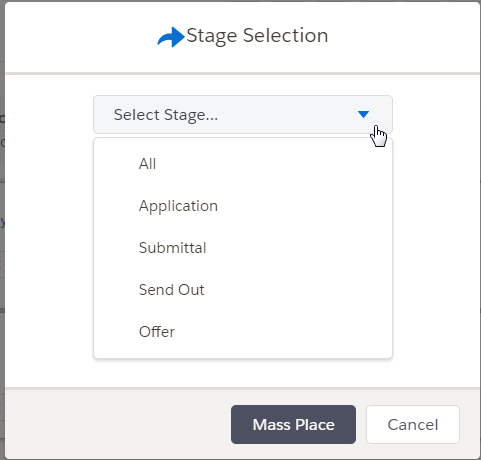
- When you click Mass Place, the Mass Placement pop-up window will display.
Mass Placement is also offered from results and from Call Lists
The following sections appear on the Mass Placement pop-up window:
- Job/Account Information
- Mass Update row
- Closing Report fields
- List of Candidates
- Save / Cancel buttons
Job/Account Information
The top section of the page can be customized and fields from the Job or Account objects can be displayed.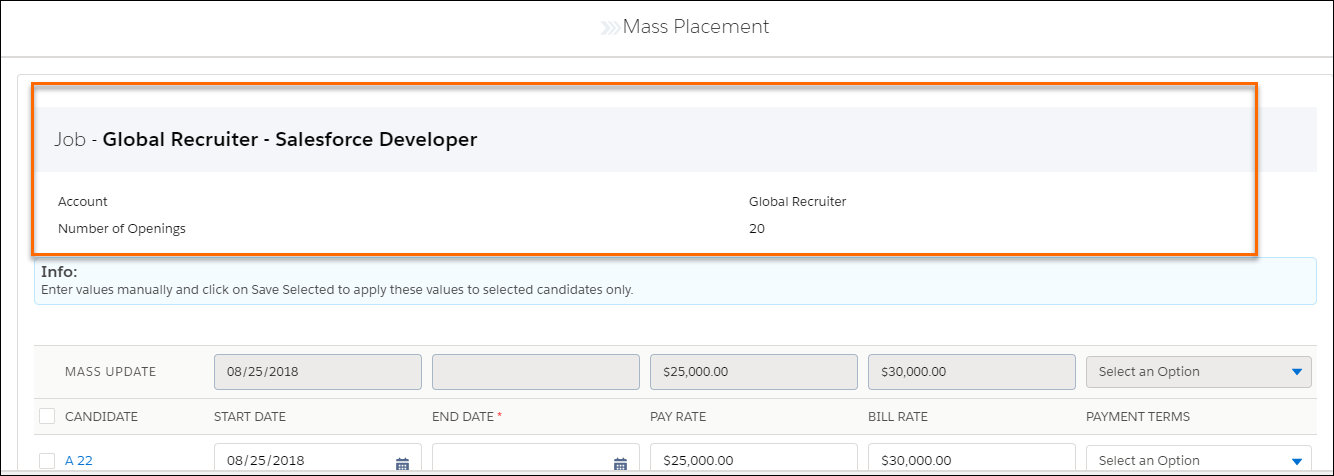
Admin Note:
The fields that can be added and removed come from the following Field Set:
- Setup > Object Manager > Job> Field Sets > TR1__ATS_Mass_Placement_Job_Info
If you are using custom Job Record Types, we recommend using a different Field Set by following these steps:
- Create a Field Set against the Job object with the fields you want to include.
- Go to Setup > Custom Metadata Type > Mass Placement Mapping.
- If there is already a record here for your custom Job record type, click Edit and add the name of the Field Set to TR1__Job_Field_Set_Name__c.
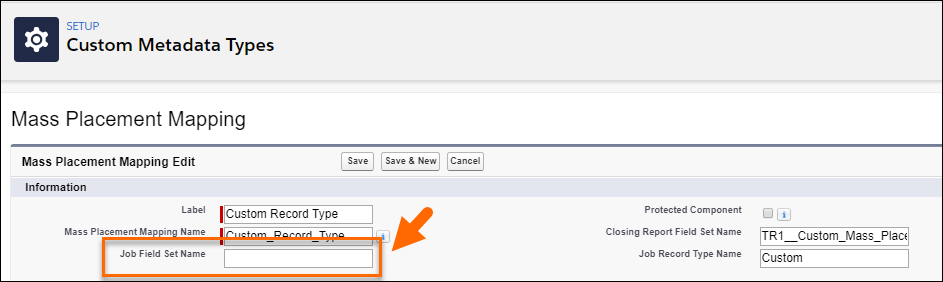
-
If there is no record yet for your custom Job record type, click New, fill in the information (including the name of the Job Field Set you want to reference at the top section of the Mass Placement page, and then click Save.
The set of fields shown on this page can be customized. Different sets of fields can be created for the different Closing Report record types. The fields you see are dependent on the Record Type of the Job.
Admin Note:
We support both record types that come with the package as well as custom record types. To configure the Closing Report Field Set that is referenced on the Mass Placement page, follow the steps below:
- If required - Create a Field Set against the Closing Report object. This will not be necessary for Consulting and Permanent Closing Reports, as the related field sets are included in the package:
- For Consulting Jobs: Setup > Build > Create > Objects > Closing Report > Field Sets: Consulting Mass Placement.
- For Permanent Jobs: Setup > Build > Create > Objects > Closing Report > Field Sets: Permanent Mass Placement. It is necessary for custom record types.
- Go to Setup > Custom Metadata Type > Mass Placement Mapping. From here, you will need to create a Custom Metadata Type record per record type.

- Once you have created the Custom Metadata Type record, enter the API name of the relevant Closing Report Field Set to the Closing Report Field Set Name field:

- Click Save.
You have the option to configure the fields that will pre-populate on the Closing Report edit page, with the values being taken from the corresponding Job fields (e.g. Bill Rate and Pay Rate). The configuration will apply to Closing Reports created in the and in Mass Placement.
- Go to Setup > Custom Metadata Types > Closing Report Mapping [Manage Records] and click New.
- Create a Custom Metadata Type record for each field you want pre-populated. Enter the API name of the Closing Report field and the API name of the corresponding Job field.
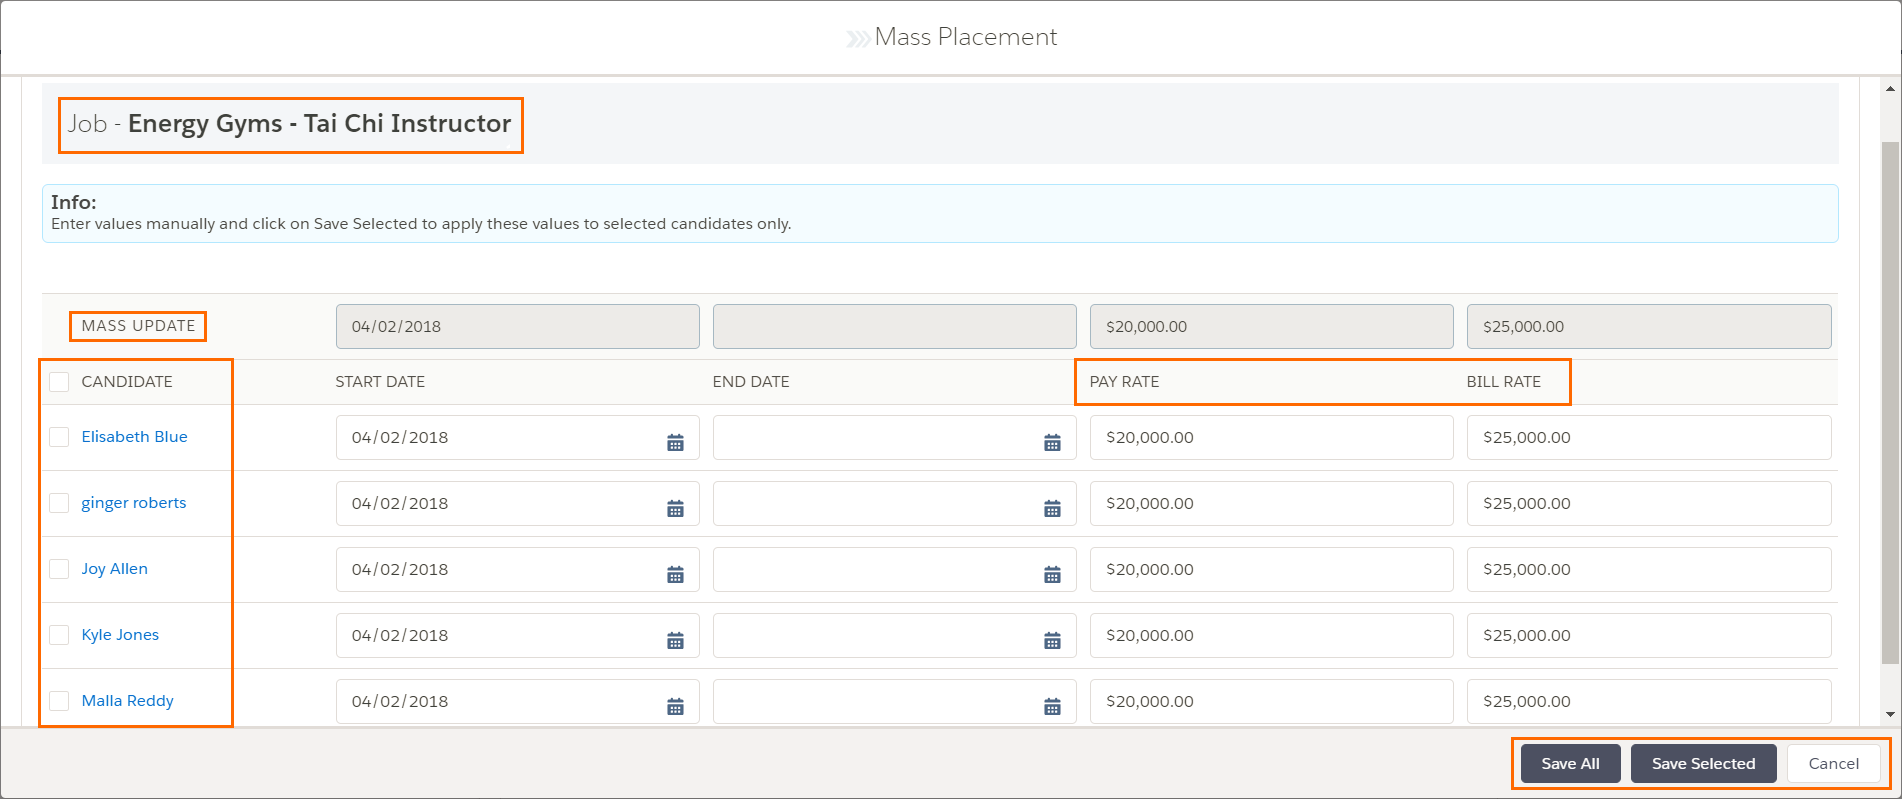
Entering Data
There are a few options available to your users depending on the data that should go into Closing Reports.
- No editing: All Closing Reports are created with prepopulated values which is the same for all Candidates. To do this, click Save All.
- Edit or populate any of the fields and apply them to all Candidates: Click the top left checkbox to select all Candidates and the Mass Update row will become editable. Values you enter in any of the fields in the Mass Update row will propagate to the necessary fields for every selected Candidate. When finished, click Save Selected.
- Enter different values for selected individuals or groups of Candidates: Select the Candidate(s) and enter the desired value in the relevant top row field. Repeat this as required and click Save Selected.
You have the option to select all Candidates for a mass placement, regardless of the number selected. However, only the first 500 Candidates will be shown on the Mass Placement page. Once the first 500 have been placed and a Closing Report has been created for each of them, they will disappear from the page and the remaining Candidates will be visible and will be ready to be processed.
Quick Add
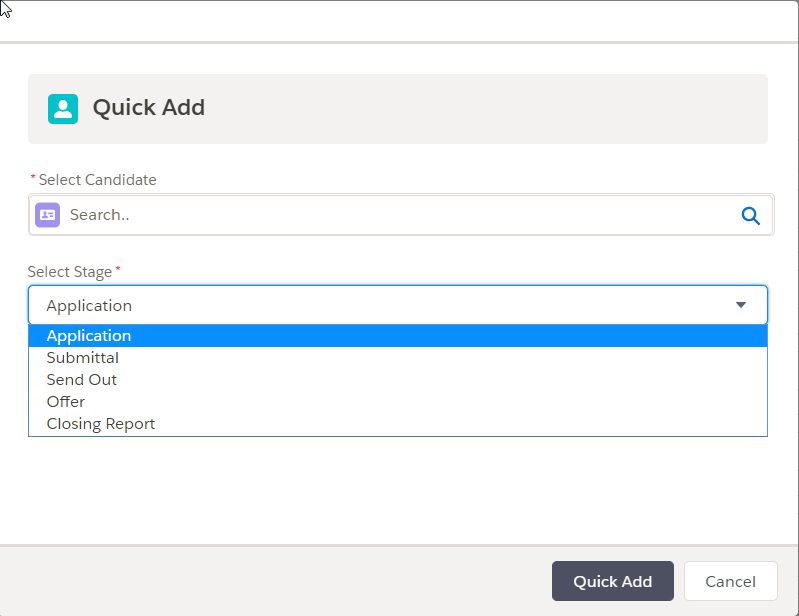
Click the Quick Add button to add a Candidate to a Job. In the pop-up window, choose a Candidate from the drop-down and select the Stage you want to send the Candidate to. After doing that, click the Quick Add button.
Admin Note:
To select the fields you want to see underneath the Candidate’s name in the Select Candidate drop-down, add and remove fields from this Field Set:
- Setup > Build > Customize > Contact > FieldSet > ATS QuickAdd FieldSet.

It is also possible to filter the Contacts that display in the Select Candidate dropdown. See ATS v2: Lookup Filtering for more information.
Move Back / Move Forward
You can easily move Candidates from one stage to another using Move Back and Move Forward. Check the box for one or more Candidates and then click either the Move Forward or Move Backward button.
The menu choices are listed below:
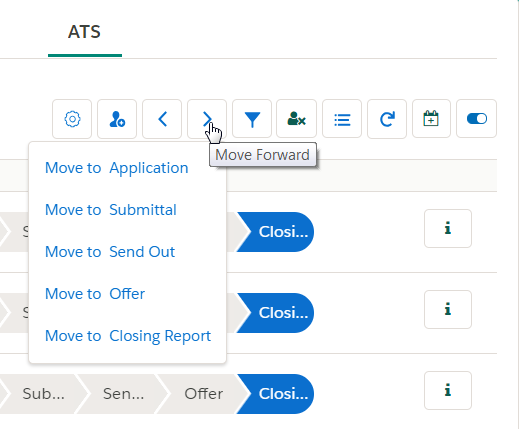
If Candidates in different stages are selected, you will only be able to move forward to the most advanced stage. As an example, if you select a Candidate in the Application Stage and another Candidate in the Send Out stage, the Move Forward menu will only display Move to Send Out, Move To Offer, and Move to Closing Report. The same logic applies to Move Back.
Candidates in the Application and Closing Report stages are ignored with the Move Back actions, even if they're selected. This also applies to Candidates in the Closing Report stage if Move Forward is used.
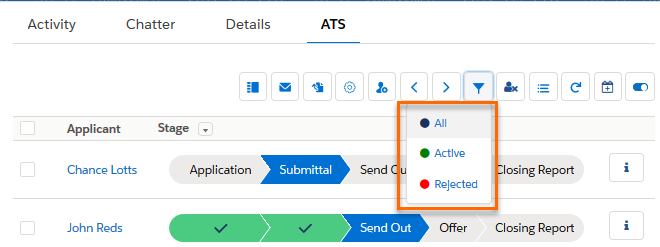
Filter
Use the Filter button to restrict the list of Candidates to display only active Candidates (or only rejected Candidates). To see the entire set of Candidates for the Job, click the All item again.
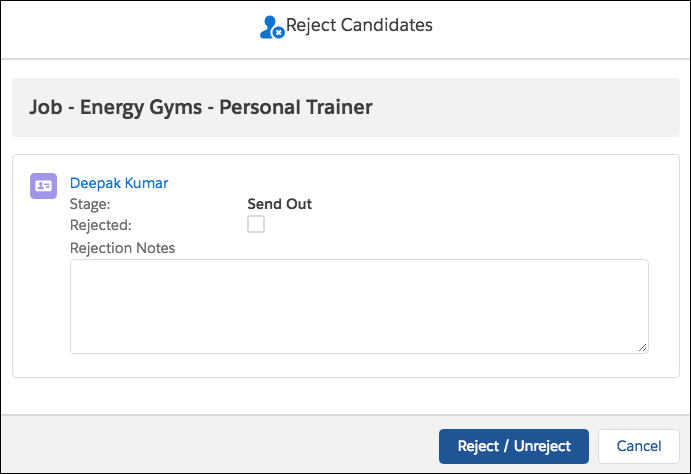
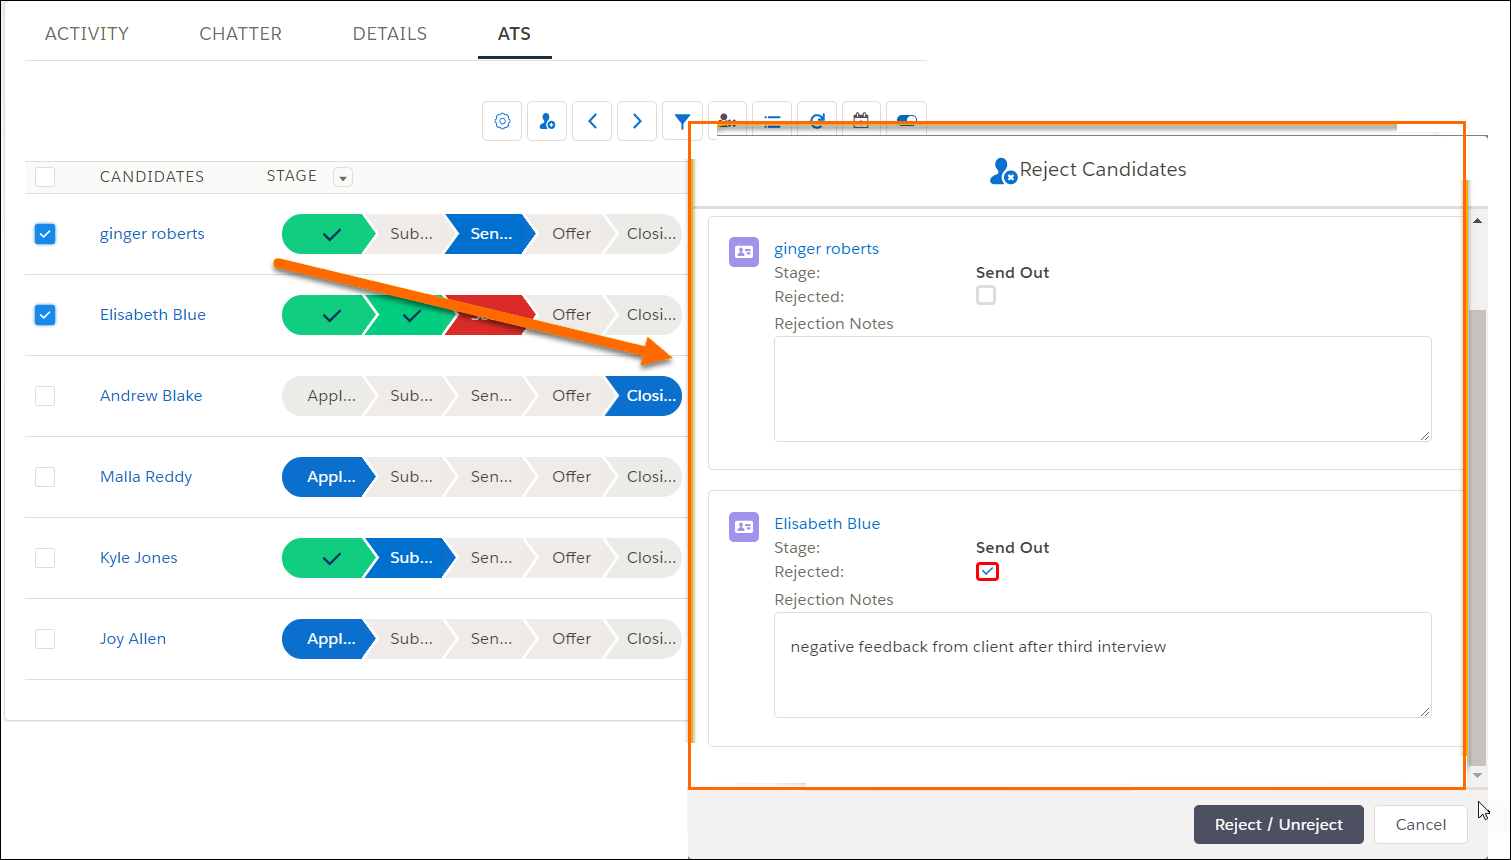
Reject / Unreject
To reject one or more Candidates, make your selection and then click the Reject / Unreject button. In the pop-up window, review the name of the Candidate, enter a Rejection Note (optional), and click the Reject / Unreject button. This pop-up is customizable.
Admin Note
To select the fields you want to see on the Reject/Unreject pop-up page, add and remove fields from the following Field Set:
- Setup > Build > Create > Objects > Application V2 > Field Sets: ApplicationRejectionFieldSet.
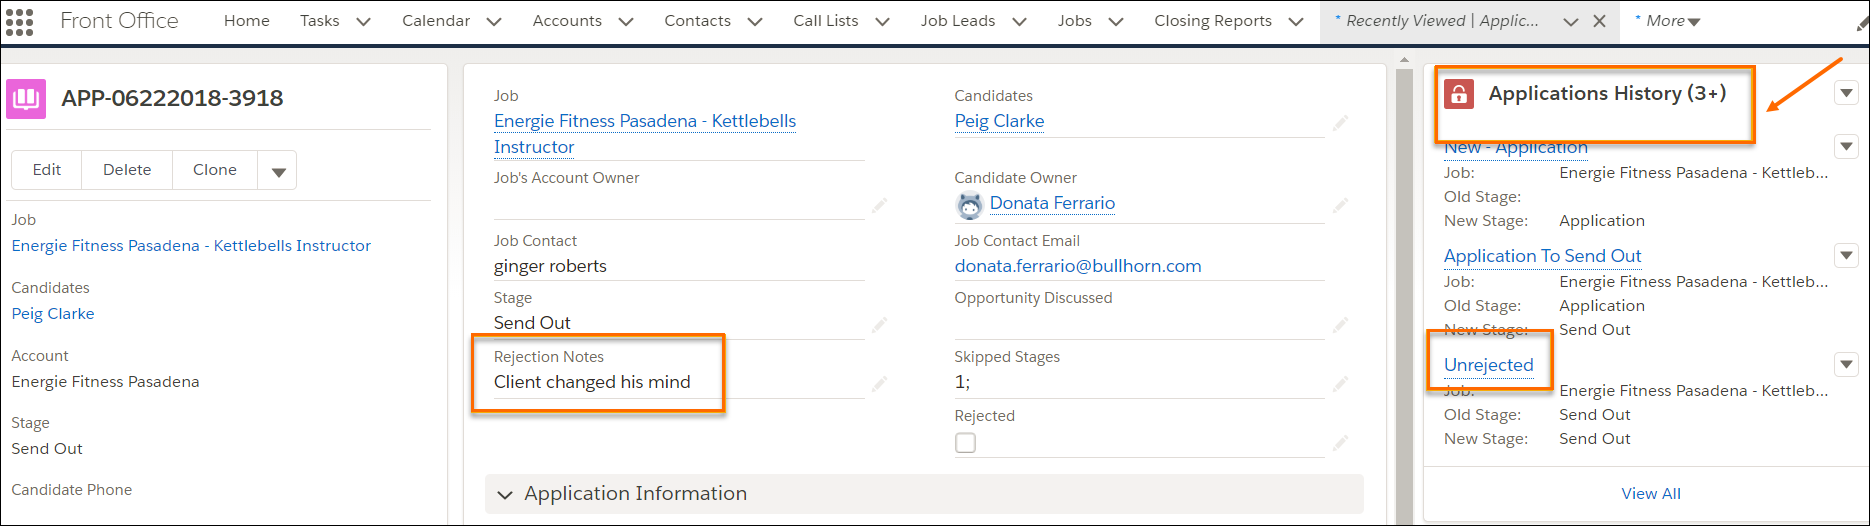
In the out of the box configuration, the Rejection Notes field is a text field and and the value entered there is stored on the record. This field gets updated every time reject/unreject is used (the previous value is overwritten), but historical data is saved on an Application History record in the background for every reject/unreject action. This is where the Rejection Notes are captured.
If you replace the TR1__Rejection_Notes__c text field in your configuration, make sure to have the same field on the page layout and Application History page layout to have the data mapped correctly.
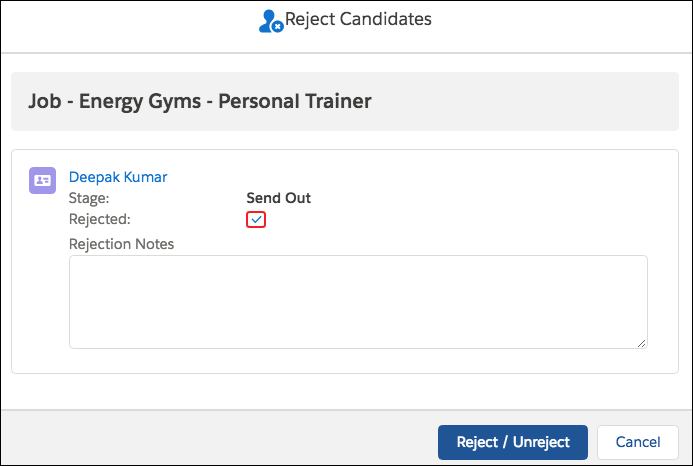
To cancel a previous rejection and restore the status of a Candidate to Active, select the Candidate and click the Reject / Unreject button. You will see a check in the Rejected box on the pop up. To confirm, click the Reject / Unreject button in the pop up-window. Optionally, add a note to explain the reason for reverting the rejection.
It's possible to select multiple Candidates for the Reject/Unreject action, including a mix of rejected and active Candidates. The pop-up window will have a section for each selected Candidate, showing the status of each. When the Reject/Unreject button is used, the correct action is performed for each.
Add To Call List
Mark the checkbox for one or more Candidates, then click the Call List button to display a pop-up window. In this window, you can either:
- Choose an existing call list that you want to add the Candidates to.
- Create a new call list.
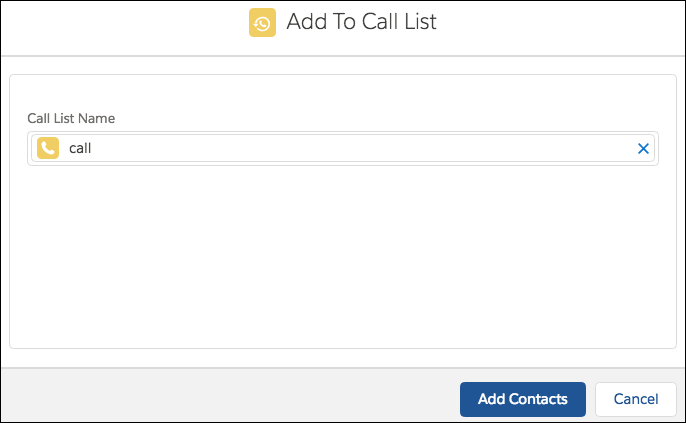
Add to an Existing Call List
In the pop-up window, choose the Call List Name to add the Candidates to. Then, click the Add Contacts button.
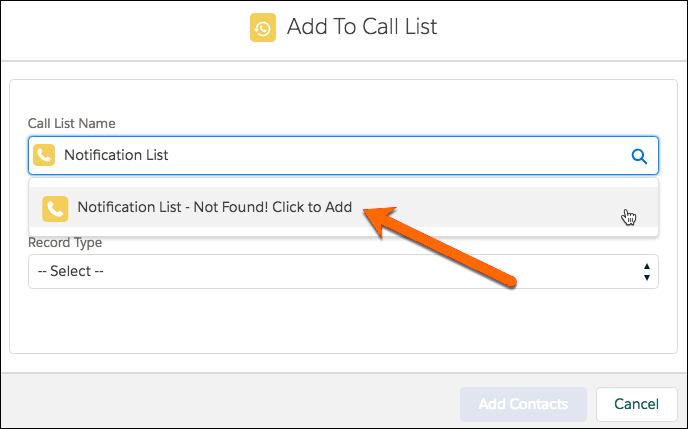
Create a New Call List
In the pop-up window, enter the name of the new call list. This new name will appear in the drop-down menu with a confirmation message that says "Not found! Click to Add". Verify that the new call list name is correct, and then click this item.
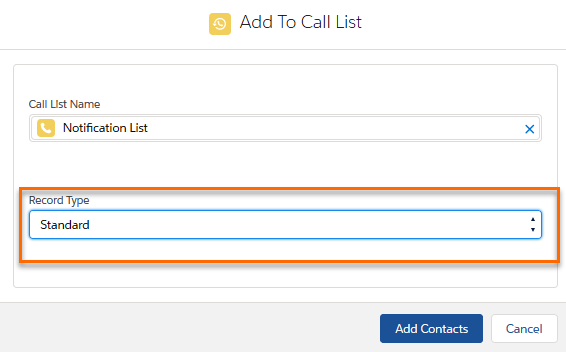
Select the call list record type in the Record Type drop-down. Then, click the Add Contacts button to create the new call list.
Refresh
Click the Refresh button to refresh the page and ensure any updates are reflected, especially after adding a new Candidate.
View Interview Schedules
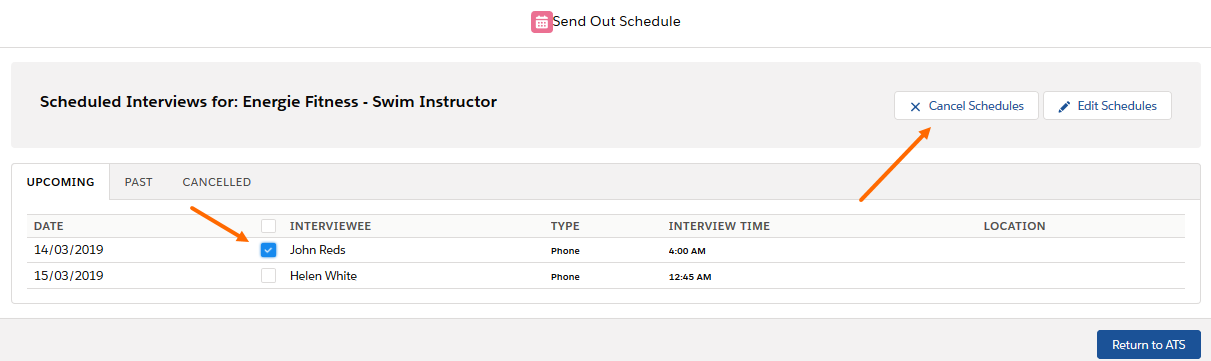
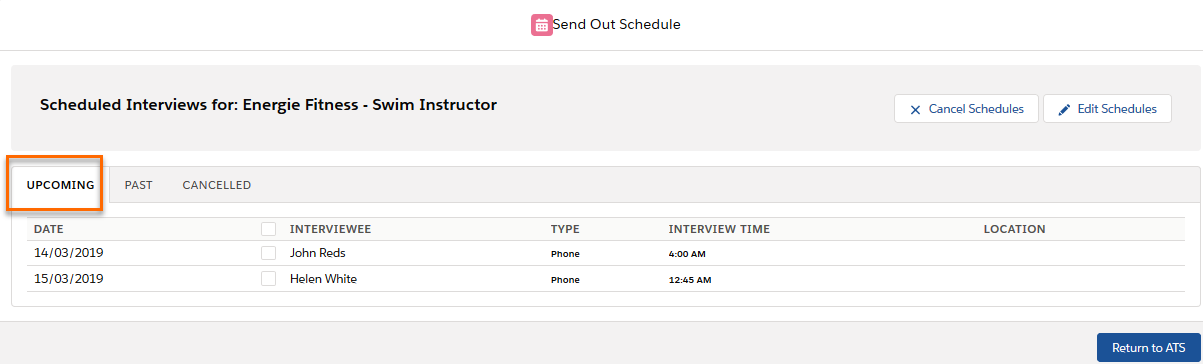
Click the View Interview Schedules button to see any upcoming, past, or canceled interviews for a Job. You can also edit existing interview schedules and cancel interviews from this pop-up window. Click the Return to Candidates button to return to the Candidate List.
The default view is Upcoming interviews:
Click the Past tab to see any past interviews for this job and click the Canceled tab to see if any interviews have been canceled:
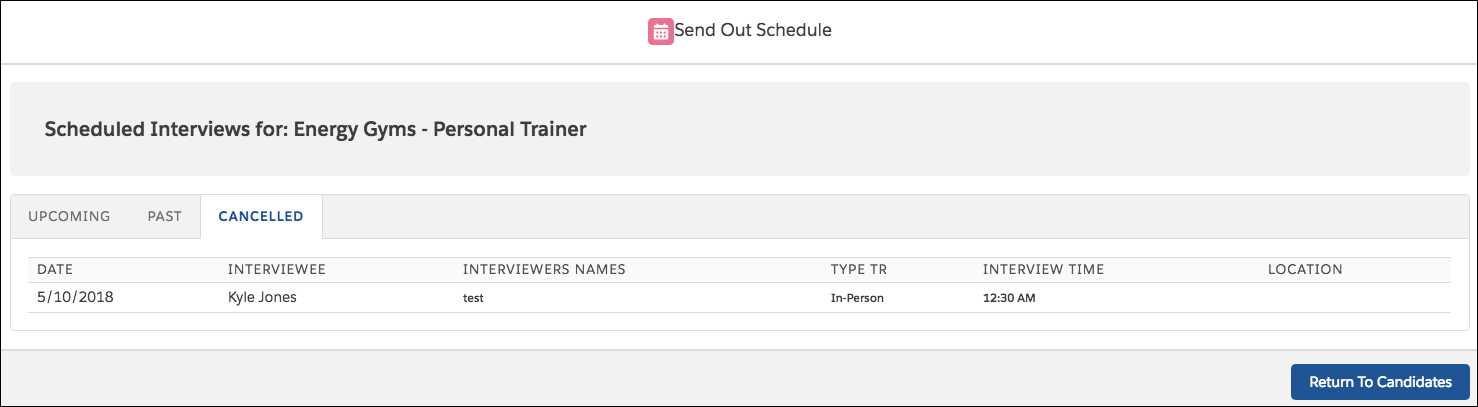
For Scheduled Interview records to display in View Interview Schedules, the related SendOutv2 record needs to have a Record Type of External Interview.
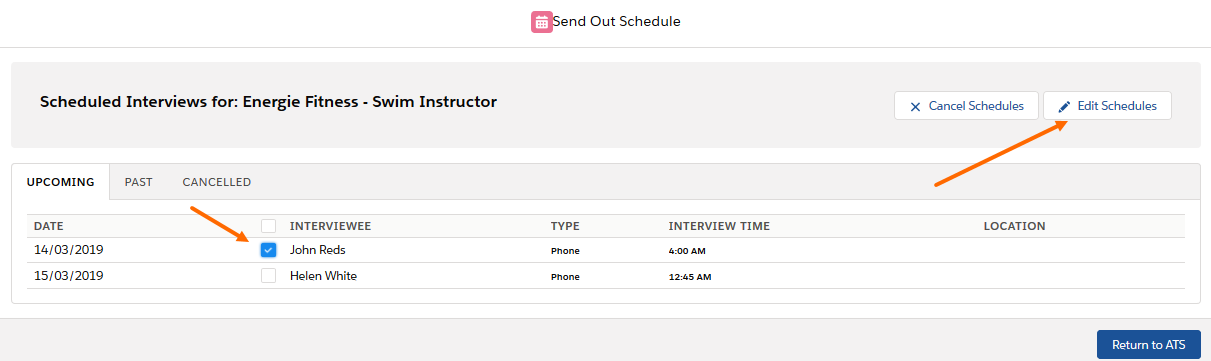
Edit an Interview Schedule
To change the interview schedule for a Candidate, mark the checkbox for a Candidate and then click the Edit Schedules button. Only interviews with a future date can be edited.
Cancel an Interview
To cancel an interview, mark the checkbox for a Candidate and then click the Cancel Schedules button.