How Power Share for Power Notes Works
Power Share is not supported if Power Notes are created in mass/bulk mode.
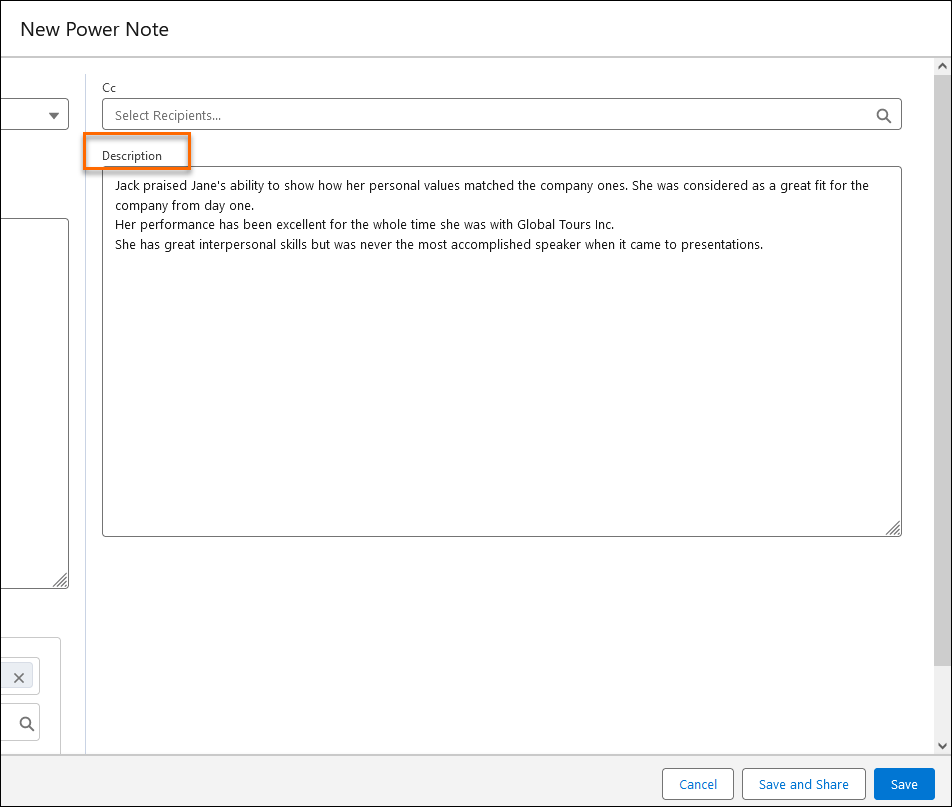
- Create a Power Note.
- For more information on Power Notes and how to create one, see Power Notes.
- In the Description field, enter any text/information you want to share.
- Power Share is only supported for Power Notes created as Tasks.
- Power Share is only supported for Power Notes created as Tasks.
- Click the Save and Share button.
- The original Power Note is automatically saved.
- The New PowerShare page has a Select Text to Share field. Highlight the text you would like to share and click Paste Selected Text to Share.
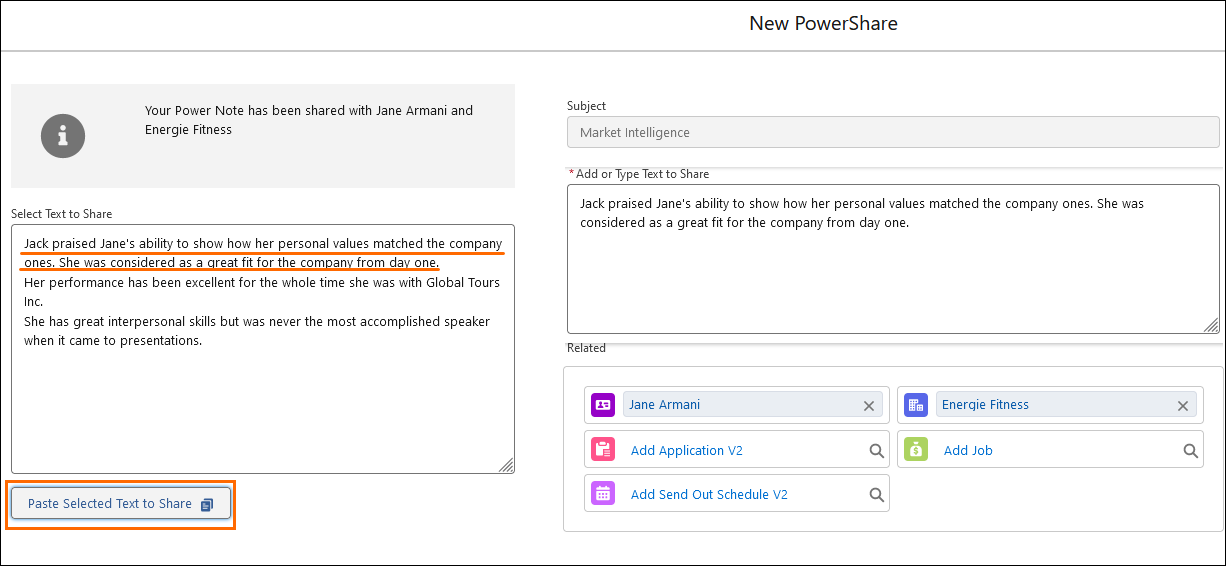
- The selected text will move over to the field Add or Type Text to Share. Edit this text, as desired.
- In the Related field, click the magnifying glass icon to search for the desired record(s) on which the note will be displayed.
- Only one record at a time can be selected in each look-up.

- Only one record at a time can be selected in each look-up.
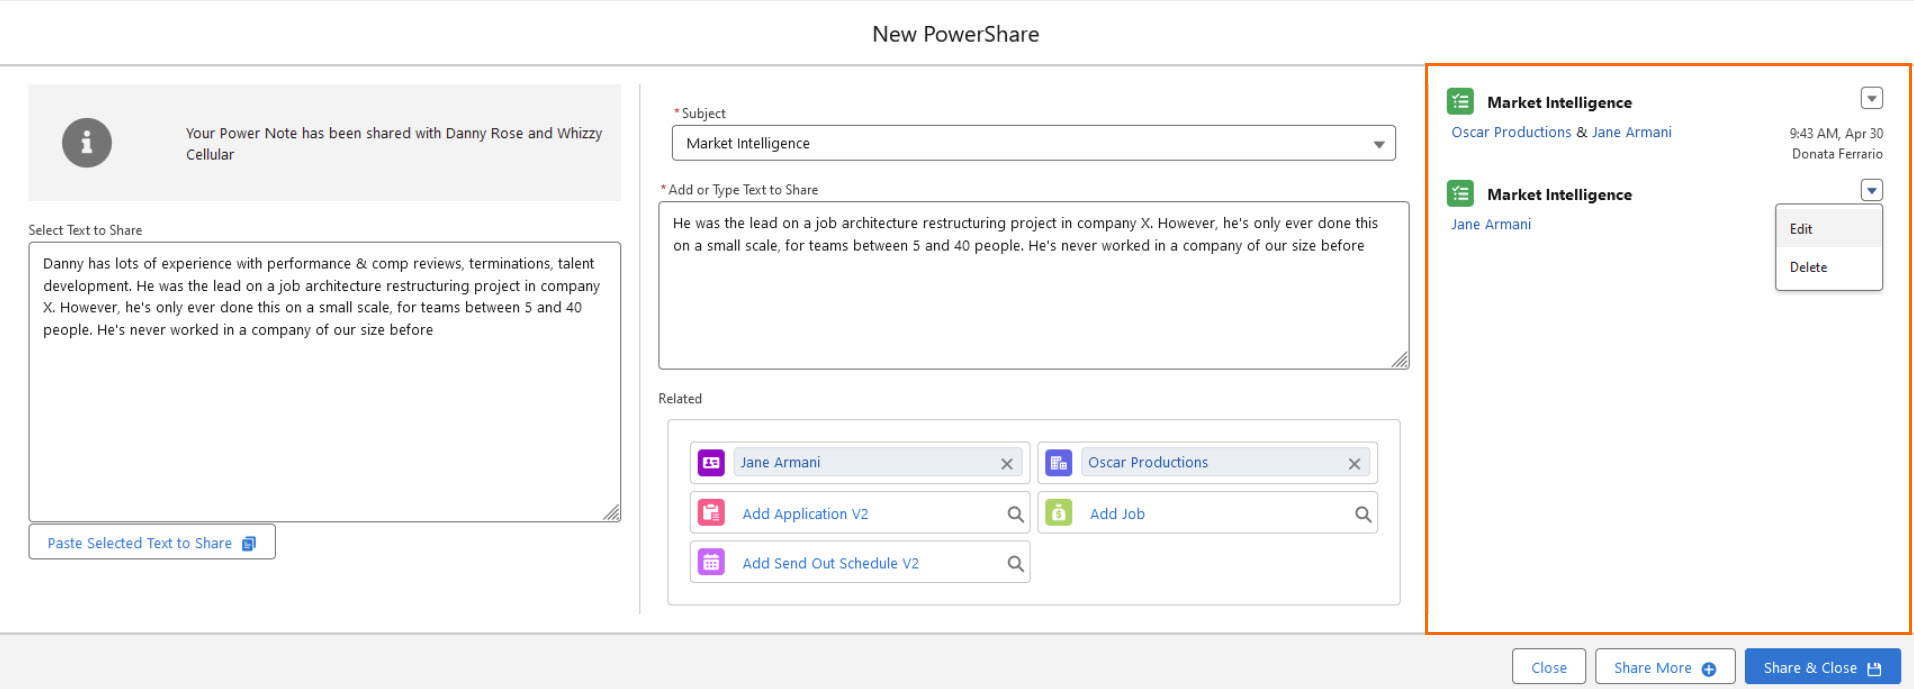
- If you would like to create another note in the same session, click Share More to save your current note and continue to the next note.
- If you have no more notes to create, continue to the next step.
- Notes saved during your session appear in the right pane.
- Right Panel: This is where the saved PowerShare notes are listed so that users have a chance to check what was created during the session.
- You can view, edit or delete any note saved in the right panel.
- You can view, edit or delete any note saved in the right panel.
- Right Panel: This is where the saved PowerShare notes are listed so that users have a chance to check what was created during the session.
- If you are finished with your session, click Share and Close to save your current note and close the session.
- If you have nothing to save, click Close.
If you saved previously and there is no new note to save, leave the page by clicking Close. Clicking either of the aforementioned share buttons will create duplicate notes.
Was this helpful?