Creating New Access Groups
Access Groups, or clusters, determine what users are able to see when signed in to . Depending on your organization, Access Groups may be based on group name, customer name, branch number, client number, or more.
- In , open the Maintenance drop-down menu and select Administration.
- From the Administration menu, select Access Groups.
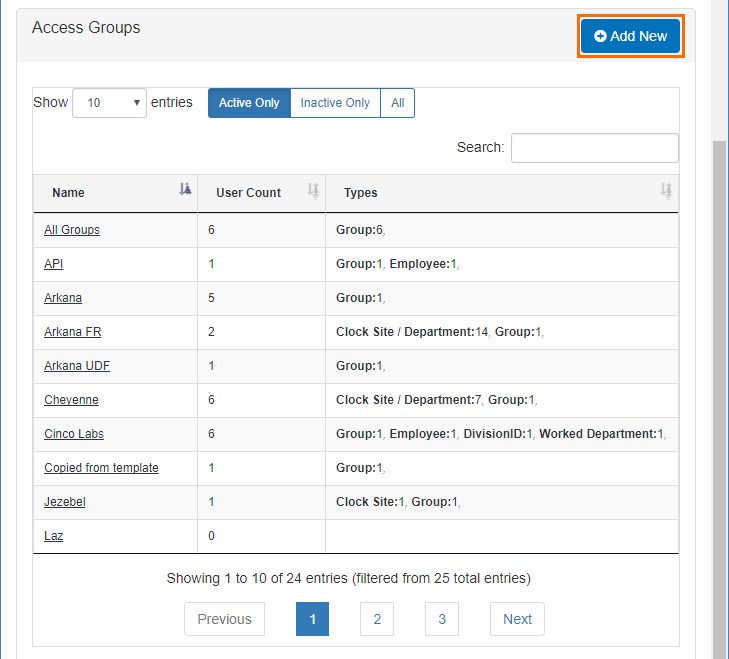
- In the bottom section of the Access Groups screen, click the Add New button.
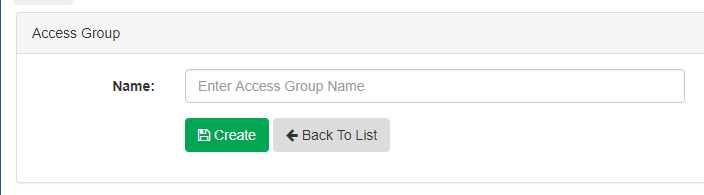
- Enter the name for the new group in the provided field and click Create.
- Under the Access Group Definitions section and Definitions tab, click the Add Definition button.
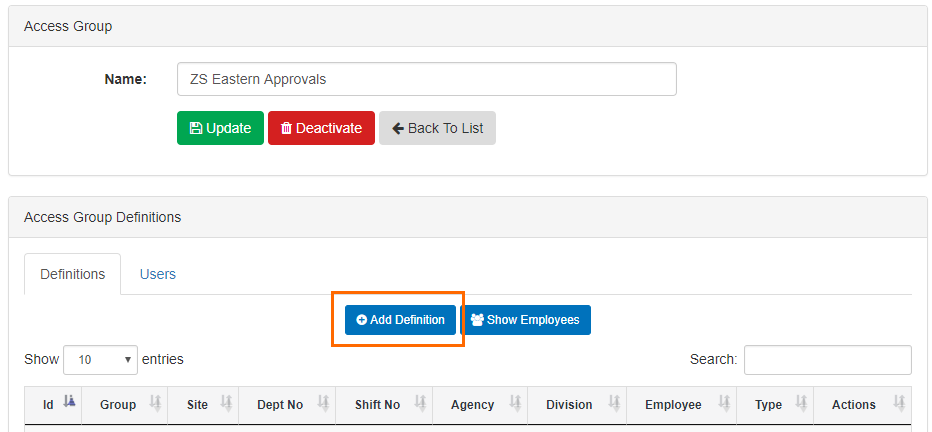
- Definitions indicate the kind of information that will be included in the Access Group you're creating. If an Access Group doesn't have a definition, it will not provide visibility into any labor details. The following Access Group Definition Types are available:
 Agency
Agency limits user access based on agency assignment in .
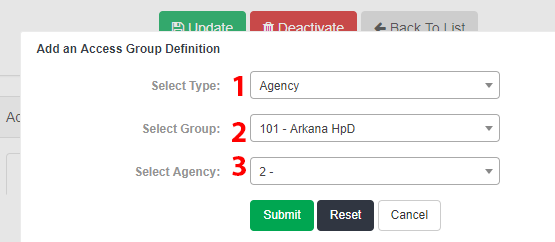
- Select Agency in the Type drop-down menu.
- Select a Group from the list.
- Choose an Agency in the menu.
- You will only see agency options here if they exist within the group/branch you selected above.
- When you're done setting Agency type options, click Submit to add the definition.
You may only add one group or agency option at a time, but you may add more definitions as needed.
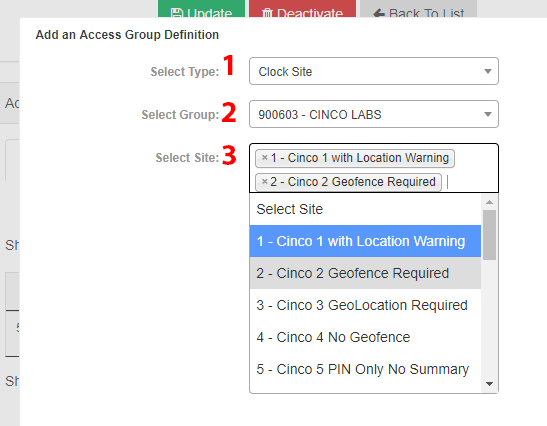
Clock SiteClock Site allows users to see specific clocks only within a group.
- Select the Clock Site type.
- Select the Group where the clock site can be found.
- Select the Site. This is where employees are assigned to work.
- You may add more than one clock site to the definition at a time. While the Site menu is open, click on any site you want to add.
- To remove a site after selecting it, click the X that appears to the left of the name and number of the site.
- When you're done setting Clock Site type options, click Submit to add this definition.
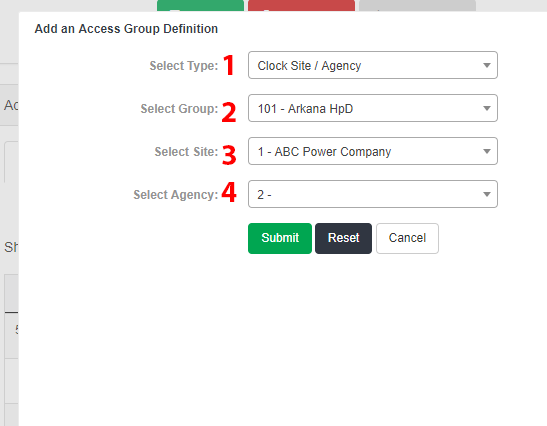
Clock Site/AgencyClock Site/Agency limits the view of work details based on the clock site and agency settings for an employee. This is similar to Clock Site but features more filters.
- Select the Clock Site/Agency type.
- Select the Group where the clock site can be found.
- Select the Site. This is where employees are assigned to work.
- You may add more than one clock site to the definition at a time. While the Site menu is open, click on any site you want to add.
- To remove a site after selecting it, click the X that appears to the left of the name and number of the site.
- Choose an Agency in the menu.
- You will only see agency options here if they exist within the group/branch you selected above.
- When you're done setting Clock Site/Agency type options, click Submit to add this definition.
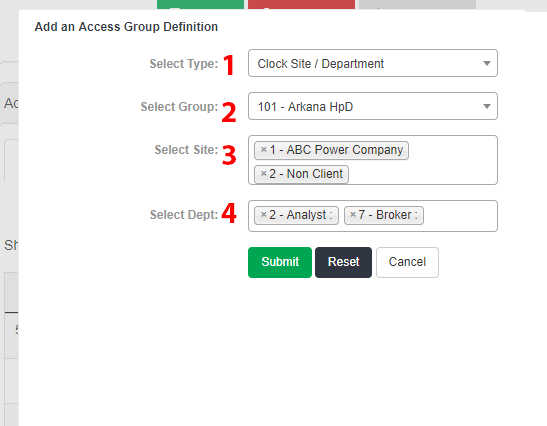
Clock Site/DepartmentClock Site/Department allows users to see information only for employees assigned to a specific clock site and department.
- Select the Clock Site/Department type.
- Select the Group where the clock site can be found.
- Select the Site. This is where employees are assigned to work.
- You may add more than one clock site to the definition at a time. While the Site menu is open, click on any site you want to add.
- To remove a site after selecting it, click the X that appears to the left of the name and number of the site.
- Choose a Dept in the menu. You will only see department options here if they exist within the group/branch you selected above.
- You can also add more than one department to the definition at a time.
- When you're done setting Clock Site/Department type options, click Submit to add this definition.
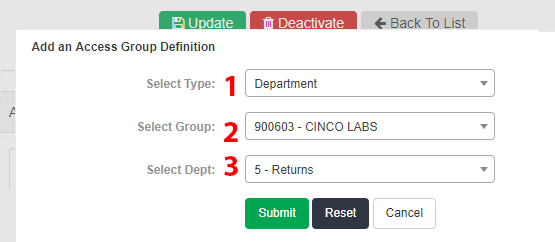
DepartmentDepartment allows users in the Access Group to see all employees that are assigned to a specific department or group of departments.
- Select Department in the Type drop down menu.
- Next, select a Group from the list.
- Choose a Dept in the menu.
- You will only see departments options here if they exist within the group/branch you selected above.
- When you're done setting Department type options, click Submit to add the definition.
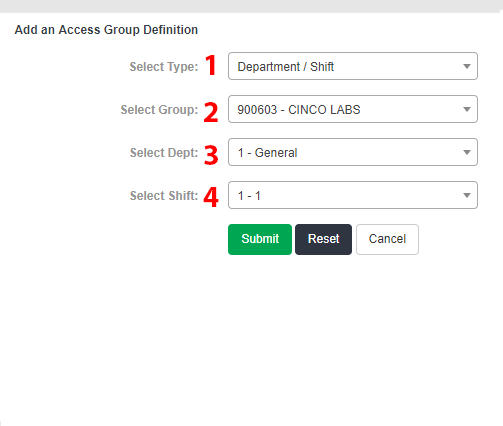
Department/ShiftDepartment/Shift allows users to see time details for employees that worked a specific shift for a department.
Requires Shift Tracking
- Select the Department/ Shift type.
- Select the Group where the clock site can be found.
- Select the Department. This is where employees are assigned to work.
- Choose a Shift in the menu.
- You will only see shift options here if they exist within the group/branch you selected above.
- If there are no shifts defined, you will not be able to set this option. For more on Shift Setup, see Department Shift Setup.
- When you're done setting Department/Shift type options, click Submit to add the definition.
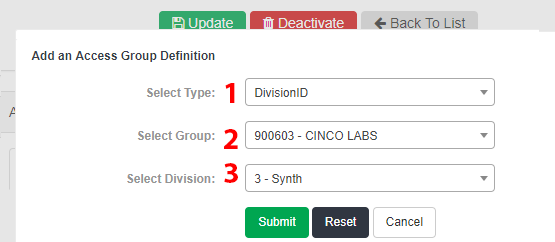
Division IDDivision ID creates a definition for the Access Group based on the Division ID assigned to employees.
- Select DivisionID in the Type drop-down menu.
- Select a Group from the list.
- Choose a Division in the menu.
- You will only see Division ID options here if they exist within the group/branch you selected above.
- When you're done setting Division ID type options, click Submit to add this definition.
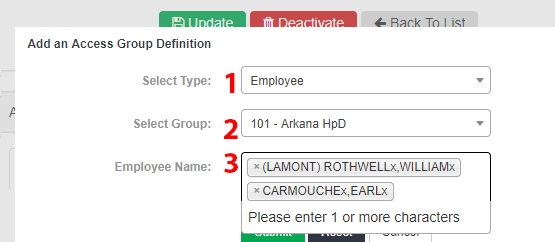
EmployeeEmployee allows users to see details for a specific group of employees in .
- Select the Employee type.
- Select the Group where the employee can be found.
- Select the Employee Name. This is where you can search for and add to the definition.
- You may add more than one department to the definition at a time. While the Employee menu is open, search for any employee you want to add by name, using your keyboard.
- To remove an employee after selecting, click the X that appears to the left of the name.
- When you're done setting Employee type options, click Submit to add this definition.
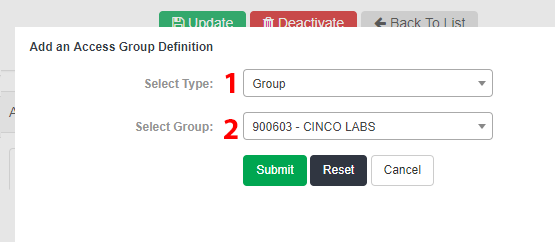
GroupGroup is a common setting used to define access based on an entire group within .
- Select the Group type.
- Select the Group you want to include in the Access Group definition.
- When you're done setting Group type options, click Submit to add the definition.
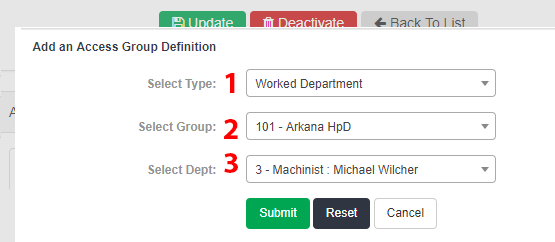
Worked DepartmentWorked Department limits the details view to employees that worked in a specific department. This is similar to the Department option, but the view will not include employees unless they have generated hours assigned to a department in the definition.
- Select the Worked Department type.
- Select the Group where the employee can be found.
- Select the Dept. Add a worked department in this menu.
- You may add more than one department to the definition at a time. While the Employee menu is open, search for any employee you want to add by name, using your keyboard.
- To remove an employee after selecting , click the X that appears to the left of the name.
- When you're done setting Employee type options, click Submit to add this definition.
- Click Submit after each definition to add it to the Access Group.
- Click Update to save the details.
- Click Back to List to return to the Access Groups screen.
For information on editing Access Groups, see Editing Existing Access Groups.